4
TAL 1201 (L) Rev. 8 - 483389 - DRAFT 1-9-12
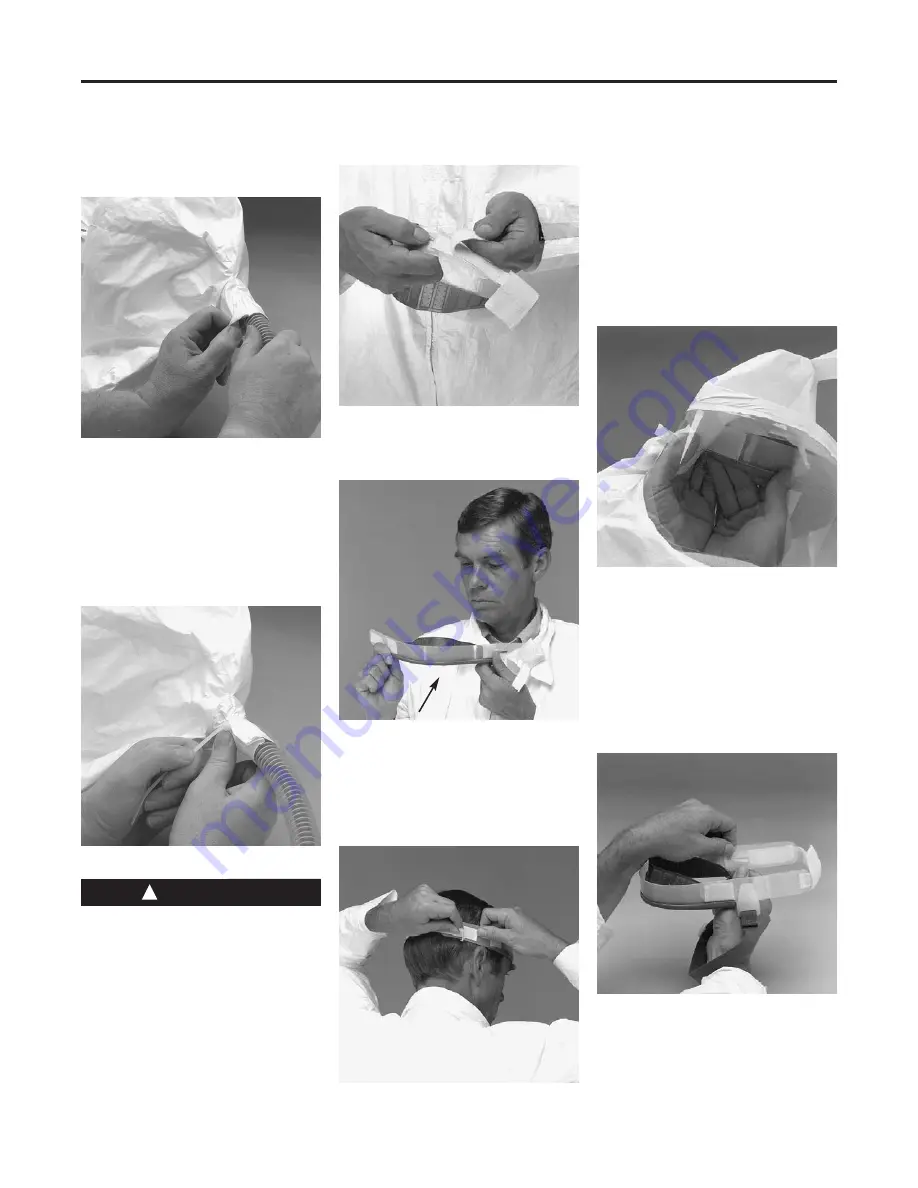
To assemble the hood tube to the
hood:
1. Push the tube into the hood inlet
port so that the end of the muffler
is about 1 inch inside the hood.
2. Fold any extra hood material
around the tube.
3. Line up the plastic hose clamp so
the grooves are against the hood
material.
4. Pull the plastic clamp for a firm,
hand-tight fit. DO NOT over-tight-
en or the hood tube will collapse.
Cut off any extra clamp material.
Do not don the respirator until you
have completed all of the assembly
steps required for your respirator.
Different respirator models need
different inlet air pressures. Failure
to follow this precaution may result
in inadequate air flow to the respi-
rator and may cause serious respi-
ratory injury or death.
Adjusting the Hood Suspension
Before Installing
1. Loosen the Velcro* strip at the
back of the suspension by pulling
the strip away from the plastic
band.
2. Position the suspension so that
the stitching on the sweatband is
down.
3. Place the sweatband against your
forehead and wrap the plastic
band around your head for a snug
but comfortable fit.
4. Press the Velcro strips together to
secure the suspension.
To Install the Hood Suspension
Note
If the optional chin strap will be used,
install it at this time. See Assembling
the Optional Chin Strap.
1. Insert the suspension into the hood.
2. Turn the suspension so that the
sweatband faces the hood lens.
3. Attach the three Velcro strips on
the suspension to the three strips
inside the hood.
Assembling the Optional Chin Strap
The chin strap must be attached to
the hood suspension before the sus-
pension is installed in the hood. To
install the chin strap:
1. Insert one end of the chin strap in
the slot located at the side of the
suspension.
2. Insert the other end of the strap in
the slot on the other side.
Assembling the Respirator to an
Optional Protective Cap
Note
If a protective cap is to be worn, it
must be from MSA. Only the cap from
MSA is equipped with proper adapters
Assembling the Respirator
WARNING
!
Summary of Contents for Versa-Hood
Page 10: ...10 TAL 1201 L Rev 8 483389 DRAFT 1 9 12 Notes...
Page 11: ...Notes TAL 1201 L Rev 8 483389 DRAFT 1 9 12 11...
Page 12: ......


