9
4
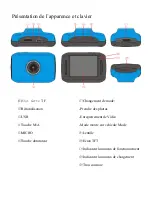
: represents that the memory card has been
inserted .
5
: digital zoom icon, click it to enlarge.
6
: digital zoom icon, click it to minify.
7
: visual shutter, touch this visible frame for taking photos or recording.
8
: battery icon, representing the current power status of the battery.
9
: represents the status of digital zoom.
10
: click this icon to switch into the playback mode.
11
:
click this icon to set the date and time, finished setting and press Shutter key to
confirm.
Note:
Note:
Note:
Note: the
the
the
the screen
screen
screen
screen will
will
will
will be
be
be
be off
off
off
off automatically
automatically
automatically
automatically during
during
during
during recording
recording
recording
recording process
process
process
process in
in
in
in order
order
order
order to
to
to
to save
save
save
save
power;
power;
power;
power; user
user
user
user can
can
can
can press
press
press
press the
the
the
the power
power
power
power button
button
button
button shortly
shortly
shortly
shortly to
to
to
to start
start
start
start the
the
the
the screen
screen
screen
screen and
and
and
and restore
restore
restore
restore display.
display.
display.
display.
9
9
9
9
Playback
Playback
Playback
Playback mode:
mode:
mode:
mode:
9.1
9.1
9.1
9.1
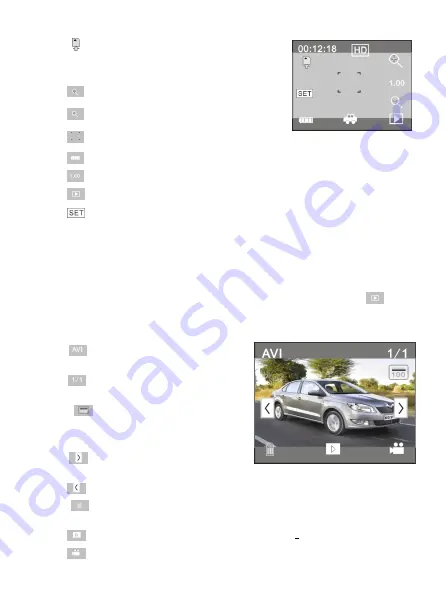
After starting up and entering the previewing state, click the playback icon (
) at the
lower right corner of the LCD to switch to the playback mode:
Click
1
: represents that the current file is an
AVI video file.
2
: represents that there is one file in the
current folder/one file in total.
3
: current folder name (such as:
I:\DCIM\100MEDIA
I: is the movable disk of the device).
4
: Means that clicking can select files
frontwards.
5
: Means that clicking can select files backwards.
6
: Means that clicking can activate to confirm the deletion of the current file
picture.
7
: Means that clicking can play the current movie clips.
8
: Means that clicking can switch back to the previous photo mode (video mode).
Summary of Contents for MPCS1
Page 1: ...MPCS1 ...
Page 2: ...1 Mounting Accessories Quick User Guide ...
Page 14: ......
Page 36: ......
Page 44: ...8 Nutzung 1 Laden Sie die eingebaute Lithium Batterie auf USB Kabel Ladeanzeige leuchtet auf ...
Page 60: ......
Page 84: ......
Page 108: ......


