background image

English

7

4. Warning

English

6

You should be fully aware of the notice below, before using
the product.

The company does not take the responsibility for the defect
of the product (accessory, connecting device etc.), damage,
data loss, accident & disorder etc., occurred from not fully
understanding the notice below, so please be sure to check
this notice.

1. Do not use the product for the other purpose except for the matters

described in the manual.

2. Pay attention not to hurt your hand while you touch a product box, manu-

al, accessory etc. Keep the manual to use at any time. 

3. Pay attention not to have a severe impact on the product, might cause a

trouble or a damage. 

4. Pay attention not to use the device or leave it alone in places with high

temperature and humidity or of big thermal difference, and by the strong
magnetic field. 

5. Do not spill any liquid (water, beverage etc.) on this device. 
6. The device that you discretionary disassembled or remodeled can be exempt-

ed from the free service, so pay special attention to this. 

7. The company does not take the responsibility for data loss caused by the

defect of the product, failed operation and other reasons, so pay attention
to this.

8. Check the polarity (+,-) of the battery when you insert a battery into the

device.

9. Try not to injure you nail or not to be scratched by the edges when you

open the battery cover. 

10. Remove the battery when not in use. Leakage of battery might cause a

damage on device.

11. Pay attention not to use the earphone continuously for many hours that

might cause a hearing problem. 

12. Please plug or unplug the earphone and cable by holding the plugs not

by pulling out the earphone or cable, to prevent internal line breaking. 

13. When you plug the USB cable into the computer or device, please check

again the direction of plugging it. In case the USB cable is plugged in the
wrong way, the computer or the device might be damaged.

14. Do not leave the USB cable plugged into the computer.
15. Do not give an impact to the connected part while the USB cable is con-

nected to the device. 

16. Remember not to leave USB cable to be connected to the device and

the computer

17. Maintain and keep clean the USB connection of the device. 
18. When the device is covered with foreign particles, please wipe off it with

soft cloth or clean towel and be careful not to use chemicals. 

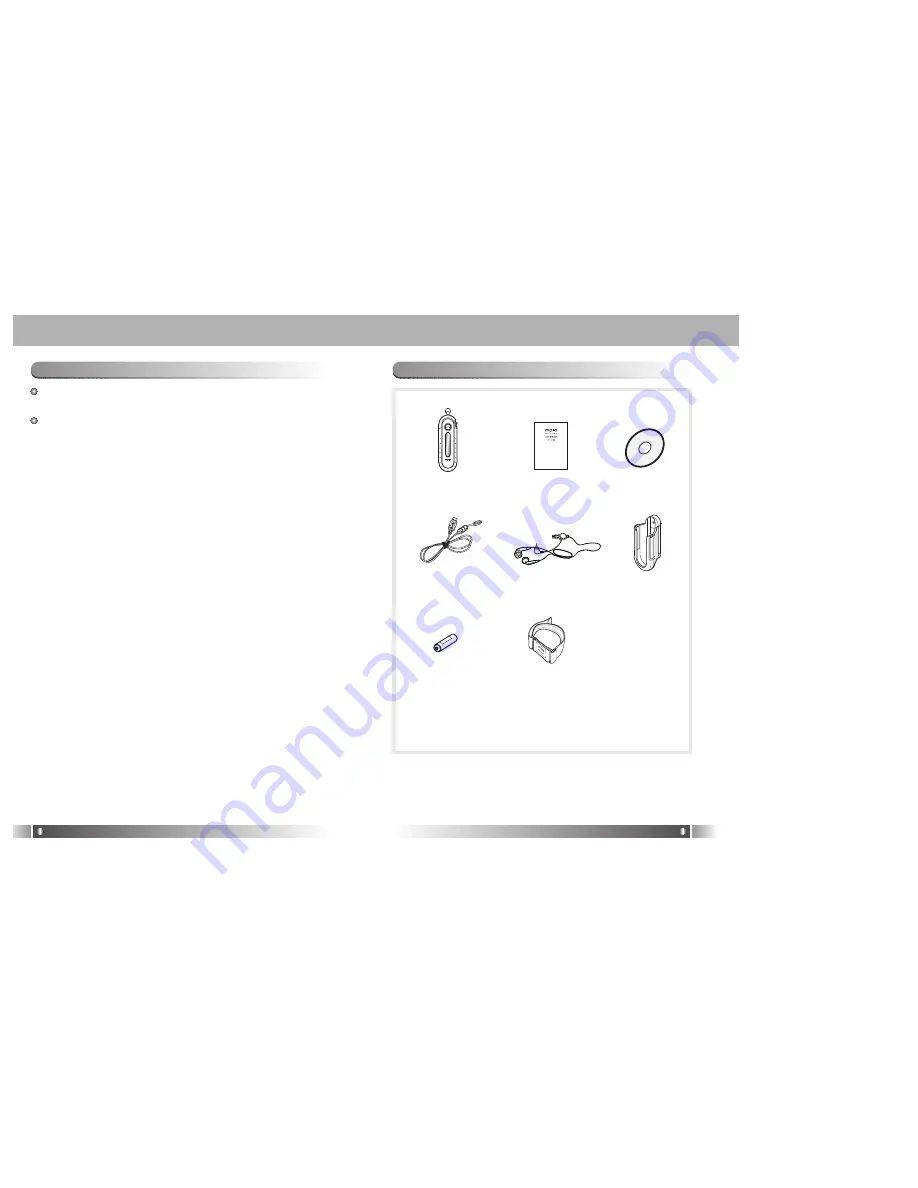
5. Accessories Included with your DMK+

+

DMK

Installation CD

User’s Guide

USB Cable

Belt Clip

Necklace Type

Earphone

AAA type battery

Arm Band

Summary of Contents for DMK PLUS

Page 1: ...O 838 Zhangyang Road Pudong Shanghai Zip 200 122 Tel 21 5058 6018 Fax 21 5058 6017 2003 Digitalway Inc User s Guide DMK designing your digital dream The contents of user s guide could be changed witho...

Page 2: ...ing in this manual are covered by trademarks or registered trademarks of each company or organization concerned the mark TM or is not always indicated Designing Your Digital Dream 1 What is MP3 Player...

Page 3: ...Weight MPIO DMK MP3 WMA ASF 64 128 256 MB 1Line Graphics LCD With Violet EL Backlight Maximum 4 5 Mbps 10mW R 5mW L 5mW 85dB 0 1 20Hz 20KHz 1 5V AAA Type Alkaline Battery 1EA 13 hrs MP3 file played wi...

Page 4: ...nd other reasons so pay attention to this 8 Check the polarity of the battery when you insert a battery into the device 9 Try not to injure you nail or not to be scratched by the edges when you open t...

Page 5: ...se Buttton 7 Jog Button 8 MIC Rear Panel 8 The Hole For Necklace Type Earphone 9 Battery Case Front Panel Rear Panel 7 Inserting the Battery 1 Slide the battery cover in the direction of the arrow 2 I...

Page 6: ...ou can see the playing time on LCD is turned to forward or rewind 3 Volume Control Adjust the volume by pressing the vol ume button to your desired level 4 Turn Off the MPIO To turn your MPIO off pres...

Page 7: ...rmal balance Balance suitable for pop music 3 ROCK Balance suitable for rock music 4 CLASSIC Balance suitable for Classical music 5 X BASS To strengthen bass 6 ENT Move to upper level Menu Mode 1 Norm...

Page 8: ...listen a specific section 1 Make the music playing 2 Set HOLD Slide on 3 Press Volume button at the start point A Repeat Segmentation starts 2 Press Volume button again at the end point A B Repeat Seg...

Page 9: ...the CD ROM Drive The Install Menu Screen will display automatically If the Install CD is not run automatically double click on My Computer on the desktop Select CD ROM Drive D or E and run the install...

Page 10: ...but ton 7 Select Search for better driver than the one your driver is using now Recommended button 8 Assign the location of the driver to be searched to the CD ROM driver 9 If the driver installation...

Page 11: ...emory Information Part 6 Memory File Folder Managing Part Manages files folders in the internal memory memory card of MPIO Download Upload Stop Up Level New Folder Refresh Delete Cut Copy Paste Proper...

Page 12: ...ed Skin of Manager 2 Skin Select a language to be used in the Manager 2 Language Select whether to apply the display tool tip Layout Help Move to the MPIO Web Site Visit Digitalway s Web Site Displays...

Page 13: ...ick the Logo Editor then the Logo Editor Window is displayed 3 Select 128x16 from the Image Size Item of the Logo Editor 4 Search the file in which the Bitmap file is stored by clicking the button wit...

Page 14: ...Play List File to Memory 12 Audio Information Number Size of the Selected File B Add Delete File to the Audio List Window Add File a Method 1 1 Move to the folder in which music files are located usin...

Page 15: ...sable in the Mac OS version 9 and below 1 Turn the power of Macintosh and insert the MPIO Install CD into CD ROM Driver 2 Double click the CD ROM Icon and the iTunes Plug In Installer icon in the fold...

Page 16: ...English 30 Memo...

Reviews: