- 5 -
Wall Mounting (Optional)
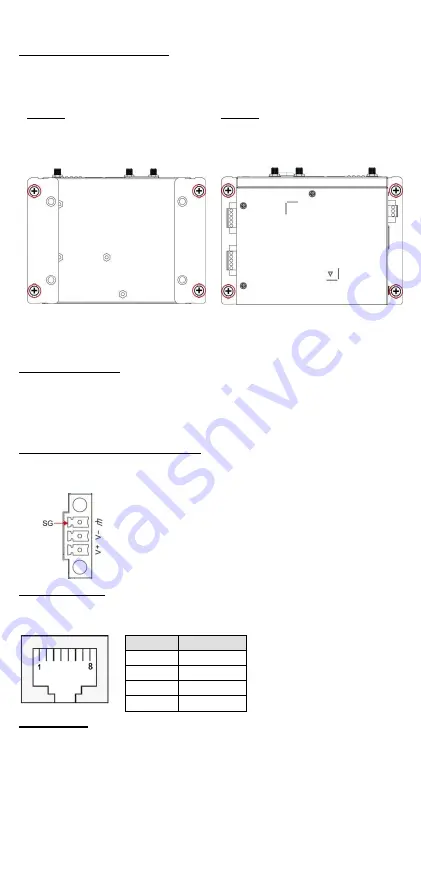
The UC-8100A-ME-T can be mounted with a wall-mounting kit that needs
to be purchased separately. Follow these steps to mount the computer on
to a wall:
Step 1
Use four screws to fasten the
wall-mounting brackets on the
left panel of the computer.
Step 2
Use another four screws to mount
the computer on a wall or a
cabinet.
Connector Description
Power Connector
Connect the power jack (in the package) to the UC-8100A-ME-T’s DC
terminal block (located on the top panel), and then connect the power
adapter. It takes about 30 seconds for the system to boot up. Once the
system is ready, the Power LED will light up.
Grounding the UC-8100A-ME-T
Grounding and wire routing help limit the effects of noise due to
electromagnetic interference (EMI).
SG: The Shielded Ground (sometimes called
Protected Ground) contact is the top contact of
the 3-pin power terminal block connector when
viewed from the angle shown here. Connect the
SG wire to an appropriate grounded metal
surface.
Ethernet Ports
The two 10/100 Mbps Ethernet ports (LAN 1 and LAN 2) use RJ45
connectors.
Pin
Signal
1
Tx+
2
Tx-
3
Rx+
6
Rx-
Serial Ports
The two serial ports (P1 and P2) use terminal connectors. Each port can
be configured by software for RS-232, RS-422, or RS-485. The pin
assignments for the ports are shown in the following table:


