background image

21 


MOVON Corporation. 

6Fl., Hyunjuk Bldg., 7 Selleung-ro 94-gil, Gangam-Gu, Seoul, 06161 Korea 

Tel: 

+82 2 2050 4679 

Fax: 

+82 2 539 5692 www.movon.co.kr 


Click “Export All Settings” button, if you want to download vehicleprofile.dat. 
This vehicleprofile contains all the calibration settings you’ve set. With this file, 
you can simply apply current settings to another vehicle. 
 

* How to use ‘vehicleprofile’ for MDSM-7. 

 
A.


Copy  and  paste  vehicleprofile.dat  into  the  micro  SD  card,  formatted  by 
MDSM-7. Otherwise, MDSM-7 will automatically format the SD card. 

B.


Insert  the  micro  SD  card  into  MDSM-7  which  you  want  to  apply  the 
exported profile. 

C.


MDSM-7  will be  rebooted  automatically.  Then, the profile  will be  applied 
to MDSM-7. 


4.3


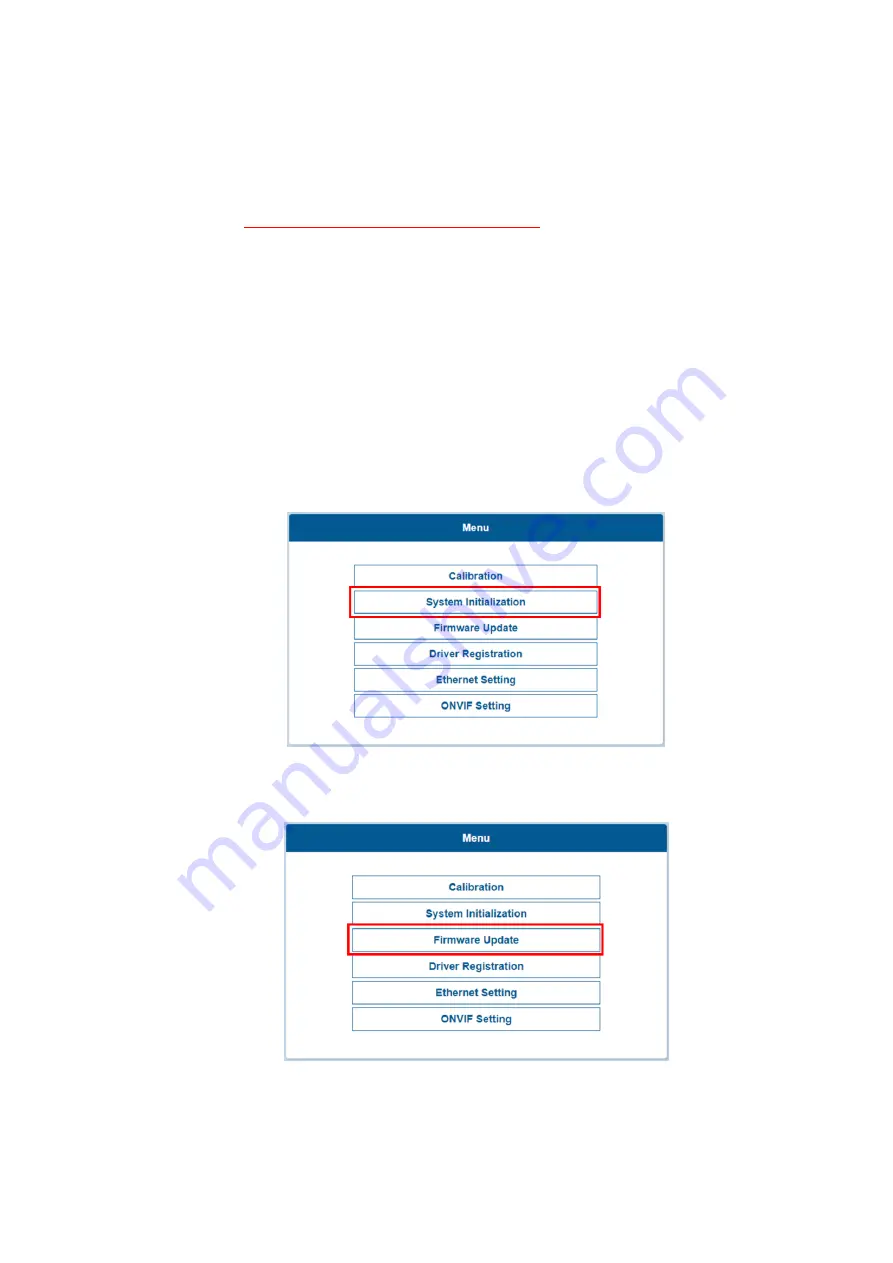
System Initialization 
If you want to delete all data and return to factory setting, click the “System Initialization” 
on the menu. 


4.4


Firmware Update 


Select “Firmware Update” to upload the latest firmware.   


After uploading the file, click “Update Firmware” button below. Then, MDSM-7 
will automatically reboot. 

Summary of Contents for MDSM-7

Page 1: ...MDSM 7 Installation Guidebook ...

Page 2: ...r cable 3P 10 2 3 6 Peripheral Component Interconnect Box PCI Box 10 2 3 7 Vibration unit Optional 10 2 3 8 Video Out Cable Optional 11 2 3 9 FMS Cable Optional 11 2 3 10 Contactless CAN Reader Optional 11 2 3 11 Ethernet cable Optional 11 2 3 12 Micro SD Card Consumable 11 2 4 Micro 5 pin USB Cable Optional for Calibration 12 3 Installation 13 3 1 System Connection 13 3 2 MDSM 7 installation posi...

Page 3: ...9 4 2 5 Miscellaneous Settings 20 4 2 6 Calibration Complete 20 4 3 System Initialization 21 4 4 Firmware Update 21 4 5 Driver Registration Face ID set up 22 4 5 1 Edit the driver ID 23 4 6 Ethernet Setting 23 4 7 Onvif Setting 24 5 Recognize MDSM 7 in computer Install RNDIS Driver 24 5 1 Computer with Windows XP 7 8 8 1 24 5 2 Computer with Windows 10 24 ...

Page 4: ...etting modification Kevin 4 1 0 3 19 09 19 Update the expression pictures etc Kevin 5 1 0 4 19 11 01 Include the error code Onvif settings Dominic 6 1 0 6 19 11 22 Camera setting updates Dominic 7 1 0 7 19 12 16 MFB Error Code Julia 8 1 0 8 20 02 10 Calibration driver registration etc Julia 9 1 0 9 20 02 19 Changed the orders and added comment Dominic 10 1 1 0 20 03 10 Amendment based on firmware ...

Page 5: ...distributor or authorized installers for installation MOVON will hold no liability of any damage occurred during installation proceeded by users or unauthorized installers MDSM 7 is developed to give only warnings to drivers The final decision to maneuver or control shall be made by drivers themselves Furthermore MDSM 7 is not capable of providing 100 detection rate Please ensure that keep eyes fo...

Page 6: ...Sub Processor ARM Cortex M0 for illuminator Camera Control Camera Effective Pixels 720 X 480 View Angle 42 D 30 H 29 V Video Video Out CVBS 1Vp p 75Ω Operating Temperature 20 70 C Storage Temperature 40 85 C 2 2 Product components Main unit Power cable 3P PCI Box Hexagon wrench 4 x Screws Micro SD card Consumable Contactless CAN Reader Optional FMS Cable RS 232 Optional Vibration unit Optional Eth...

Page 7: ...Description Sensitivity 1 On Level 3 Off Level 2 Defualt Operating speed 2 3 OFF OFF Default 60kmh 40mph OFF ON 40kmh 25mph ON OFF 20kmh 15mph ON ON Test mode Volume 4 ON Level 4 OFF Level 2 Default MFB Press the button Volume changes in a loop Current volume 2 3 4 1 2 5PIN connector Ethernet Out Port MFB button Camera lens LED 1 360 Rotation Wrench Hole Cradle Screw Tape Speaker Dip Switch SD Car...

Page 8: ...it will reboot automatically and apply new angle settings Volume settings Click the button once to increase the volume Each click increases 1 volume level It starts from current volume and changes in a loop from 1 to 4 After volume 4 it goes to level 1 Current volume 3 4 1 2 3 2 3 4 LED Description Warning status alarm Parameters of warnings Type of warning Level 3 Level 2 Default Level 1 Time Ang...

Page 9: ...ription LED Color Possible Cause Camera Error LED 1 Yellow LED 2 Red Camera component error GPS Error LED 1 Yellow LED 2 Blue GPS component error Other problems LED 1 Yellow LED 2 Green SD Card or Video recording error CAN communication error RS232 output data MDSM 7 transmits Error code in a RS232 output data format Please see MDSM 7 s output protocol document ...

Page 10: ...ND To ground source Please ensure that is connected properly to ground or it could damage the vehicle and MDSM 7 2 3 6 Peripheral Component Interconnect Box PCI Box Peripheral Component Interconnect Box PCI Box is to connect the cables and accessories PCI BOX LED status table Color status Yellow In case of wiring only constant power Green In case of wiring constant power and IGN power 2 3 7 Vibrat...

Page 11: ...s to transmit DSM event data to another FMS Fleet Management System through RS 232 2 3 10 Contactless CAN Reader Optional 2 3 11 Ethernet cable Optional Transmit the video through Ethernet Port RJ45 2 3 12 Micro SD Card Consumable Micro SD card is consumable product Only first 3 months will be guaranteed It is recommended to format micro SD card regularly and replace it when it cannot be recognize...

Page 12: ... stable performance it is recommended that you format the memory card every 2 3 weeks Formatting will delete all data in the card If you want to keep the data please back up in advance If MDAS fails to format the card more than twice please try formatting using PC It may happen to some SD cards When you extract the card please 2 4 Micro 5 pin USB Cable Optional for Calibration NOTE You can use a c...

Page 13: ... Connection Description Red IGN To ignition ACC power line Turns off when key is at OFF Yellow Power Battery power line Black GND To ground source Please ensure that is connected properly to ground or it could damage the vehicle and MDSM 7 There are different ignition powers it is recommended to use an ignition power IG1 that does not drop power shortly when the engine turns on After installation ...

Page 14: ...80 100cm from the eyes of the driver to MDSM 7 camera If MDSM 7 cannot be located in the center it is recommend to locate within right and left side 15 Please make sure the camera should be lower than driver s eyes level about 15 30 The camera should face the driver s face directly and MDSM 7 should be fixed with 4pcs screws After fixing cradle installer has to adjust the camera pitch angle After ...

Page 15: ...to PC using Micro USB cable with 5 pins Power on MDSM 7 If you hear repeated beep sound this means MDSM 7 is properly connected to computer Activate the browser and enter into http 20 0 0 1 18087 to access MDSM 7 calibration page Google Chrome is recommended If you see the page below please select language you want and sign in using following information ID admin Password 1234 4 2 2 Calibration 4 ...

Page 16: ...7 only recognizes encrypted CAN data from our Database site http info mdas co kr Please download can file from the DB and upload to system 4 2 2 2 Verify Speed Signal You can check the speed data is coming correct by test drive If there is a deviation please use the following correction method Please click the Correction button when you drive at 40km h 24mph Then MDSM 7 will set new speed automati...

Page 17: ...uide box to proceed to next step Wait 3 seconds to complete and save camera setting When the setting is complete the page will change like below and the unit will make multiple beeps Height option If the installer technician is relatively tall or short compared to male average height of the country please choose tall or short option Then the guide box will move up or down accordingly Please fit yo...

Page 18: ...f 1 to 3 As the level gets higher it gets more sensitive Yawning warning will generate when yawning for 2 seconds DIP switch on unit Enable DIP switch on MDSM 7 s unit Sound Level Control the warning sound level on a scale of 1 to 4 Activation Speed Set the Activation Speed 15 60Km h 10 40mph The functions will be acticvated when the vehicle is faster than this speed In Test mode 0Km 0mph the func...

Page 19: ...ng Scales of 1 to 5 and the higher number is more sensitive Dring log with video Enable Driving log with video On Off Record Ratio Set the Recording ratio Continuous G sensor DSM You can allocate the recording capacity of SD card from 0 0 10 10 0 0 Mode Description File name Folder Continuous Record continuously Create file every 1 miute in a loop Date_Time 20190601_063903_NOR NOR G sensor Record ...

Page 20: ...200 Set Video out format NTSC PAL 2 1 Choose if you want to display the dots on display Set the K Line Baudrate Off 9 600 19 200 57 600 115 200 Repeat alarm when camera covered if it is ON alarming sound is generated every 3 minutes Snapshot transmittion If it is ON snapshot is transmitted out when drowsiness alert is occurred 4 2 6 Calibration Complete Click Complete button to finish Calibration ...

Page 21: ...opy and paste vehicleprofile dat into the micro SD card formatted by MDSM 7 Otherwise MDSM 7 will automatically format the SD card B Insert the micro SD card into MDSM 7 which you want to apply the exported profile C MDSM 7 will be rebooted automatically Then the profile will be applied to MDSM 7 4 3 System Initialization If you want to delete all data and return to factory setting click the Syste...

Page 22: ...ister driver ID Registered driver IDs will be listed on the right side Click the ID to change the name as you want Max 10 characters in Alpahbet Underbar only Maximum 20 ID can be stored If you register more than 20 IDs then the first ID on the top will be replaced Once you finish the ID registration Please click the Save button Please click the Exit button to exit and reboot Please be noted that ...

Page 23: ...driver IDs from the SD card as a group When you finish editing please click Save and Exit 4 6 Ethernet Setting IP address Please type the MDVR s IP address on IPv4 IP address The last three digit needs to be different with MDVR s IP address Refer to the below table MDVR s IP address MDAS 9NPlus s IP address 10 0 0 10 10 0 0 88 xxx except 10 Netmask type the MDVR s netmask address on the IPv4 addre...

Page 24: ...s requirement 4 7 Onvif Setting This page is designed only for an engineer who fully understands Onvif protocol If port number and address of Onvif setting need to be changed please contact a manufacturer or distributor 5 Recognize MDSM 7 in computer Install RNDIS Driver Please connect MDSM 7 to your laptop using Micro 5Pin USB cable before install the driver 5 1 Computer with Windows XP 7 8 8 1 D...

Page 25: ...Fax 82 2 539 5692 www movon co kr Download RNDIS Driver here http movon co kr downloads rndisdriver zip Unzip the file and remember the unzipped folder location Go to the Device manager and select a USB serial Port COM x under Ports COM LPT Click it using the right button of your mouse then click Properties ...

Page 26: ...unjuk Bldg 7 Selleung ro 94 gil Gangam Gu Seoul 06161 Korea Tel 82 2 2050 4679 Fax 82 2 539 5692 www movon co kr In the newly popped up window Go to Driver tab and click Update Driver Select Browse my computer for driver software ...

Page 27: ...Selleung ro 94 gil Gangam Gu Seoul 06161 Korea Tel 82 2 2050 4679 Fax 82 2 539 5692 www movon co kr Click Browser button and Browse For Folder window will pop up Choose rndisdriver Remember the path where you downloaded and unzipped the file ...

Page 28: ...28 MOVON Corporation 6Fl Hyunjuk Bldg 7 Selleung ro 94 gil Gangam Gu Seoul 06161 Korea Tel 82 2 2050 4679 Fax 82 2 539 5692 www movon co kr Press Next on the page below ...

Reviews: