Moultrie M-999i Instructions Manual Download Page 5

Page 5

M-999i Digital Game Camera

Page 16

M-999i Digital Game Camera

QUICK START INSTRUCTIONS

B

Use the steps below as a guide to quickly set up your camera so it will function using the factory 

default settings.

STEP 1

Open camera cover. Press the battery chamber release button.  Install eight (8) AA size alkaline or 
lithium batteries with polarities as indicated in the Battery Tray. Re-install the Battery Tray and insert 
your SD card. We recommend that you erase the SD card (ERASE IMAGES) inside the camera before 
taking pictures: this will not only erase all images, but will also format your SD card for use in the camera.

STEP 2

Insert SD Memory Card until you hear an audible click. Camera will not operate without SD Card. 

Slide the power switch to 

Quick Start.

 Press the Left button to set the time and date. 
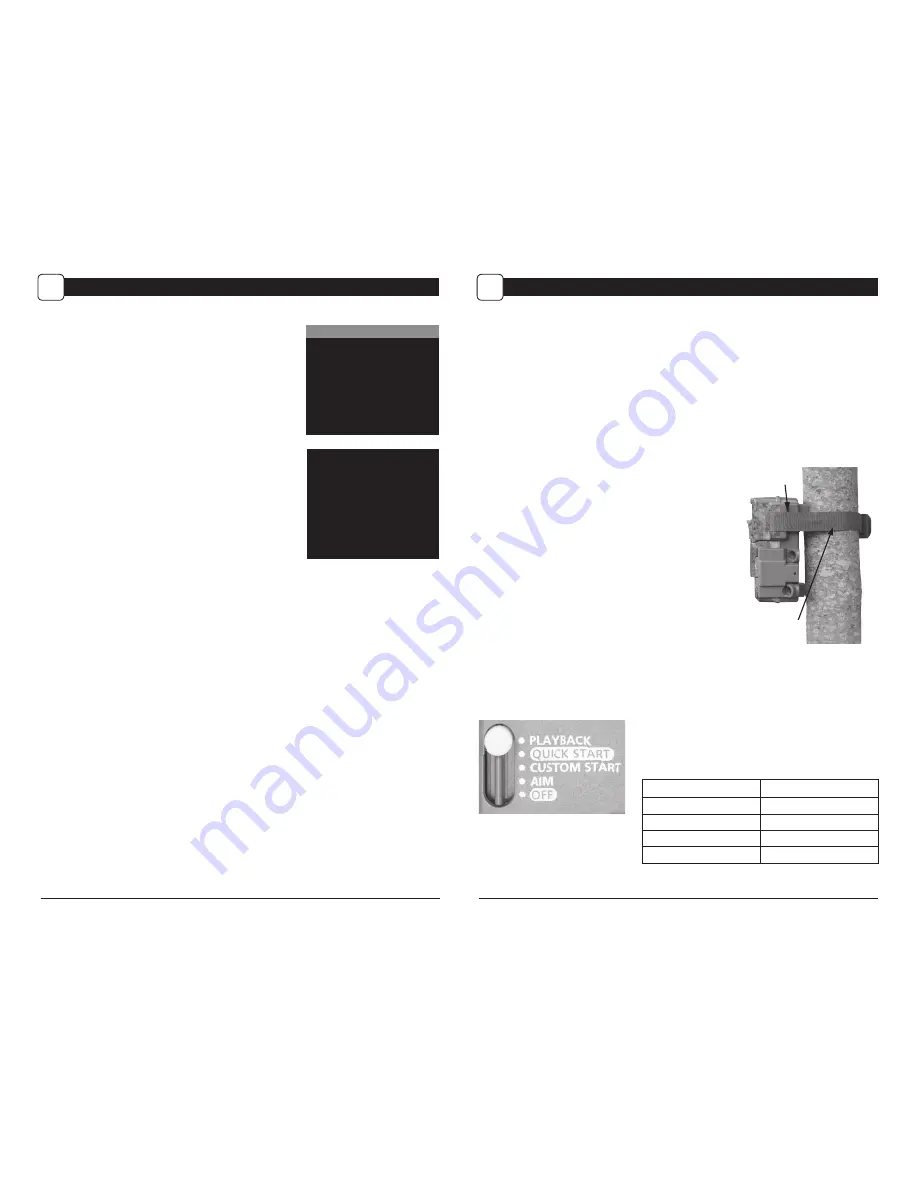
STEP 3

Mount camera in desired location using a mounting 

strap. 

NOTE: Camera must be attached to a stable 

object for motion detection to function properly. 

Mounting camera on an unstable structure may 

result in excess image captures with no subject 

(false triggers).

STEP 5


Close cover. The camera will operate using Default settings. You may also customize the settings

if desired in Custom Start.

STEP 4


Switch camera to Aim. Aim camera using motion 

detection to determine target area. Walk in front of the 

camera at the desired distance and the camera LED will flash 

showing the covered area. Switch camera to 

Quick Start

.

Setting Run Mode

When you choose Quick Start, the only settings that 
you will be able to change will be 

Date and Time

, allowing 

for rapid setup. Other settings are:

Eyelet

Mounting 

Strap

OPTION

SETTING

Mode

Motion Detect

Detection Delay

30 seconds

Multi-Shot

3-Triggered

Photo or Video

Photo

PLAYBACK MODE

L

PLAYBACK

Press OK to begin viewing

images

Press 

5


for Playback tips

^

Play Video

< Previous 

Next >

Delete File

v

OK

Single/Matrix

View

Playback

To view images or videos on your camera’s screen, slide the 
Mode Switch to the Playback position. From the Main Screen,
you can view images, play videos or delete files.

Playback Tips

Pressing the Up button will show a quick review of the 
Playback commands. The commands are:

Up 

- Play Video

Left

 - Previous file

Right 

- Next file

OK

 - Toggles between Single View and Matrix View

Down

 - Delete file

Summary of Contents for M-999i

Page 1: ...http www moultriefeeders com return policy and complete the form or our Service Department will gladly answer any questions you have Call 800 653 3334 Monday Friday 8 00 AM to 5 00 PM CST www moultriefeeders com FCC Statements Note changes and modifications not expressly approved by the party responsible could void the user s authority to operate this device This device complies with Part 15 of the...

Page 2: ...mera is compatible with our Moultrie Mobile cellular service when combined with the Field Modem MV1 Please visit www moultriemobile com for more information NOTE Camera firmware update may be required for full Moultrie Mobile functionality Using the Moultrie Camera Power Panel Place near the tree where the camera is mounted Place for best exposure to sun To attach to a tripod secure the power pane...

Page 3: ... at another location Removing the SD Card To remove the SD Memory Card open the camera cover and push gently on the SD card and it will pop out slightly allowing you to remove it Load the SD card into the player or card reader to view or move stored images to another location Important Make sure that the camera is in the OFF position before removing SD card ln the Field You can download the pictur...

Page 4: ...port Also allows for attachment of Moultrie Field Modem MV1 Please visit www moultriemodile com for more information EXTERNAL POWER PORT Accepts the Moultrie PowerPanel Moultrie AC Adapter or Moultrie Battery Box accessories sold separately only Refer to www moultriefeeders com for more information NOTE The use of any other power source will void your warranty and possibly harm your camera CAMERA ...

Page 5: ...image captures with no subject false triggers STEP 5 Close cover The camera will operate using Default settings You may also customize the settings if desired in Custom Start STEP 4 Switch camera to Aim Aim camera using motion detection to determine target area Walk in front of the camera at the desired distance and the camera LED will flash showing the covered area Switch camera to Quick Start Se...

Page 6: ...K to take test photo START 4 SYSTEM SETTINGS SECURITY CODE 0 0 0 0 0 Security Code Press the OK button Use the Up Down and Left Right buttons to select a 5 digit security code for your camera Press the OK button to confirm the selection Press the Right button to move to the next option NOTE Please remember your security code If the code is lost you can contact Moultrie customer support to reset th...

Page 7: ...or Motion and Time Lapse can be set in their respective option menus MOTION DETECT TL MODE Note Adjust settings in MOTION DETECT and TIME LAPSE modes press OK to take test photo START 4 MEMORY OPTIONS J Erase Images Press the OK button Use the Up Down buttons to choose between Yes erase all images No does not change stored images Press the OK button to select When your selections has been made pre...

Page 8: ...d is ideal for close range traps and deeply wooded areas Press the OK button Use the Up Down buttons to choose between HIGH or LOW Press OK to lock in your selection then press Left button to go to the next option MOTION DETECT MODE MULTI SHOT X 1 off 3 Triggered 3 Burst Setting Multi Shot Press the OK button Use the Up Down buttons to choose between settings Choose how many pictures you would lik...

Page 9: ...DEO RESOLUTION 4 VIDEO LENGTH 4 PHOTO VIDEO SETTINGS PHOTO RESOLUTION Low 2MP Medium 4MP X High 10MP Enhanced 20MP Setting Photo Quality Press the OK button Use the Up Down buttons to choose between 4 image resolution settings 1 Enhanced 6080 x 3420 2 High 4224 x 2376 3 Medium 2688 x 1512 4 Low 1920 x 1080 Press the OK button to confirm the selection Press the Right button to move to the next opti...

Page 10: ... 2 to be set Press Left button to go to the Main Screen WARNING If Program 1 is set to Always On settings for Program 2 will be disabled GENERAL SETTINGS INFOSTRIP SETTINGS 4 PHOTO VIDEO SETTINGS 4 MEMORY SETTINGS 4 SYSTEM SETTINGS 4 INFOSTRIP SETTINGS DATE TIME 4 CAMERA NAME 4 TEMPERATURE UNITS 4 INFOSTRIP ACTIVE 4 INFOSTRIP SETTINGS DATE TIME 12 14 2014 10 23 pm INFOSTRIP SETTINGS CAMERA NAME M ...

Reviews: