


Step 1: Installing the Simulator and Debugger Software
2-4
2.2
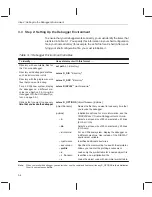
Step 1: Installing the Simulator and Debugger Software
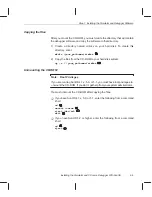
This section explains how to install the simulator and debugger software on
your hard-disk system. The software package is shipped on a CD-ROM. To
install the software, you must mount the CD-ROM, copy the files, and unmount
the CD-ROM.
Mounting the CD-ROM
Note:
Root Privileges
If you are running SunOS 4.1.x, 5.0, or 5.1, you
must have root privileges to
mount the CD-ROM. If you don’t, get help from your system administrator.
The steps to mount the CD-ROM vary according to your operating-system
version:
-
If you have SunOS 4.1.x, load the CD-ROM into the drive and enter the
following from a command shell:
mount –rt hsfs /dev/sr0 /cdrom
exit
cd /cdrom/sparc
-
If you have SunOS 5.0 or 5.1, load the CD-ROM into the drive and enter
the following from a command shell:
mount –rF hsfs /dev/sr0 /cdrom
exit
cd /cdrom/cdrom0/sparc
-
If you have SunOS 5.2 or higher:
J
If your CD-ROM drive is already attached, load the CD-ROM into the
drive and enter the following from a command shell:
cd /cdrom/cdrom0/sparc
J
If you do not have a CD-ROM drive attached, you must shut down your
system to the PROM level, attach the CD-ROM drive, and enter the
following:
boot –r
After you log into your system, load the CD-ROM into the drive and
enter the following from a command shell:
cd /cdrom/cdrom0/sparc
Summary of Contents for SCOUTTRAINER25
Page 1: ...TMS320C2xx Simulator Getting Started Guide 1996 Microprocessor Development Systems ...
Page 2: ...Printed in U S A April 1996 D412015 9741 revision SPRU176 ...
Page 3: ...TMS320C2xx Simulator Getting Started Guide SPRU176 April 1996 Printed on Recycled Paper ...
Page 6: ...vi ...
Page 18: ...1 10 ...
Page 44: ...Index 6 ...


