background image

5


G

ettin

g Started

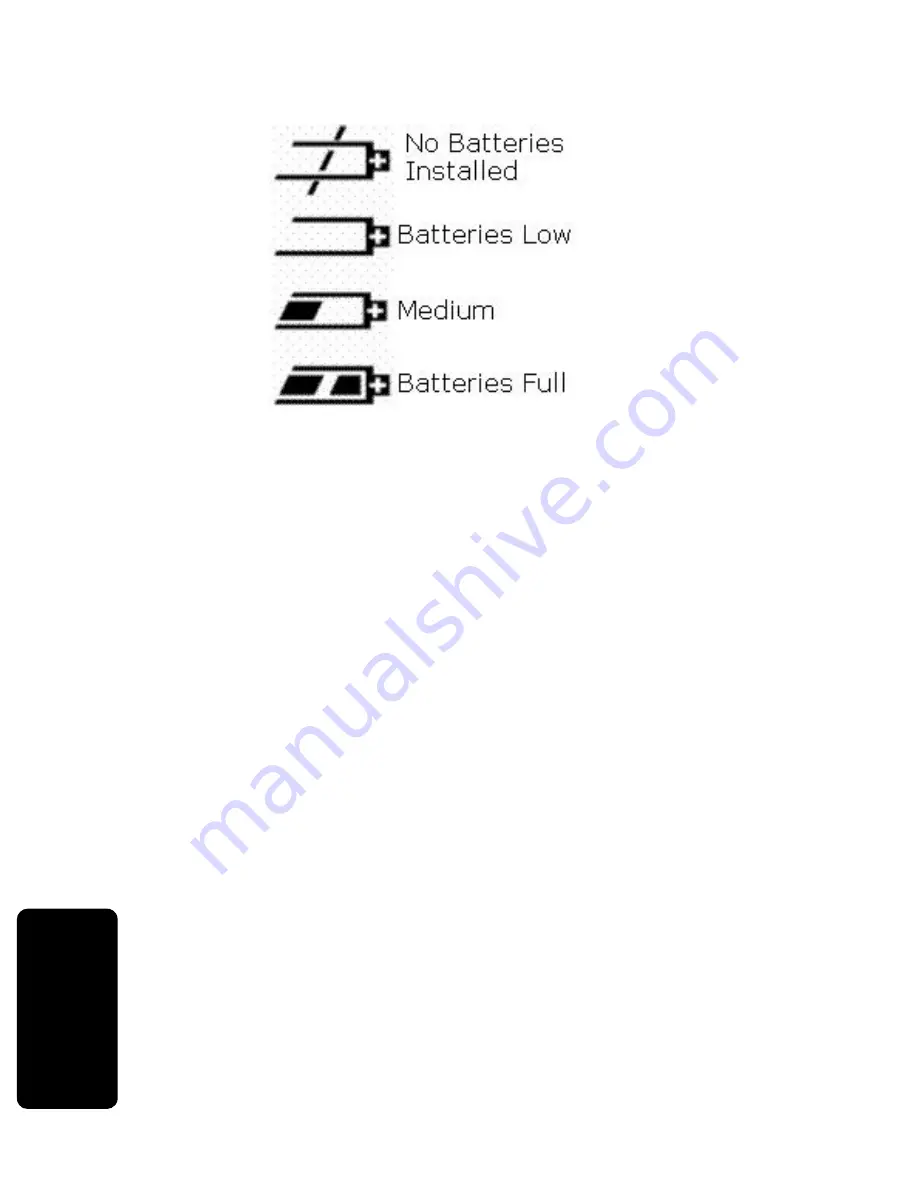
The base display has a battery meter to show status 

of the backup batteries.

Phone Navigation

The handset and base unit displays, soft keys, and 

navigation keys are used to select the various 

features and functions of your phone. This section 

describes how to use these components so you can 

set up your preferences. 
For step-by-step instructions on setting personal 

preferences, see “Setting Up.” 

Summary of Contents for MD7080

Page 1: ...80 Digital 5 8 GHz Expandable Cordless Two Line Telephone System with Base Speakerphone Keypad and Answering Machine Système de téléphone sans fil numérique à 5 8 GHz extensible à deux lignes avec base à haut parleur pavé numérique et fonction répondeur ...

Page 2: ......

Page 3: ...e tone 0 8 jkl mno def ghi 5 6 3 4 abc 2 1 9 7 Adjust volume Left soft key Right soft key Earphone jack 2 5 mm connector Ring new message indicator Page other handset s Redial last number called up to 32 digits Line 2 Make or answer a call Line 1 Make or answer a call Use handset like a speakerphone Microphone Scroll up or down Cancel a command end a call ...

Page 4: ...key while PHONEBK is displayed opens your list of phone numbers and names Charging LED Speaker LED Speakerphone Page Handsets Left soft key Line 1 Line 2 Right soft key Scroll up or down on display Volume Handsfree Redial Intercom Skip backwards Skip forwards Delete message Play stop message from mailbox 2 Play stop message from mailbox 1 ...

Page 5: ...uct Registering helps us facilitate warranty service and permits us to contact you should your Motorola product require an update or other service Registration is not required for warranty coverage To register your product online visit https broadbandregistration motorola com Note Product registration is not available in Canada Please retain your original dated sales receipt for your records For w...

Page 6: ...e to time without obligation on the part of Motorola to provide notification of such revision or change Motorola provides this guide without warranty of any kind either implied or expressed including but not limited to the implied warranties of merchantability and fitness for a particular purpose Motorola may make improvements or changes in the product s described in this manual at any time MOTORO...

Page 7: ... the Soft Keys 7 Using the Navigation Key 7 Installation 8 Installing the Phone on a Desk 8 Installing the Phone on the Wall 9 Setting Up 12 Personalizing Your New Telephone System 12 Ringer Options 12 Setting the Ring Tone and Ring Volume 13 Setting Key Beeps On or Off 13 Setting the Ring Tone 14 Naming a Handset or Base Unit 15 Setting the Date and Time for Your Telephone 17 Setting the Language...

Page 8: ...ng a Phonebook Entry 28 Sorting the Phonebook 28 Calling a Number from the Phonebook 29 Using Caller ID 29 Reviewing the List of Caller ID Calls 29 Deleting Caller ID Calls 30 Multihandset Functions 31 Registering an Expansion Handset 32 Deregistering an Expansion Handset 32 Using the Intercom 33 Enabling Auto Answer 34 Transferring Calls to Other Handsets 34 Conference Calling 35 Creating a Confe...

Page 9: ...g the Outgoing Message 40 Setting the Number of Rings Before the Answering Machine Picks Up 40 Setting the Security ID Number 41 Recording a Memo 41 Checking Messages from the Base Unit 41 Checking Messages Remotely 43 Message Forwarding 44 Quick Enable Message Forwarding 45 Screening Calls 45 Motorola Limited Warranty 46 ...

Page 10: ...r cord Place the power cord so that it will not be walked on 5 Never insert objects of any kind into the product slits as that may result in fire or shock 6 Unplug this product from the wall outlet before cleaning Do not use liquid cleaners or aerosol cleaners Use a damp cloth for cleaning 7 Do not disassemble this product If service or repair work is required contact the Motorola address found in...

Page 11: ... future reference 2 Follow all warnings and instructions marked on the product 3 Do not install this product near a bath tub sink or shower 4 Operate this phone using only the power source that is indicated on the marking label If you are unsure of the power supply to your home consult your dealer or local power company 5 Do not place this product on an unstable cart stand or table This product ma...

Page 12: ...should have at least one phone in your home that isn t cordless in case the power in your home goes out 10 To avoid interference to nearby appliances do not place the base of the cordless phone on or near a TV microwave oven refrigerator or VCR Caution To maintain compliance with the FCC s RF exposure guidelines place the base unit at least 20 cm from nearby persons ...

Page 13: ... bottom of this equipment is a label that contains among other information a product identifier in the form US AAAEQ TXXXX You must upon request provide this information to your telephone company The digits represented by in the product identifier indicate the Ringer Equivalency Number REN for this equipment The REN is useful in determining the number of devices you may connect to your telephone l...

Page 14: ...n of your telephone from your line The FCC requires that you connect your cordless telephone to the nationwide telephone network through a modular telephone jack USOC RJ11C RJ11W or RJ14C RJ14W Rights of the Telephone Company Should your equipment cause trouble on your line which may harm the telephone network the telephone company shall where practicable notify you that temporary discontinuance o...

Page 15: ...ion is subject to the following two conditions This device may not cause harmful interference This device must accept any interference received including interference that may cause undesired operation This equipment has been tested and found to comply with the limits for a Class B digital device pursuant to Part 15 of the FCC Rules These limits are designed to provide reasonable protection agains...

Page 16: ... different from that to which the receiving antenna is connected If these measures do not eliminate the interference please consult your dealer or an experienced radio television technician for additional suggestions Also the Federal Communications Commission has prepared a helpful booklet How to Identify and Resolve Radio TV Interference Problems This booklet is available from the U S Government ...

Page 17: ...xv FCC Info Hearing Aid Compatibility This telephone system meets the FCC standards for hearing aid compatibility ...

Page 18: ...ices you may connect to your telephone line and still have all of these devices ring when your telephone number is called The sum of the RENs of all devices connected to one line may not exceed 5 Before installing this cordless phone you should make sure that it is permissible to be connected to the facilities of the local telecommunications company The equipment must be installed using an accepta...

Page 19: ...s equipment should be made by an authorized Canadian maintenance facility designated by Motorola Any repairs or alterations made by the consumer or any malfunctions of this equipment may give the telecommunications company cause to request that you disconnect the equipment and may void the limited warranty Privacy Privacy of communications may not be ensured when using this telephone Other devices...

Page 20: ...harmful interference to radio or television reception which can be determined by turning the equipment on and off the user is encouraged to try to correct the interference with one or more of the following measures Reorient or relocate the receiving antenna that is the antenna for radio or television that is receiving the interference Reorient or relocate and increase the separation between the te...

Page 21: ... is a risk of explosion if you replace the battery with an incorrect battery type Use only the battery that came with your phone or an authorized replacement recommended by the manufacturer Keep batteries out of the reach of children Remove batteries if storing over 30 days Do not dispose of batteries in fire which could result in explosion The rechargeable batteries that power this product must b...

Page 22: ...he Battery 1 Remove stickers if present 2 Remove the battery door 3 Insert the battery into the battery compartment 4 Plug the battery connector into the receptacle in the battery compartment and replace the battery door Black Red ...

Page 23: ...nto an outlet 6 Rest the handset in the base so the charging LED lights 7 For the initial charge charge the battery for at least 16 hours Note Every time a battery is plugged in the phone must be charged in the base for at least 10 seconds for the phone to properly restart ...

Page 24: ... compartment cover 2 Insert four AA alkaline batteries as directed on the compartment 3 To replace the compartment cover insert the tabs of the cover into the slots on the base station and press down until the cover clicks into place Note The backup batteries discharge somewhat during each power outage If your power fails often or for more than an hour you should replace the batteries to ensure th...

Page 25: ...vigation The handset and base unit displays soft keys and navigation keys are used to select the various features and functions of your phone This section describes how to use these components so you can set up your preferences For step by step instructions on setting personal preferences see Setting Up ...

Page 26: ...he speakerphone is on V displays The menu display In a menu display points to the currently selected item and b indicates there are more items above and below the currently selected item Device name Line 1 Line 2 messages Number of calls Answering machine status Ringer off icon Time Date Battery meter Function Line 1 Line 2 indicators Function Time Date Indicates currently selected item Indicates ...

Page 27: ...he next In this guide soft key functions are shown as the function name For example if a step instructs you to select MENU do so by pressing the soft key below MENU Using the Navigation Key The navigation key is used to scroll up and down through menu items lists of settings Caller ID and redial lists and the phonebook Up and down scroll key Left soft key Right soft key ...

Page 28: ...tructions you will need to install the phone Installing the Phone on a Desk 1 Plug the telephone line cords for Line 1 and Line 2 into the jack on the back of the phone Line 1 Tel Line 1 L1 L2 Line 2 Tel Line 2 Plug the corresponding telephone line cords into the wall jacks designated for Line 1 and Line 2 Note Use the Tel Line 1 L1 L2 if your wall jack has only one socket for both lines ...

Page 29: ...ing the Phone on the Wall The wall mount of your MD7080 series phone is located in the base 1 Press the release button on the bottom of the phone 2 Carefully slide the wall mount from the base Release button Mounting bracket ...

Page 30: ...ntil the mount clicks in place 4 Plug the power cord into the back of the base and into an electrical outlet 5 Plug the telephone line cords for Line 1 and Line 2 into the jack on the back of the phone Line 1 Tel Line 1 L1 L2 Line 2 Tel Line 2 Plug the corresponding telephone line cords into the wall jacks designated for Line 1 and Line 2 ...

Page 31: ...11 Installation 6 Line up the tabs on the wall mount bracket with the holes on the back of the wall mount Snap the wall mount firmly into place ...

Page 32: ...stinguish one from another Ringer Options Follow the steps listed to set one ring tone for incoming calls and another ring tone for numbers stored in your phonebook You must have Caller ID service to use this feature The Ringer option has five submenus Day Volume ringer volume factory default 6 00 AM to 9 00 PM off low medium high Night Volume Ringer volume factory default 9 00 PM to 6 00 AM off l...

Page 33: ...XIT to return to the standby screen or scroll to a different menu option Setting Key Beeps On or Off The phone beeps each time you press a key You can turn this feature off the phone beeps by default or set it to beep only when the ringer is on 1 Select MENU 2 Scroll to Ringer 3 Select LINE 1 or LINE 2 4 Press SELECT 5 Scroll to Key Beeps 6 Press CHANGE to scroll through the options ON OFF or LINK...

Page 34: ... 1 Select MENU 2 Scroll to Ringer 3 Select LINE 1 or LINE 2 4 Scroll down to Ring Tone to select the ring tone for incoming calls 5 Press CHANGE to scroll through the ring tones Each tone plays as you press CHANGE 6 Stop at the desired ring tone 7 Scroll down to PHONEBOOK TONE to set the ring tone for numbers stored in a phonebook 8 Press DONE 9 Press EXIT to return to the standby screen or scroll...

Page 35: ...someone s name Ian Naming a handset makes it easy to select the handset from a list for example to intercom another handset You can change the name of the base unit by using the same steps for naming a handset 1 Press MENU 2 Scroll to Name handset or Name base 3 Press SELECT 4 Enter the name you want to use up to 12 characters The flashing square shows the input cursor position Select DELETE to er...

Page 36: ... entry from uppercase to lowercase press A flashing square indicates that you are in the uppercase text entry mode A flashing cursor indicates that you are in the lowercase text entry mode 5 Press DONE 6 Press EXIT to return to the standby screen or scroll to a different menu option Button Number of Presses 1 2 3 4 5 1 space 1 2 A B C 2 3 D E F 3 4 G H I 4 5 J K L 5 6 M N O 6 7 P Q R S 7 8 T U V 8...

Page 37: ... Scroll down to move to the next field 7 Select CHANGE to change the time format 12 hour or 24 hour clock Scroll down to move to the next field Note When setting the Date and Time from the base unit scroll down and press CHANGE to select the correct day of the week 8 Press CHANGE to select a different date format MM DD or DD MM 9 Scroll down to move to the next field 10 Enter the current date 11 S...

Page 38: ...ting Up Setting the Language 1 Press MENU 2 Scroll to Language 3 Press SELECT 4 Scroll to your desired language 5 Select DONE 6 Select EXIT to return to the standby screen or scroll to a different menu option ...

Page 39: ...A B or HANDSFREE to answer using the speakerphone If you have call waiting service press A or Bto answer the second call Note If you receive an incoming call while on line A or B there is an audible sound on the line the caller ID data appears on the screen the line icon is visible and the corresponding mailbox on the base unit blinks If you have expansion handsets registered to your base unit the...

Page 40: ...quence This is useful for example when you have to dial 9 to get a dial tone or for accessing a voice mail system To insert a pause within a number press the pound key twice A P is displayed on the handset display Using Automated Dialing You can retrieve numeric information like a PIN or credit card number from the phonebook during a phone call This feature is useful when using an automated respon...

Page 41: ...he phone you can store your account number and PIN in the phonebook and then access them during the call instead of entering them manually each time 1 While on a call scroll until points to the entry you want to recall 2 Press DIAL softkey 3 Repeat steps 1 and 2 as often as necessary to complete your transaction ...

Page 42: ...y To adjust the speakerphone volume press the volume up or volume down key These keys are located on the side of the handset or on the top of the base unit To toggle between the handset and the speakerphone press HANDSFREE If you have call waiting service press A or Bto switch to the second call When you are finished talking press Bto hang up and turn the speakerphone off Note Pressing HANDSFREE w...

Page 43: ...1 Press REDIAL 2 Scroll until points to the number you want to redial 3 Press the DIAL softkey A or B or HANDSFREE If a number in the redial list matches a number in your phonebook the name from the phonebook displays instead of the number Finding a Lost or Misplaced Handset To page a missing handset press PAGE on the base station All handsets registered to the base station will start beeping To s...

Page 44: ...onebook which can hold 50 names and numbers The base has a 40 entry phonebook that is shared among all handsets Storing a New Number 1 Select PHONEBK 2 To store a number in the base phonebook select SHARED To store a number in the handset phonebook select PRIVATE 3 Scroll to NEW ENTRY and select SELECT 4 Enter the name up to 12 characters The flashing underline shows the input cursor position Sele...

Page 45: ...percase text entry mode A flashing cursor indicates that you are in the lowercase text entry mode 5 Scroll down 6 Enter the phone number up to 24 digits Select DELETE to erase characters to the left of the input cursor 7 Scroll down 8 To set the ring tone for incoming calls from this number select CHANGE A tone plays each time you select CHANGE Stop at the ring tone you want to set 9 Select DONE B...

Page 46: ...RE 4 Enter the name up to 12 characters See Storing a New Number for information on entering text 5 Scroll down until the phone number displays in the Number field Select DELETE to erase characters to the left of the input cursor if modifications need to be made 6 Scroll down 7 To set the tones for incoming calls from this number select CHANGE A tone plays each time you select CHANGE Stop at the r...

Page 47: ...ETE to erase characters to the left of the input cursor 4 Scroll down 5 To set the tones for incoming calls from this number select CHANGE A tone plays each time you select CHANGE Stop at the ring tone you want to set 6 Select DONE Editing a Phonebook Entry 1 Select PHONEBK 2 Scroll down until points to the phonebook entry you want to edit 3 Select OPTIONS 4 Scroll down to EDIT and select SELECT T...

Page 48: ...to delete 3 Select OPTIONS 4 Scroll down to DELETE and select SELECT Sorting the Phonebook Phonebook entries are stored in the order in which they were saved by default However you can set the phonebook to sort entries alphabetically Once sorted a phonebook cannot be unsorted or reset to its previous list order 1 Select PHONEBK and scroll to any phonebook entry 2 Select OPTIONS 3 Scroll down to SO...

Page 49: ... caller ID service but INCOMING CALLor NoData is displayed for all of your incoming calls contact your telephone company Reviewing the List of Caller ID Calls The handset can store up to 40 caller ID records 1 Scroll down to view the recent calls list The most recent call is listed first 2 Scroll to review more calls 3 To call the number press A B or HANDSFREE To reformat the number before you cal...

Page 50: ...rom the caller ID list select OPTIONS 2 Scroll to DELETE to delete the current caller ID entry or DELETE ALL to delete all caller ID records and select SELECT If you select DELETE ALL select YES at the DELETE ALL prompt 3 Press NO to return to the caller ID list ...

Page 51: ... to a phone line You can place the handset and its charging base anywhere a standard electrical outlet is available With multiple handsets you can Conference call Talk handset to handset on the intercom Set up handsets to automatically answer intercom calls Transfer calls from one handset to another Monitor a room To order expansion handsets visit us online www motorola com cordless In Canada chec...

Page 52: ...voice mail messages if necessary to clear the IN USE Voice Mail indicator 1 Press OFF on the base unit and all handsets 2 Press and hold down PAGE on the base unit until the IN USE indicator begins to flash slowly then release 3 Press and hold down PAGE again until the IN USE indicator begins to flash quickly then release PAGE 4 Quickly and fully press and release PAGE again Please register handse...

Page 53: ...andset pressing INTERCOM automatically pages the handset If you have multiple handsets a list of handsets is displayed 2 Scroll to and select the handset you want to page 3 Select PAGE The other phone is paged To answer a page press OK If your page is not answered after two minutes or if the person you are paging selects EXIT or presses B NO ANSWER is displayed on your handset and paging stops 4 T...

Page 54: ...atically answers a page after one ring AFTER 3 RINGS The handset automatically answers a page after three rings 4 Select EXIT to return to the standby screen or scroll to a different menu option Transferring Calls to Other Handsets 1 Select HOLD 2 Press INTERCOM If you only have one additional handset pressing INTERCOM automatically pages the handset Continue to step 5 3 Scroll to and select the h...

Page 55: ... to a call or join a conference call from an expansion handset or base station press A Bor HANDSFREE To disconnect from a conference call press Bon the handset or base station Creating a Conference Call with Lines 1 and 2 If you are on A and Brings with the party you wish to conference Press B The system automatically places A on hold OR Press soft key HOLD and answer B The display reads L1CallOnH...

Page 56: ...t to listen from press INTERCOM If you only have one additional handset pressing INTERCOM automatically pages the handset 5 If you have multiple additional handsets scroll to the handset you want to monitor and select PAGE The handset being monitored automatically answers the page the microphone is turned on and the speaker is turned off For example MONITORING Kitchen 1 is displayed on the handset...

Page 57: ... messages from the base station from the handset or remotely You can also set your phone to automatically forward answering machine messages to another phone number Answering Machine Overview You can setup the answering machine functions from a handset or the base unit Mailbox 1 holds the messages for A and Mailbox 2 holds the messages for B ...

Page 58: ...ering Machine Turning the Answering Machine On or Off 1 Press MENU 2 Scroll to ANS MACH SETUP 3 Press SELECT 4 Press MAILBOX 1 or MAILBOX 2 5 Press Answer ON OFF 6 Select ON or OFF 7 Press DONE Setting Voice Prompts 1 Press MENU 2 Scroll to and select ANS MACH SETUP 3 Press SELECT 4 Select MAILBOX 1 or MAILBOX 2 5 Scroll to and select VOICE PROMPT 6 Scroll to and select ENGLISH FRENCH or SPANISH 7...

Page 59: ... or Hi qual Shortr 6 Select DONE to save selection Setting Up Your Outgoing Message You can record a personal outgoing message OGM that plays when you receive a call but cannot answer If you do not record a personal message a prerecorded greeting will play Recording an Outgoing Message OGM 1 Press MENU 2 Select MAILBOX 1 or MAILBOX 2 3 Scroll to and select ANS MACH SETUP 4 Scroll to and select OUT...

Page 60: ... setting Setting the Number of Rings Before the Answering Machine Picks Up 1 Press MENU 2 Scroll to and select ANS MACH SETUP 3 Select MAILBOX 1 or MAILBOX 2 4 Scroll to and select Ring number 5 Scroll to the desired number of rings 3 4 5 6 or TOLLSAVER 6 Press DONE Toll Saver sets the answering machine to pick up the call after three rings when new messages are present or after five rings when th...

Page 61: ...oll to and select SECURITY ID 5 Enter your three digit security number 6 Press DONE Recording a Memo To record a message that you can play back later 1 Press and hold MEMO on the base station 2 Select MAILBOX 1 or MAILBOX 2 to leave the message 3 Release the MEMO button to stop recording Checking Messages from the Base Unit Skip backwards Skip forwards Delete message Play stop message from mailbox...

Page 62: ...sages from a Handset 1 Select MENU 2 Scroll to and select MESSAGES 3 Select MAILBOX 1 or MAILBOX 2 4 Scroll to and select the function you want The functions are 1 REVIEW 2 PLAY STOP 3 SKIP 4 ANSWER ON OFF 5 MEMO 7 REPEAT MENU 0 ERASE ...

Page 63: ... security ID number A synthesized voice prompts you with instructions 3 To skip the voice prompts and operate the base station directly press the appropriate number key on the phone The functions are Press 2 to play stop messages Press 3 to skip forwards Press 1 to skip backwards Press 4 to turn the answering machine on off Press 5 to record a memo Press 7 to repeat the menu Press 0 to delete the ...

Page 64: ...phone number 1 Press MENU 2 Scroll to and select ANS MACH SETUP 3 Select MAILBOX 1 or MAILBOX 2 4 Scroll to and select FORWARD MSGS 5 Scroll to and select SET FWD NUMBER 6 Enter the phone number where your messages will be forwarded 7 Press DONE If a pause is required press the pound key twice 8 Scroll to and select FORWARD ON OFF 9 Select ENABLE 10 Press DONE ...

Page 65: ...wer the call you will be prompted for your security code See Setting the Security ID Number for details For more information about retrieving your message see Checking Messages Remotely To disable message forwarding press and release MEMO again Screening Calls You can screen a call by allowing the answering machine to pick up and listening to the message as it is being recorded 1 When RECORDING IN...

Page 66: ...and Software purchased by consumers in the United States or Canada which are accompanied by this written warranty Products and Accessories as defined above unless otherwise provided for below Length of coverage one 1 year from the date of purchase by the first consumer purchaser of the product unless otherwise provided for below Decorative Accessories and Cases Decorative covers bezels PhoneWrap c...

Page 67: ...cessories Defects or damage that result from the use of Non Motorola branded or certified Products Accessories Software or other peripheral equipment are excluded from coverage Unauthorized Service or Modification Defects or damages resulting from service testing adjustment installation maintenance alteration or modification in any way by someone other than Motorola or its authorized service cente...

Page 68: ...ftware including but not limited to personal contacts games and ringer tones will be reinstalled To avoid losing such data software and applications please create a back up prior to requesting service How to Get Warranty Service or Other Information For accessories and software please call the telephone number designated above for the product with which they are used You will receive instructions ...

Page 69: ...OR IN CONNECTION WITH THE ABILITY OR INABILITY TO USE THE PRODUCTS ACCESSORIES OR SOFTWARE TO THE FULL EXTENT THESE DAMAGES MAY BE DISCLAIMED BY LAW Some states and jurisdictions do not allow the limitation or exclusion of incidental or consequential damages or limitation on the length of an implied warranty so the above limitations or exclusions may not apply to you This warranty gives you specif...

Page 70: ... 5 6 3 4 abc 2 1 9 7 Réglage du volume Touche programmable de gauche Touche programmable de droite Prise d oreillette connecteur 2 5 Témoin de sonnerie messages Prise pour écouteur Renuméroter le dernier numéro appelé jusqu à 32 chiffres Ligne 2 Appeler ou répondre Ligne 1 Appeler ou répondre Utilisation du combiné avec le haut parleur Microphone Touche de défilement haut bas Annuler une commande ...

Page 71: ...own on display Volume Handsfree Redial Intercom Skip backwards Skip forwards Delete message Play stop message from mailbox 2 Play stop message from mailbox 1 Haut parleur Touche programmable gauche Touche programmable droite Défilement haut ou bas sur l écran Ligne 1 Ligne 2 DEL de charge DEL du haut parleur Mains libres Recomposition Volume Interphone Enregistrement de mémo Transfert de message s...

Page 72: ...ter le service de garantie et nous permet de vous contacter si votre produit Motorola a besoin d une mise à jour ou d un autre service L enregistrement n est pas nécessaire pour la couverture de la garantie Pour enregistrer votre produit sur Internet consultez notre site Web https broadbandregistration motorola com Remarque l enregistrement du produit n est pas disponible au Canada Veuillez conser...

Page 73: ...autre sans obligation de notifier de telles révisions ou modifications Motorola fournit ce guide sans aucune garantie implicite ni explicite y compris mais sans s y limiter les garanties implicites de qualité marchande ou d adaptation à un usage particulier Motorola peut apporter des améliorations ou des modifications au x produit s décrit s dans ce manuel à tout moment MOTOROLA et le logo M styli...

Page 74: ...s 7 Utilisation de la touche de navigation 7 Installation 8 Installation du téléphone sur un bureau 8 Installation du téléphone sur un mur 9 Configuration 12 Personnalisation de votre téléphone 12 Options de sonnerie 12 Réglage du timbre et du volume de sonnerie 13 Activation et désactivation des timbres des touches 13 Réglage du type de sonnerie 14 Attribution d un nom à un combiné ou à la base 1...

Page 75: ...dification d une entrée d annuaire 27 Suppression d une entrée d annuaire 28 Classement de l annuaire 28 Appel d un numéro à partir de l annuaire 29 Utilisation de l identification de l appelant 29 Consultation de la liste d identification de l appelant 29 Suppression des entrées d identification de l appelant 30 Fonctions de combinés multiples 31 Enregistrement d un combiné supplémentaire 32 Dése...

Page 76: ...registrement d un message sortant MS 39 Modification du message sortant 40 Réglage du nombre de sonneries avant que le répondeur se mette en route 40 Réglage du numéro d identification sécurisée 41 Enregistrement d un mémo 41 Vérification des messages depuis la base 41 Vérification des messages à distance 43 Transfert des messages 44 Activation rapide du transfert de messages 45 Filtrage d appels ...

Page 77: ...2 N utilisez pas l appareil lorsque vous êtes mouillé ou dans l eau 3 N utilisez pas ce produit près de l eau une baignoire un évier ou une piscine par exemple 4 Ne posez rien sur le câble d alimentation Placez le câble d alimentation de façon à ne pas marcher dessus 5 N insérez jamais d objets quels qu ils soient dans les fentes de l appareil car cela pourrait entraîner un incendie ou un choc éle...

Page 78: ...dant un orage Utilisez un parasurtenseur pour protéger le matériel 10 N utilisez pas le téléphone sans fil pour signaler une fuite de gaz notamment si vous êtes à proximité de la conduite de gaz Attention Afin de réduire le risque d incendie utilisez uniquement un cordon d alimentation n 26 AWG ou supérieur certifié UL ou CSA ...

Page 79: ...ment impor tante Directives d installation 1 Assurez vous de lire et de bien comprendre toutes les directives et conservez les pour référence future 2 Respectez toutes les mises en garde et instructions indiquées sur le produit 3 N installez pas ce produit près d une baignoire d un évier ou d une douche 4 Utilisez ce téléphone uniquement à partir de la source d alimentation indiquée sur l étiquett...

Page 80: ...l endommager 9 Puisque les téléphones sans fil fonctionnent à l électricité vous devriez avoir au moins un téléphone filaire dans votre résidence au cas où il y aurait une panne de courant 10 Pour éviter l interférence avec des appareils situés à proximité du téléphone ne placez pas la base du téléphone sans fil près d un téléviseur d un four à micro ondes d un réfrigérateur ou d un magnétoscope A...

Page 81: ...EN sert à déterminer le nombre maximal d appareils que vous pouvez connecter à votre ligne téléphonique pour que chacun de ces appareils puisse sonner lorsque vous recevez un appel La somme des REN de tous les appareils connectés à une même ligne ne doit pas être supérieure à 5 Avant d installer ce téléphone sans fil assurez vous que sa connexion au réseau de l opérateur téléphonique local est aut...

Page 82: ...un installateur qualifié Réparations Toute réparation sur cet appareil doit être effectuée par une structure de maintenance canadienne autorisée et désignée par Motorola Toute réparation ou altération faite par l utilisateur ou tout dysfonctionnement de cet appareil peuvent amener l opérateur téléphonique à vous demander de déconnecter l appareil et peuvent annuler la garantie limitée Confidential...

Page 83: ...t pas dans une installation particulière Si cet équipement génère effectivement des interférences dommageables à la réception radio ou télévision ce qui peut être vérifié en l éteignant et en le rallumant il est recommandé à l utilisateur d essayer de corriger les interférences par l une ou plusieurs des mesures suivantes réorienter ou déplacer l antenne réceptrice c est à dire l antenne de radio ...

Page 84: ... batterie par un autre type que celui recommandé Utilisez seulement la batterie vendue avec votre téléphone ou une batterie de remplacement autorisée recommandée par le fabricant du téléphone Maintenez les batteries hors de portée des enfants Retirez les batteries du téléphone si vous le rangez pendant plus de 30 jours Ne jetez pas les batteries au feu car elles pourraient exploser Les batteries r...

Page 85: ...es autocollants éventuels 2 Retirez le couvercle de la batterie 3 Insérez la batterie dans son logement 4 Branchez le connecteur de la batterie dans le réceptacle du logement de la batterie et replacez le couvercle de la batterie Black Red Rouge Noir ...

Page 86: ...e de courant 6 Placez le combiné dans le socle de façon à ce que le voyant charge s allume 7 Pour la charge initiale vous devez charger la batterie pendant au moins 16 heures Remarque chaque fois qu une batterie est connectée le téléphone doit être chargé sur le socle pendant au moins 10 secondes pour lui permettre de redémarrer correctement ...

Page 87: ...les pour l enlever 2 Insérez quatre piles alcalines de type AA dans le sens indiqué sur le logement 3 Pour replacer le couvercle du logement insérez ses languettes dans les encoches de la base et appuyez dessus pour l encliquer Remarque les piles de secours perdent de leur charge à chaque coupure de courant Si votre alimentation électrique est souvent coupée ou durant plus d une heure vous devriez...

Page 88: ...igation du combiné et de la base permettent de sélectionner les différentes fonctions et fonctionnalités de votre téléphone Ce chapitre décrit comment utiliser ces éléments afin de configurer vos préférences Pour des instructions pas à pas sur la configuration de vos préférences personnelles voir Configuration Pas de batterie Batterie faible Charge moyenne Batterie chargée ...

Page 89: ...nt fournies uniquement si vous vous abonnez au service d identification de l appelant auprès de votre compagnie de téléphone locale Lorsque le haut parleur du téléphone est allumé l icône V s affiche Affichage du menu Dans l affichage du menu le symbole indique l élément sélectionné et le symbole b indique qu il y a d autres éléments au dessus et au dessous de l élément sélectionné ...

Page 90: ...que sélectionnez MENU vous devez appuyer sur la touche programme située sous MENU Utilisation de la touche de navigation La touche de navigation permet de faire défiler vers le haut ou vers le bas les éléments du menu les listes de paramètres les listes des identités d appelant et de renumérotation ainsi que l annuaire Touche programmable de droite Touche programmable de gauche Touche de défilemen...

Page 91: ...s dont vous aurez besoin pour installer le téléphone Installation du téléphone sur un bureau 1 Branchez les cordons téléphoniques de la ligne 1 et de la ligne 2 dans la prise à l arrière du téléphone Line 1 ligne 1 L1 L2 Line 2 ligne 2 Branchez les ensuite dans les prises murales correspondant aux lignes 1 et 2 Remarque utilisez la prise Line 1 L1 L2 si votre prise murale est unique pour les deux ...

Page 92: ...mur La fixation murale de votre modèle MD7080 se trouve dans la base 1 Appuyez sur le bouton de déblocage au fond de la base 2 Faites glisser doucement la fixation pour la sortir de la base Release button Mounting bracket Fixation Bouton de déblocage ...

Page 93: ...4 Connectez une extrémité du câble d alimentation dans la prise située à l arrière de la base puis l autre extrémité dans une prise de courant 5 Branchez les cordons téléphoniques de la ligne 1 et de la ligne 2 dans les prises à l arrière du téléphone Line 1 ligne 1 L1 L2 Line 2 ligne 2 Branchez les ensuite dans les prises murales correspondant aux lignes 1 et 2 ...

Page 94: ...11 Installation 6 Alignez les languettes du support de fixation avec les trous à l arrière de la plaque de fixation Enfoncez fermement le support de fixation ...

Page 95: ...ie Suivez les étapes indiquées pour régler un timbre de sonnerie pour les appels entrants inconnus et un autre pour les numéros enregistrés dans votre annuaire Remarque cette option fonctionne uniquement si vous avez le service d identification de l appelant L option de sonnerie a cinq sous menus Volume quot volume de la sonnerie réglé par défaut en usine de 6 00 AM à 9 00 PM coupé bas moyen haut ...

Page 96: ...ifférente Activation et désactivation des timbres des touches Le téléphone émet un signal sonore chaque fois que vous appuyez sur une touche Vous pouvez désactiver cette fonction par défaut le téléphone émet un signal sonore ou la définir pour émettre un signal sonore uniquement lorsque la sonnerie est activée 1 Sélectionnez MENU 2 Défilez jusqu à Prog sonnerie 3 Sélectionnez LIGNE 1 ou LIGNE 2 4 ...

Page 97: ... 3 Sélectionnez LIGNE 1 ou LIGNE 2 4 Défilez jusqu à Timbre sonn pour sélectionner le type de sonnerie pour les appels entrants 5 Appuyez sur MODIF pour faire défiler les types de sonnerie Chaque tonalité de sonnerie se fait entendre lorsque vous appuyez sur MODIF 6 Arrêtez lorsque vous obtenez la sonnerie désirée 7 Défilez jusqu à TIMBRE RÉP pour définir la tonalité à utiliser pour les numéros en...

Page 98: ...ttribuant un nom aux combinés il devient plus facile de les sélectionner dans une liste pour joindre un combiné par interphone par exemple Vous pouvez modifier le nom de la base en suivant les mêmes étapes que pour un combiné 1 Appuyez sur MENU 2 Défilez jusqu à Nom combiné ou Nom base 3 Appuyez sur SÉLECT 4 Saisissez le nom que vous voulez utiliser jusqu à 12 caractères Le carré clignotant indiqu...

Page 99: ... Pour changer la casse appuyez sur Un carré clignotant indique que la saisie en majuscules est activée Un trait clignote si la saisie en minuscules est activée 5 Appuyez sur TERMINÉ 6 Appuyez sur SORTIE pour retourner à l écran de veille ou naviguez jusqu à une option de menu différente Touche Nombre d enfoncements 1 2 3 4 5 1 espace 1 2 A B C 2 3 D E F 3 4 G H I 4 5 J K L 5 6 M N O 6 7 P Q R S 7 ...

Page 100: ...a 6 Défilez vers le bas pour passer au champ suivant 7 Sélectionnez MODIF pour changer le format de l heure 12 heures ou 24 heures Défilez vers le bas pour passer au champ suivant Remarque lorsque vous réglez la date et l heure à partir de la base défilez et appuyez sur MODIF pour sélectionner le jour exact de la semaine 8 Appuyez sur MODIF pour sélectionner le format de la date MM JJ ou JJ MM 9 D...

Page 101: ...e 1 Appuyez sur MENU 2 Défilez jusqu à Prog langue 3 Appuyez sur SÉLECT 4 Défilez jusqu à la langue désirée 5 Sélectionnez TERMINÉ 6 Sélectionnez SORTIE pour retourner à l écran de veille ou naviguez jusqu à une option de menu différente ...

Page 102: ... la touche MAINS LIBRES pour répondre avec le haut parleur Si vous êtes abonné au service d appel en attente appuyez sur Aou Bpour répondre au deuxième appel Remarque si vous recevez un appel pendant une communication sur la ligne A ou B un signal sonore vous avertit sur la ligne l identification de l appelant s affiche à l écran avec l icône de la ligne et la messagerie correspondante clignote su...

Page 103: ...ois secondes avant de transmettre les prochains chiffres de la séquence de composition Cette fonction est utile si vous devez par exemple composer le 9 pour obtenir la tonalité de composition standard ou pour utiliser un système de messagerie vocale Pour insérer une pause dans un numéro appuyez deux fois sur la touche dièse La lettre P s affiche sur le combiné Softer Louder plus fort moins fort ...

Page 104: ...ée Par exemple si vous accédez souvent aux informations de votre compte bancaire par téléphone vous pouvez enregistrer votre numéro de compte et votre code PIN dans l annuaire et y accéder durant l appel pour éviter de les saisir manuellement à chaque fois 1 En cours d appel faites défiler jusqu à ce que pointe vers l entrée à composer 2 Appuyez sur la touche programme COMPOS 3 Reprenez les étapes...

Page 105: ...ume du haut parleur appuyez sur la touche Volume ou Volume Ces touches se trouvent sur le côté du combiné ou sur le dessus de la base Appuyez sur la touche MAINS LIBRES pour passer du combiné au haut parleur et inversement Si vous êtes abonné au service d appel en attente appuyez sur Aou Bpour basculer vers le second appel Lorsque vous avez fini de parler appuyez sur B pour raccrocher et désactive...

Page 106: ...sur la touche REDIAL 2 Défilez jusqu à ce que pointe vers le numéro à recomposer 3 Appuyez sur la touche programme COMPOS sur A ou B ou sur la touche mains libres Si un numéro de la liste de recomposition correspond à un numéro de l annuaire le nom et le numéro sauvegardés dans l annuaire s affichent au lieu du numéro Recherche d un combiné égaré Pour repérer un combiné égaré appuyez sur la touche...

Page 107: ...qui peut contenir 50 noms et numéros La base comporte un annuaire de 40 entrées partagé par tous les combinés Enregistrement d un nouveau numéro 1 Sélectionnez RÉPERT 2 Pour enregistrer un numéro dans l annuaire de la base sélectionnez PARTAGÉ Pour enregistrer un numéro dans l annuaire du combiné sélectionnez PRIVÉ 3 Faites défiler jusqu à NOUV ENTRÉE et sélectionnez SÉLECT 4 Saisissez le nom jusq...

Page 108: ...i la saisie en minuscules est activée 5 Défilez vers le bas 6 Saisissez le numéro de téléphone jusqu à 24 caractères Sélectionnez SUPPRIM pour effacer les caractères situés à gauche du curseur 7 Défilez vers le bas 8 Pour définir une sonnerie pour les appels entrants de ce numéro sélectionnez MODIF Une tonalité de sonnerie se fait entendre chaque fois que vous sélectionnez MODIF Arrêtez vous au ty...

Page 109: ...ères Voir Enregistrement d un nouveau numéro pour des informations sur la saisie de texte 5 Défilez vers le bas jusqu à ce que le numéro de téléphone s affiche dans le champ du numéro Sélectionnez SUPPRIM pour effacer les caractères situés à gauche du curseur si des modifications sont nécessaires 6 Défilez vers le bas 7 Pour définir une sonnerie pour les appels entrants de ce numéro sélectionnez M...

Page 110: ...difier sélectionnez SUPPRIM pour effacer les caractères situés à gauche du curseur 4 Défilez vers le bas 5 Pour définir une sonnerie pour les appels entrants de ce numéro sélectionnez MODIF Une tonalité de sonnerie se fait entendre chaque fois que vous sélectionnez MODIF Arrêtez vous au type de sonnerie désiré 6 Sélectionnez TERMINÉ Modification d une entrée d annuaire 1 Sélectionnez RÉPERT 2 Défi...

Page 111: ...ez RÉPERT 2 Défilez vers le bas jusqu à ce que pointe vers l entrée de l annuaire à supprimer 3 Sélectionnez OPTIONS 4 Défilez vers le bas jusqu à SUPPRIM et sélectionnez SÉLECT Classement de l annuaire Les entrées de l annuaire sont enregistrées dans l ordre où elles ont été sauvegardées par défaut Toutefois vous pouvez configurer l annuaire pour le classer par ordre alphabétique Une fois le tri ...

Page 112: ...NT ou Aucune donnée s affiche pour tous vos appels entrants veuillez contacter votre compagnie du téléphone Consultation de la liste d identification de l appelant Le combiné peut contenir jusqu à 40 enregistrements d identification de l appelant 1 Défilez vers le bas pour consulter la liste des appels récents L appel le plus récent s affiche en premier 2 Défilez pour consulter d autres entrées 3 ...

Page 113: ...ppelant sélectionnez OPTIONS 2 Défilez jusqu à SUPPRIMER pour supprimer l entrée actuelle d identification de l appelant ou SUPPRIMER TOUT pour supprimer toutes les entrées puis sélectionnez SÉLECT Si vous sélectionnez SUPPRIMER TOUT sélectionnez OUI à l invite SUPPRIMER TOUT 3 Appuyez sur NON pour revenir à la liste d identification de l appelant ...

Page 114: ...n combiné et son socle de charge partout où il y a une prise électrique standard Avec plusieurs combinés vous pouvez faire ce qui suit tenir des conférences téléphoniques parler d un combiné à un autre par l interphone régler les combinés pour qu ils répondent automatiquement aux appels d interphone transférer les appels d un combiné à un autre surveiller une pièce Pour commander des combinés supp...

Page 115: ...éteindre le témoin EN SERVICE de la messagerie 1 Appuyez sur le bouton ÉTEINT de la base et de tous les combinés 2 Appuyez sur le bouton PAGE de la base et maintenez le enfoncé jusqu à ce que le témoin EN SERVICE commence à clignoter lentement puis relâchez la touche 3 Appuyez de nouveau sur la touche PAGE jusqu à ce que le témoin EN SERVICE commence à clignoter rapidement puis relâchez la touche ...

Page 116: ...ERCOM l appelle automatiquement En cas de combinés multiples la liste des combinés s affiche 2 Défilez vers le combiné que vous voulez rechercher et sélectionnez le 3 Sélectionnez PAGE L autre téléphone est recherché Pour répondre à cette recherche appuyez sur OK Si cette recherche ne reçoit pas de réponse dans les deux minutes ou si la personne recherchée sélectionne SORTIE ou appuie sur B AUCUNE...

Page 117: ... à une recherche après la première sonnerie APRÈS 3 SONNERIES le combiné répond automatiquement à une recherche après la troisième sonnerie 4 Sélectionnez SORTIE pour retourner à l écran de veille ou naviguez jusqu à une option de menu différente Transfert d appels vers d autres combinés 1 Sélectionnez GARDE 2 Appuyez sur la touche INTERCOM Si vous n avez qu un combiné supplémentaire l enfoncement...

Page 118: ...is un combiné ou depuis la base appuyez sur A Bou sur la touche MAINS LIBRES Pour raccrocher d une conférence téléphonique appuyez sur Bsur le combiné ou sur la base Lancement d une conférence avec les lignes 1 et 2 Si vous êtes sur la ligne Aet que Bsonne pour l appel de la personne qui doit participer à la conférence Appuyez sur B Le système met automatiquement A en attente ou Appuyez sur la tou...

Page 119: ... surveiller appuyez sur INTERCOM Si vous n avez qu un combiné supplémentaire l enfoncement de la touche INTERCOM l appelle automatiquement 5 Si vous disposez de plusieurs combinés supplémentaires défilez jusqu au combiné que vous voulez surveiller et sélectionnez PAGE Le combiné surveillé répond automatiquement à la recherche le microphone s allume et le haut parleur s éteint Par exemple SURVEILLA...

Page 120: ... de la base du combiné ou à distance Vous pouvez aussi régler votre téléphone pour qu il transfère automatiquement les messages enregistrés vers un autre numéro de téléphone Vue d ensemble du répondeur Vous pouvez régler les fonctions du répondeur depuis un combiné ou depuis la base Messagerie 1 contient les messages de A et Messagerie 2 ceux de B ...

Page 121: ... 1 Appuyez sur MENU 2 Défilez jusqu à PROG RÉPOND 3 Appuyez sur SÉLECT 4 Appuyez sur MESSAGERIE 1 ou MESSAGERIE 2 5 Appuyez sur RÉP ACT DÉS 6 Sélectionnez ACTIVÉ ou DÉSACTIVÉ 7 Appuyez sur TERMINÉ Réglage des invites vocales 1 Appuyez sur MENU 2 Défilez pour sélectionner PROP INTERCOM 3 Appuyez sur SÉLECT 4 Sélectionnez MESSAGERIE 1 ou MESSAGERIE 2 5 Défilez pour sélectionner INVITE VOCALE 6 Défil...

Page 122: ...TERMINÉ pour enregistrer votre sélection Réglage de votre message sortant Vous pouvez enregistrer un message personnel qui est diffusé lorsque vous recevez un appel auquel vous ne pouvez pas répondre Si vous n enregistrez pas de message personnel un message préenregistré sera diffusé Enregistrement d un message sortant MS 1 Appuyez sur MENU 2 Sélectionnez MESSAGERIE 1 ou MESSAGERIE 2 3 Défilez pou...

Page 123: ...épondeur se mette en route 1 Appuyez sur MENU 2 Défilez pour sélectionner PROP INTERCOM 3 Sélectionnez MESSAGERIE 1 ou MESSAGERIE 2 4 Défilez et sélectionnez NBRE SONNERIES 5 Défilez jusqu au nombre de sonneries voulu 3 4 5 6 ou ÉCONOM D INTER 6 Appuyez sur TERMINÉ L option Économie d interurbain règle le répondeur pour qu il se mettre en marche après trois sonneries lorsqu il contient des message...

Page 124: ...ESSAGERIE 1 ou MESSAGERIE 2 4 Défilez et sélectionnez ID SÉCURITÉ 5 Saisissez votre code sécurisé à trois chiffres 6 Appuyez sur TERMINÉ Enregistrement d un mémo Pour enregistrer un message que vous pourrez réécouter plus tard 1 Appuyez sur la touche MÉMO de la base en la maintenant enfoncée 2 Sélectionnez MESSAGERIE 1 ou MESSAGERIE 2 pour y enregistrer le message 3 Relâchez la touche MÉMO pour ar...

Page 125: ...iné 1 Sélectionnez MENU 2 Défilez et sélectionnez MESSAGES 3 Sélectionnez MESSAGERIE 1 ou MESSAGERIE 2 4 Défilez et sélectionnez la fonction désirée Les fonctions sont 1 VÉRIFICATION 2 LECT ARRÊT 3 SAUTER 4 RÉP ACT DÉS 5 NOTE MÉMO 7 RAPPEL MENU 0 EFFACER ...

Page 126: ...nne des instructions 3 Pour sauter ces instructions et contrôler le poste de base directement appuyez sur la touche numérotée appropriée du téléphone Les fonctions sont les suivantes Appuyez sur 2 pour lire interrompre les messages Appuyez sur 3 pour passer au message suivant Appuyez sur 1 pour revenir au message précédent Appuyez sur 4 pour activer ou désactiver le répondeur Appuyez sur 5 pour en...

Page 127: ... pour sélectionner PROP INTERCOM 3 Sélectionnez MESSAGERIE 1 ou MESSAGERIE 2 4 Faites défiler et sélectionnez TRANSFERT MSG 5 Défilez et sélectionnez TRANSFÉRER AU 6 Saisissezle numéro de téléphone vers lequel vos messages seront transférés 7 Appuyez sur TERMINÉ Si une pause est nécessaire appuyez deux fois sur la touche dièse 8 Défilez dans les options et sélectionnez TRANSFÉRER 9 Sélectionnez AC...

Page 128: ...dera votre code sécurisé Consultez Réglage du numéro d identification sécurisé pour plus de détails Pour plus d informations sur la récupération de votre message consultez Vérification des messages à distance Pour désactiver le transfert des messages appuyez de nouveau sur MÉMO Filtrage d appels Vous pouvez filtrer les appels en laissant le répondeur se mettre en route pour écouter le message pend...

Page 129: ...titue le recours exclusif du consommateur quant aux nouveaux Produits Accessoires et Logiciels Motorola achetés par les consommateurs au Canada ou aux États Unis et accompagnés d une garantie écrite et s applique de la manière suivante Produits et accessoires tels que définis ci dessus sous réserve d autres dispositions dans la présente garantie Durée de la couverture Un 1 an à compter de la date ...

Page 130: ...te chose semblable la chaleur extrême ou la nourriture c l utilisation de produits ou d accessoires à des fins commerciales ou à toutes fins soumettant le produit ou l accessoire à un usage ou des conditions hors du commun ou d les cas de force majeure ou autres circonstances hors de la responsabilité de Motorola sont exclus de la présente garantie Utilisation de produits et accessoires autres que...

Page 131: ...e toutes les défectuosités du Logiciel seront corrigées Logiciel NON contenu sur un support matériel Tout logiciel non fourni sur support matériel par exemple les logiciels téléchargés à partir d Internet est offert tel quel et sans garantie Qui est couvert Cette garantie ne couvre que l utilisateur de première main Engagement de Motorola Motorola réparera ou remplacera à sa discrétion et sans fra...

Page 132: ...reil expédié Les autres limitations TOUTES GARANTIES IMPLICITES Y COMPRIS MAIS SANS S Y LIMITER LES GARANTIES IMPLICITES DE QUALITÉ MARCHANDE ET D USAGE À DES FINS PARTICULIÈRES SERONT LIMITÉES À LA DURÉE DE CETTE GARANTIE IMPLICITE FAUTE DE QUOI TOUTE RÉPARATION OU TOUT REMPLACEMENT DANS LE CADRE DE CETTE GARANTIE EXPRESSE LIMITÉE SONT SOUS LA RESPONSABILITÉ EXCLUSIVE DU CONSOMMATEUR ET SE SUBSTI...

Page 133: ...essus peuvent donc ne pas vous concerner Cette garantie vous donne des droits spécifiques et vous pouvez également disposer d autres droits variables selon les États ou les juridictions Les lois aux États Unis et dans d autres pays donnent certains droits exclusifs à Motorola pour les logiciels Motorola tels que les droits exclusifs de reproduction et de distribution de copies des logiciels Motoro...

Page 134: ...Visit our website at Consultez notre site Web www motorola com cordless 520117 002 03 05 MGBI ...

Reviews: