


17
About the StarTAC Clip-On Organizer
17
3
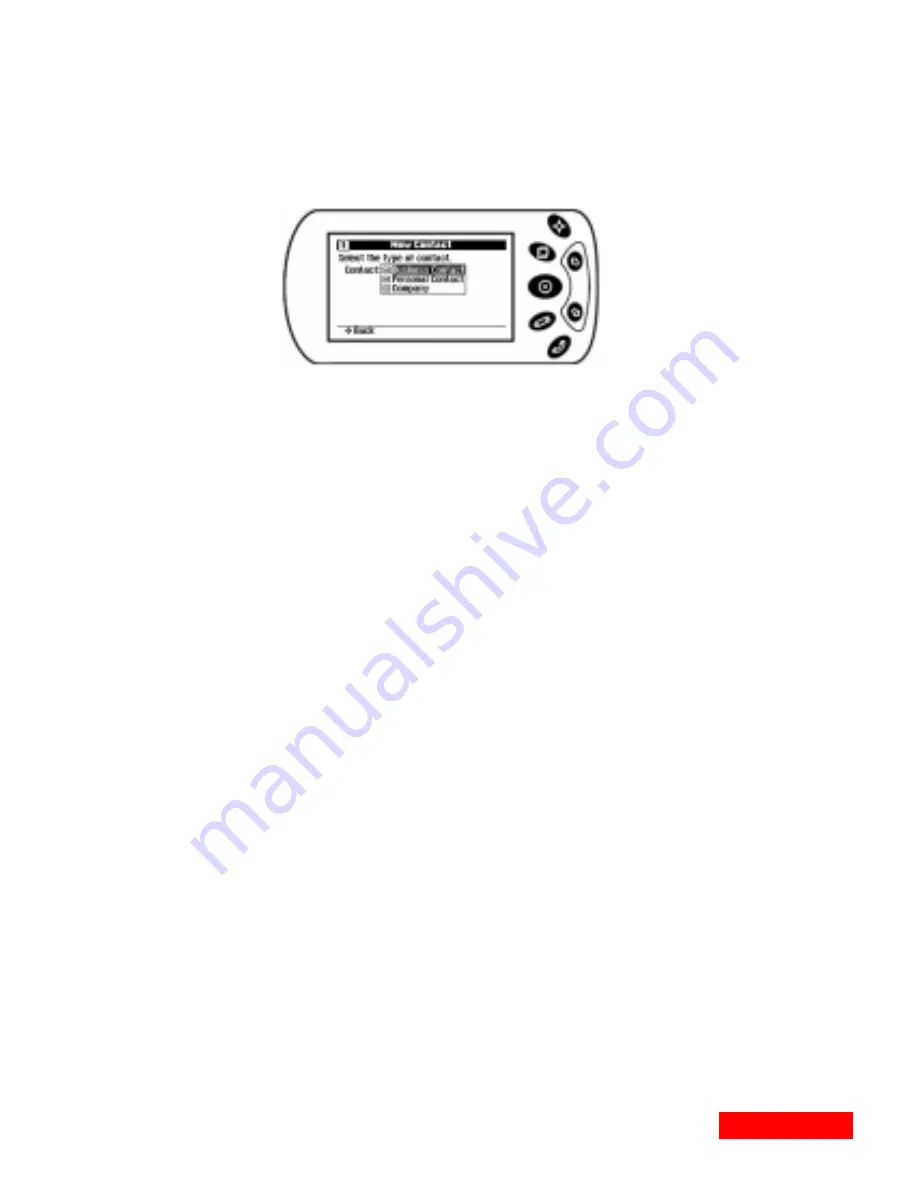
Use the Up or Down key to select the type of Contact that
you want. The Contact types are Business Contact, Personal
Contact, and Company; the fields will vary, depending on
the type of contact that you choose.
4
Now enter the contact’s first name. If the Contact is a
Company Contact, enter the name of the company. Use the
Up and Down keys to move from one letter to the other, and
use the Select key to enter each letter. To change to
numbers, press the View key. Press the View key again to
move back to letters. When you are finished, press the Edit
key.
5
Enter the Contact’s last name and press the Edit key when
you are finished. (If it is a Company Contact, this screen
will not appear.)
6
Now choose the category for your new Contact. If there are
no categories, or only one category, this Wizard screen will
not be displayed.
7
Confirm the contact name by pressing the Down key. If you
want to make a change, press the Edit key.
8
Depending on your selections, you may be asked to enter
company information for the new Contact. Choose how to
specify the company, then press the Select key. If you
choose “Company in Contacts” use the Up or Down key to
scroll through the alphabetical tabs of a cardfile. You can
use the Select key, and then the Up or Down key, to go to a
specific lettered tab. Press the Select key, and then use the
Up or Down key, to go to the card for the company. Press
the Select key to enter your choice.
Choose the
Contact type,
and press the
Select key.
Summary of Contents for CLIPON ORGANIZER
Page 12: ...12 Chapter 1 ...
Page 34: ...34 Chapter 3 ...
Page 40: ...40 Chapter 4 ...
Page 54: ...54 Chapter 6 ...
Page 64: ...64 Chapter 8 ...
Page 72: ...72 Chapter 10 ...


