Hardware Installation
9
2.4 Wall Mount Installation
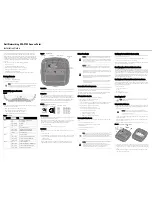
To support wall mount installations, the access point is fastened directly to a flat wall surface. The
wall should be of gypsum board, plaster, wood or concrete in composition.
To install the access point to a wall:
1.
Orient the access point by either its width or length.
2.
Mark the mounting surface at the target screw insertion points.
3.
At each point, drill a hole in the wall, insert an anchor, screw into the anchor the wall
mounting screw and stop when there is 1mm between the screw head and the wall.
If pre-drilling a hole, the recommended hole size is 2.8mm (0.11in.) if the screws are going
directly into the wall and 6mm (0.23in.) if wall anchors are being used.
4.
If required, install and attach a security cable to the access point lock port.
CAUTION
To avoid problematic performance and restarts, disable PoE from a
wired controller port connected to an access point if mid-span
power
sourcing equipment
(PSE) is used between the two, regardless of the
manufacturer.
CAUTION
Ensure AC power is supplied to the Power Injector using an AC cable
with an appropriate ground connection approved for the country of
operation.
NOTE
If not using the Power Injector to power the access point, the only other
approved power solution is the standard power supply (Part Number
PWRS-147376-01R). The standard power supply does not converge data
and power in one cable, and requires a separate data Ethernet
connection in addition to a power connection. This product is intended to
be supplied by a listed power adapter marked “Class 2” or “L.P.S” (or
“Limited Power Source”) and rated from 48Vdc, 0.27A minimum.
CAUTION
An access point should be wall mounted to concrete or plaster-
wall-board (dry wall) only. Do not wall mount the access point to
combustible surfaces.
!
!
!
AP621 IG.book Page 9 Tuesday, September 20, 2011 3:18 PM


