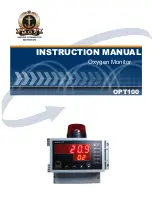
MOS OPT100 Instruction Manual Download Page 2

2.

Specifications

Housing 

ABS Plastic

Finishing 

Electrostatic Epoxy Paint

Electrical Connection 

Terminal Board

Cable Inlet 

 Racor  1/2" ( 3 x )

Installation

             Wall Mounted

IP Protection 

IP­65

Power


3.5 VA

Weight

1.2 Kg

Power Supply 

90 ~ 240 VAC or 24V DC

Operating Temperature

5 ~ 40ºC

Humidity 

20 ~ 80 %

Display 

7 Segment Red

Measuring Range 

0 ­100% O

2

Precision 

0.1

Accuracy 

0.02 % full scale

Operating Temperature

 5 ­ 40 

ºC

Auto Temperature Compensation 

40 ºC

Measuring System

Clark Polarographic Cell

Sampling Time 

20 sec.

Barometric Pressure Compensation 

811 mPA  ­ 1216mPA

Signal Output

Analog  4 ­ 20 mA programmable.

Galvanic Isolation 

2000 VAC ( optokupler )

Line Resistance 

1K2 Ohms

2

Sensor lifetime vary with the operating conditions. It is 3 years under normal conditions. Sensor
reveal exchange time via reducing the output to 70%. This means illogical O2 readout from the
monitor. Please kindly exchange the sensor immediately when you will encounter this kind of rapid
decrease.

Please kindly install new sensor into the O2 Monitor immediately after receiving it.
You should keep the sensor in refrigerated space around 5 to 10 ºC until installation.
Keep the sensor in its air tight plastic bag. Please check “Sensor Exchange” part for
installation details.

Summary of Contents for OPT100

Page 1: ...INSTRUCTION MANUAL OPT100 Oxygen Monitor...

Page 2: ...ressure Compensation 811 mPA 1216mPA Signal Output Analog 4 20 mA programmable Galvanic Isolation 2000 VAC optokupler Line Resistance 1K2 Ohms 2 Sensor lifetime vary with the operating conditions It i...

Page 3: ...g installation Location should be selected carefully to prevent any direct air flow to the Monitor from other machinery and or ventilation Do not install the unit nearby any heat source 1 Electrical c...

Page 4: ...wer should be turned on after finishing the installation completely Remove the electric connection part cover Pay caution to the data cable in between cover and the box and remove this cable from its...

Page 5: ...ET SET 209 o2 SET Adjust HIGH Alarm value with up and down buttons You can set it in between 5 0 to 30 00 aLrL 250 Low O2 alarm value can be set with ALRL parameter Press button Press button Press but...

Page 6: ...ow mentioned steps 1 Connect calibration fitting into N2 bottle 99 9 N2 with pneumatic hose 2 Connect calibration fitting into the O2 sensor via installing into the sensor inlet 3 Open the N2 bottle v...

Page 7: ...ously Be sure that Calibration fitting is connected to the sensor and N2 bottle valve is opened with 99 9 N2 gas supply to the sensor After reaching to 0 value press SET button and stop the gas supply...

Page 8: ...active with this way and start to measure correctly after installation into the OPT100 panel Do not forget to note sensor installation date onto the panel Please check SENSOR CALIBRATION part for new...

Page 9: ...nsor is damaged or expired If value stay constant consult supplier Panel screen isn t working Please check the cable and its socket in between front panel and mainboard and be sure its properly connec...

Reviews: