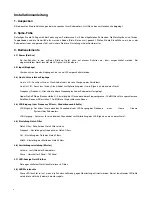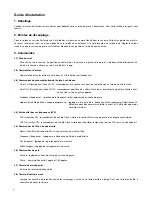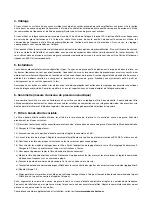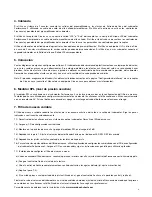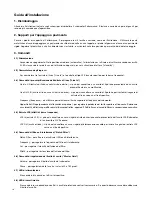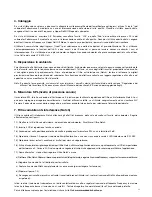
1. Unpacking
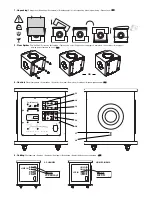
Please follow the diagrams to unpack your Performance subwoofer. Gloves are included for your convenience.
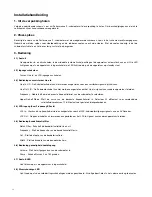
2. Floor Spikes
Attach the feet to the Performance 9 using the supplied screws as shown in the diagram. Use the metal spikes for carpeted flooring
and the rubber feet for hard flooring. Adjust the feet until the subwoofer is stable and lock them securely into position using the
locknut.
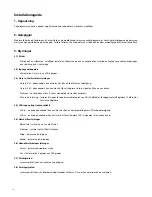
3. Controls
3.1) Power
Switch power on and off. In the middle (auto) position the power will switch on and off as required. LED is lit green when on,
red when in standby.
3.2) Input switch
Switch between Line In and LFE inputs.
3.3) Line In pre-amp controls
Line In L/R - phono cable can be connected here from an amplifier line level output.
Line Out L/R - phono cable can be connected here to copy the Line In signal to another device.
Frequency - use this to select the upper frequency limit of the subwoofer.
Upper Roll-off Slope - adjusts the slope of the upper frequency limit. Select 24dB/octave for ported satellite speakers,
12dB/octave for closed box speakers.
3.4) LFE (Low Frequency Effects) Input
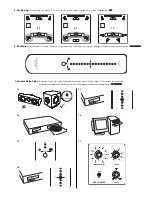
LFE In - single phono cable can be connected here from a home cinema receiver's LFE/subwoofer output.
LFE Out - single phono cable can be connected here to copy the LFE In signal to another device.
3.5) Notch Filter controls
Notch Filter - switches Notch Filter on and off.
Frequency - adjusts the frequency of the Notch Filter.
Cut - adjusts the depth of the notch.
Width - adjusts the width of the notch.
3.6) Master Gain controls
Volume - adjusts the subwoofer output level.
Phase - switches between 0 degrees and 180 degress.
3.7) Power LED
Lights blue when switched on.
3.8) Warning LED
Lights red when overload protection circuits are activating. If this happens, turn the volume down.
Installation Guide
2


