10
ENGLISH
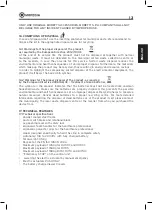
7. Lift up the patient until the desired height, keeping him facing his assistant.
8. Unlock the rear wheels and move the patient.
9. Before lowering the patient, block the rear wheels again.
10. To lower the patient, press the down-facing arrow key. (For the model RI710 the led display
on the control unit will show the boom moving)
ALWAYS HELP THE PATIENT DURING THE LOWERING PROCESS SO AS TO MAINTAIN THE
CORRECT SEATED POSITION! WHILE LOWERING THE PATIENT!
WARNING!
While lowering the patient, please remove any barrier that can impede the downward
movement. If the case, lift up the patient again and remove what causes the impediment
for lowering.
EMERGENCY STOP
The control unit is equipped with a red “STOP” button which instantly deactivates all controls
when pressed. To restore normal operation, turn the button clockwise and pull it outwards.
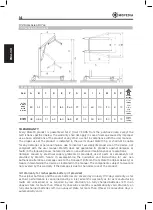
MECHANICAL LOWERING OF THE ACTUATOR
If using the manual/mechanical lowering, please make sure that it will be done in total safety
conditions for the patient. In order to activate the manual/mechanical lowering, pull downwards
the red ring placed in the upper part of the actuator and turn it counterclockwise. Once finished
the lowering process, take the red ring back to its resting position.
EMERGENCY KEYS
RI710: On the control unit there are two keys (one with an up-facing arrow and the other one
with a down-facing arrow) that can be pressed instead of those ones on the remote control to
complete all the operations when the remote control fails to work properly.
INDICATION OF THE BATTERY STATE OF CHARGE
There is a 3-Led indicator for the battery state of charge. This indicator is placed on the remote
control. 3 Leds on indicate a complete charge of the battery, whereas one just Led on indicates
the battery is out of power and needs to be charged.
RECHARGING BATTERIES
WARNING!
Make sure the red emergency button “STOP” is turned off. To do this, turn and pull
towards you the RED button
• Connect the adapter to the main socket and then to the socket on the control unit, after
removing the protection cap.
• On the charger adapter there is a led that during the charging process becomes orange
color. Charge the battery until the led becomes green color.
• Before activating the stand up lift again, make sure to disconnect the battery charger!
• Charge the batteries for at least 6 hours before using the patient lift.


