10
Installing the FlatScreen Mount
Choose a mounting location with convenient
access to an AC power outlet.
Wood Stud Mounting:
Using an electronic stud sensor, locate two wall studs,
up to 21” apart, at your desired mounting location.
�����
�����
With the help of a friend, position the
mounting system’s two horizontal wall plate arms over
the two wall studs. Using the provided level, confi rm
that the mounting system is level.
Mark the stud centers in two slots in the top and
bottom wall plate arms with a pencil.
With your electrical drill and 3/16" bit, pre-drill a 3"
deep hole at each mark.
Attach the wall plate arms to the wall using the
supplied lag bolts and washers, as shown to the right.
Tighten each bolt with your electric drill or socket
wrench. Turn clockwise until secure.
Attach the wall plate arm’s quick-snap bolt covers
to conceal the installed lag bolts.
DO NOT over tighten bolts. This can damage
the wall plate or the surface of your wall.
1)
2)
3)
4)
5)
6)
Summary of Contents for PerfectView 400L
Page 2: ......
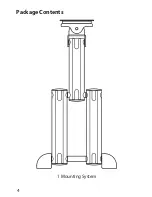
Page 8: ...4 Package Contents 1 Mounting System...
Page 15: ...11...
Page 17: ...13...
Page 21: ...17...
Page 23: ...19...
Page 25: ...21...
Page 30: ......
Page 31: ...Support d cran plat PerfectView 400L GUIDE ET GARANTIE D UTILISATEUR...
Page 32: ......
Page 38: ...34 Contenu de l emballage 1 Syst me de montag...
Page 51: ...47...
Page 53: ...49...
Page 55: ...51...
Page 60: ......
Page 61: ...Base PerfectView 400L FlatScreen para televisores planos GU A DEL USUARIO Y GARANT A...
Page 62: ......
Page 68: ...64 Contenido del paquete 1 Sistema de bas...
Page 81: ...77...
Page 83: ...79...
Page 85: ...81...


