background image

 Increases the volume level. 

 Displays the source. 

 Enters the OSD menu. 

 Exits the OSD menu. 

 Quick enter for low blue mode. 

 Quick enter for ECO mode. 

 Quick enter for sleep mode. 


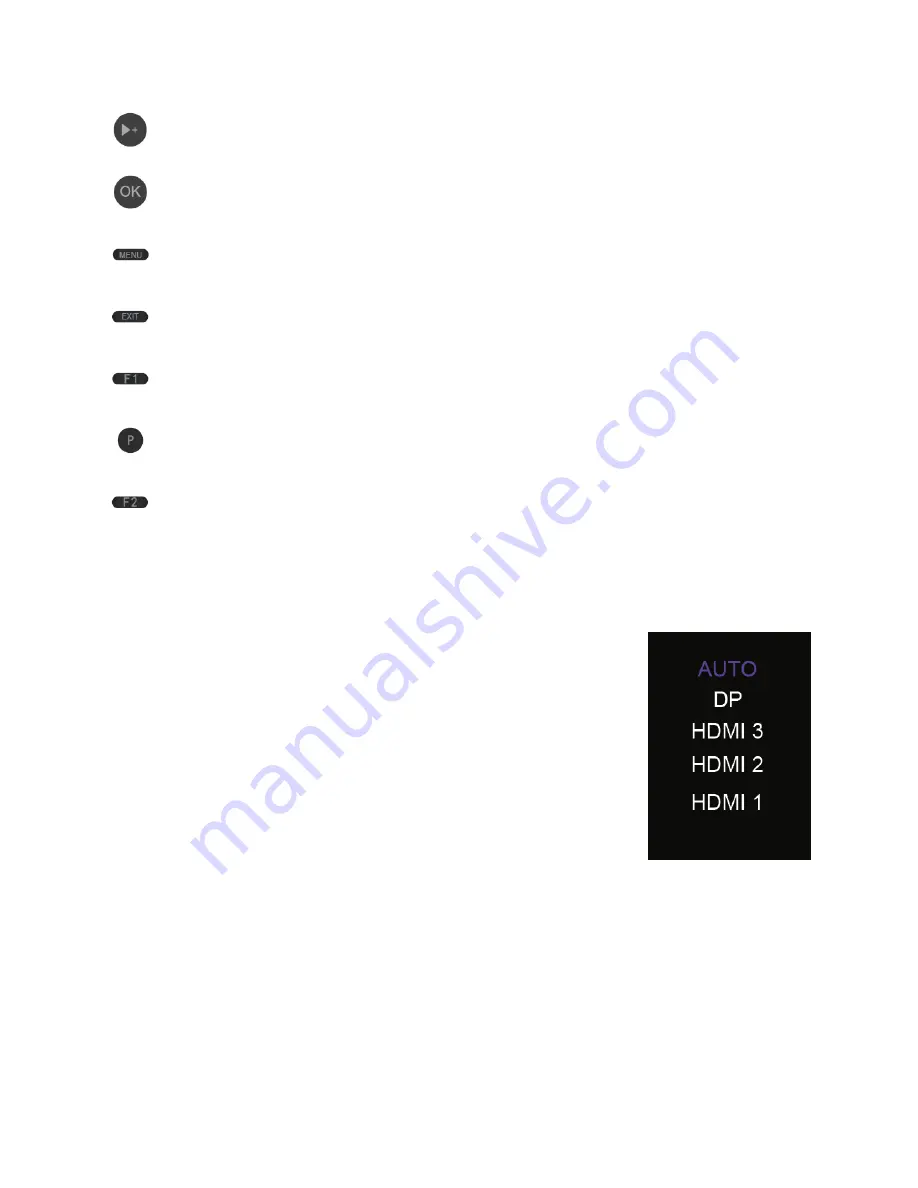
INPUT SOURCE MENU 


Press the SELECT button on the Keypad to display the Input 
Source Menu. 


Use the 

 and 

 buttons to move the highlight to the 

desired input. 


Press the V.- button or wait 3 seconds to select the 
highlighted input. 


Select the AUTO option allow the monitor to automatically 
switch to the active input. 


Summary of Contents for Zero-G 31004

Page 1: ...MP Zero G 27 WQHD 144Hz TN LED Monitor with AMD FreeSync P N 31004 User s Manual...

Page 2: ...uctuations in temperature or humidity Do not expose this device to excessively high temperatures Do not place it in on or near heat sources such as a fireplace stove radiator etc Do not leave it in di...

Page 3: ...e attempt to modify this monitor Do not leave a single image on the display for a long period of time Doing so could cause burn in of the image It is recommended to use a variable desktop background a...

Page 4: ...Sat Sun 9am 6pm PT or via email at support monoprice com PACKAGE CONTENTS Please take an inventory of the package contents to ensure you have all the items listed below If anything is missing or dama...

Page 5: ...60Hz HDMI 3 HDMI video input supporting the HDMI 2 0 specification at resolutions up to 2560 x 1440p 144Hz DP 1 DisplayPort video input supporting the DisplayPort 1 3 specification at resolutions up t...

Page 6: ...6 Rear Keypad 1 MENU If the OSD menu is not displayed press the MENU button to display the OSD menu If the OSD menu is displayed press the MENU button to select the highlighted function...

Page 7: ...u is not displayed press the button to adjust the aspect ratio If the OSD menu is displayed press the button to move the highlight up 6 If the OSD menu is not displayed press the button to cycle throu...

Page 8: ...mode Quick enter for sleep mode INPUT SOURCE MENU Press the SELECT button on the Keypad to display the Input Source Menu Use the and buttons to move the highlight to the desired input Press the V butt...

Page 9: ...ing two of the included Stand Screws attach the two Stand Legs to the Stand Base as shown in the images below 2 Place the box that the monitor came in on a flat surface then spread a towel or blanket...

Page 10: ...I 1 and HDMI 2 support the HDMI 1 4 specification at up to 60Hz refresh rate 4 Plug the DC barrel connector on the included AC Power Adapter into the DC IN jack on the Input Panel 5 Plug the included...

Page 11: ...style 1 TARGET 2 Select crosshair style 2 TARGET 3 Select crosshair style 3 LOW BLUT OFF Removes the blue color of the image to protect your eyes ON UP SCALING OFF Disables up scaling ON Enables up s...

Page 12: ...in the image OSD SET LANGUAGE English etc Choose the OSD menu language OSD H POS 0 100 Adjusts the horizontal position OSD V POS 0 100 Adjusts the vertical position OSD TIME 0 60 Adjusts the amount o...

Page 13: ...s PBP 4WIN WINDOW 2 INPUT HDMI 1 Selects the input source for window 2 HDMI 2 HDMI 3 DP 1 WINDOW 3 INPUT HDMI 1 Selects the input source for window 3 HDMI 2 HDMI 3 DP 1 WINDOW 4 INPUT HDMI 1 Selects t...

Page 14: ...SET 2 SIGNAL SOURCE AUTO Selects the desired input source DP 1 HDMI 3 HDMI 2 HDMI 1 MUTE OFF Switches audio muting on or off ON AUDIO IN AUTO Selects the audio source DP 1 HDMI 1 HDMI 2 HDMI 3 VOLUME...

Page 15: ...leased to provide free live online technical support to assist you with any questions you may have about installation setup troubleshooting or product recommendations If you ever need assistance with...

Page 16: ...ange 13 3 Input Power 12 VDC 4A AC Adapter Input Power 100 240 VAC 50 60 Hz Maximum Power Consumption 48 watts Standby Power Consumption 0 5 watts Dimensions without stand 24 2 x 14 2 x 2 0 614 x 360...

Reviews: