10
CALIBRATING THE PRINTER
Calibrating the Printer
Your Monoprice Delta Pro was calibrated before leaving the
factory to ensure great prints out of the box. However, sometimes
it may be necessary re-calibrate certain functions of the printer
over the natural course of use.
Calibrating Dimensional Accuracy
If you find that the dimensions of your prints differ from the
dimensions of your CAD model beyond 10 microns or so, you
may want to adjust the firmware to correct the discrepancy. Follow
the steps below to analyze the error and calibrate your machine
settings.
1. Go to the Delta Pro page at Monoprice.com and download the
calibration box G-code.
2. Print the calibration box G-code.
3. Carefully measure the part with calipers, aligning the jaws
with the layer lines and record the dimensions.
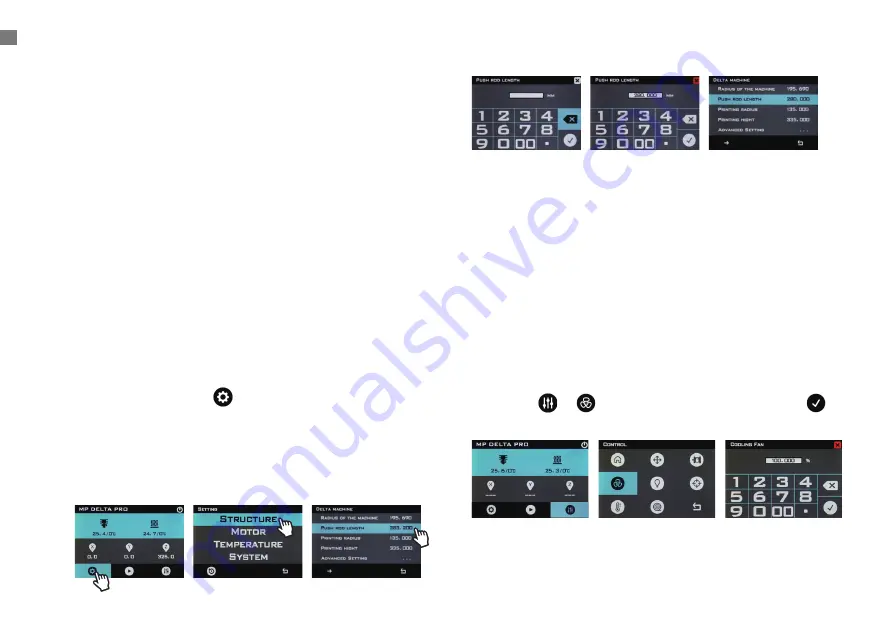
4. On the LCD screen, tap >
Structure
. Note the “Push Rod
Length.” Compute the new “Push Rod Length” value using
the following formula: New Value = Old Value × (Measured
Printed Dimension / 3D Model Dimension)
5. Tap
Push Rod Length
, erase the old value, and enter the
new value.
PID Tuning
If you find that your nozzle fails to maintain a stable temperature
or fails to reach the target temperature, you may run an auto-
PID tuning procedure to attempt to correct the issue. If nozzle
temperature issues persist after running an auto-PID tune, you
may need to replace your thermistor or heater. Follow the steps
below to run an auto-PID tune.
Note: The tuning process will vary slightly depending on the
nozzle hotend type and target temperature of the material you are
trying to print. For the PTFE-lined nozzle, turn the part cooling
fans (side fans) on 100% power before proceeding to tune the
PID. Leave the fans off for the all-metal nozzle and materials with
target temperatures higher than 260°C. You can turn on the fans
by tapping > . 100% is the default input. Then tap .
Turn to the next page.
Summary of Contents for Delta Pro
Page 1: ...Monoprice Delta Pro 3D Printer User s Manual ...
Page 15: ......


