IV. REGISTRATION
PAGE 4
If this is your first time using the iMonnit online portal, you will need to create a new
account. If you have already created an account, start by logging in. For instructions on
how to register for an iMonnit account, please consult the iMonnit User Guide viewable at
monnit.com/support/documentation
.
REGISTERING THE OPEN/CLOSED SENSOR
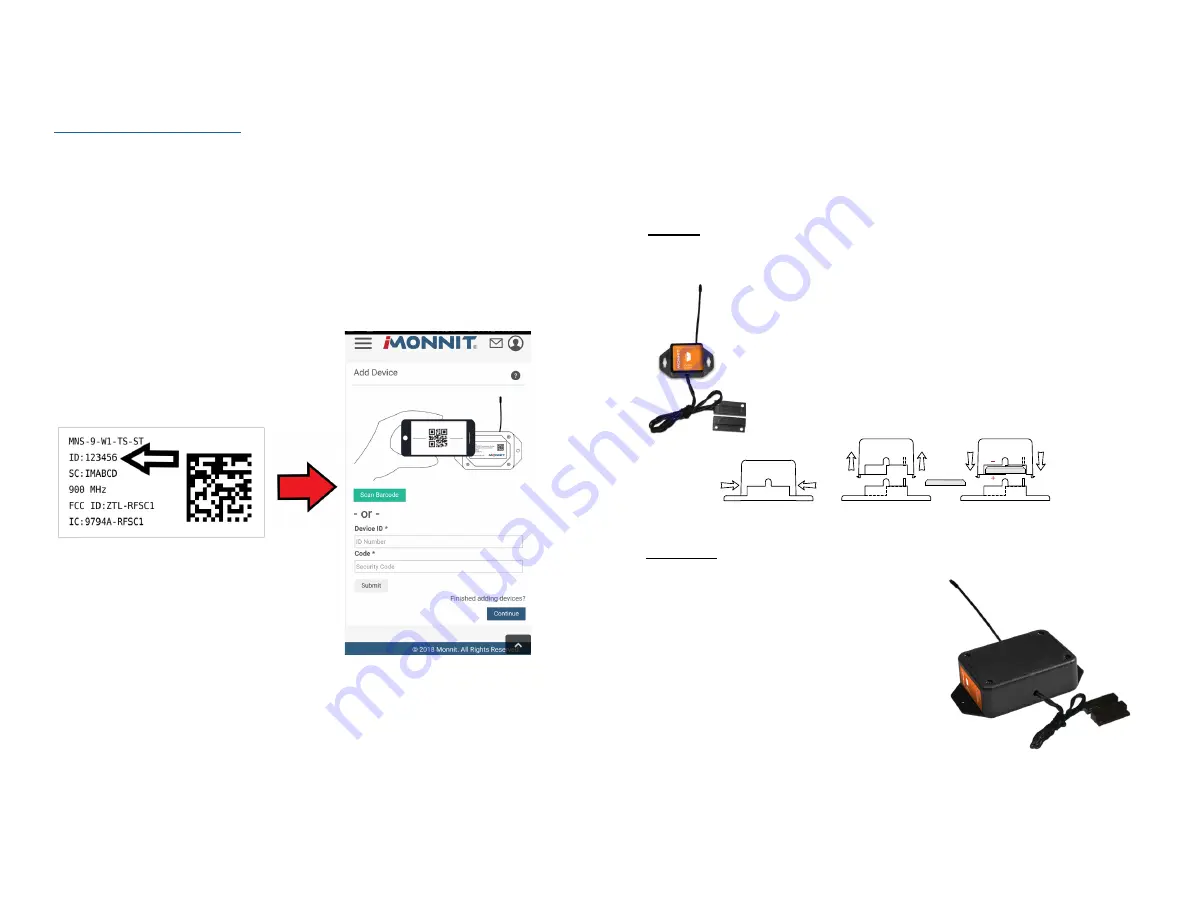
You will need to enter the Device ID and the Security Code from your Open/Closed
Sensor in the corresponding text boxes.
Use the camera on your smartphone to scan the
QR code on your sensor and gateway. If you do not have a camera on your phone, or the
system is not accepting the QR code, you may enter the Device ID and Security Code
manually.
•
The Device ID is a unique number located on each device label.
•
Next you’ll be asked to enter the Security Code (SC) on your device. A security
code will be all letters and must be entered in upper case, no numbers. It can
also be found on the barcode label of your gateway.
When completed, select the “Submit” button.
V. SETTING UP YOUR OPEN/CLOSED SENSOR
INSTALLING BATTERIES
Monnit commercial sensors are powered by AA or CR2032 coin cell batteries. Industrial
sensors need a 3.6V Lithium battery supplied from Monnit or another industrial battery
supplier. Monnit encourages customers to recycle all old batteries.
When you are finished adding the sensor to your account, the next step is to insert the
battery. The type of battery you use will depend on the category of your sensor. Wireless
Open/Closed Sensors will either be powered by commecial coin cell, AA, or an industrial
battery.
Coin Cell
Pull
(sensor away from base)
Pinch
(press in on the sides)
Press
(sensor back into base)
CR2032 BATTERY
+
_
CR2032 BATTERY
Install a coin cell battery by first taking the sensor and pinching the
sides of the enclosure. Gently pull up the enclosure, separating the
sensor from its base. Then slide a new CR2032 coin cell battery with the
positive side facing toward the base. Press the the enclosure back to
together; you’ll hear a small click.
Lastly, open iMonnit select
Sensors
from the navigation menu. Verify
that iMonnit is showing the sensor has a full battery level.
AA Batteries
The standard version of this sensor is powered by two
replaceable 1.5 V AA sized batteries (included with
purchase). The typical battery life is 10 -12 years.
This sensor is also available with a line power option.
The line powered version of this sensor has a barrel
power connector allowing it to be powered by a standard
3.0–3.6 V power supply. The line powered version
also uses two standard 1.5 V AA batteries as backup
for uninterrupted operation in the event of line power
outage.
Power options must be selected at time of purchase, as
the internal hardware of the sensor must be changed to
support the selected power requirements.
Place batteries in the device by first taking the sensor and sliding the battery door open.Insert
fresh AA batteries in the carriage, then shut the battery door.
Complete the process by opening up iMonnit and selecting
Sensors
from the main navigation
menu. Verify that iMonnit is showing the sensor has a full battery level.
The lifespan of a standard CR2032 coin cell battery in an Open/Closed Sensor is 3+ years.
PAGE 5


