6
7
I. WARNING
Read carefully the instruction manual before use and keep it for future reference, because
it contains important information.
•
This packaging contains small parts, that should be assembled by an adult only.
•
Pay special attention, when unpacking and assembling the toy. While you perform those
actions children should not be present.
•
То avoid choking hazard, keep the plastic bag away from children and while you assemble
the toy children should not be present.
•
Do not allow the child to remove the stickers, if there are any glued to the product, and to
swallow them.
•
The raw materials and colors, used for producing the products, are suitable and safe for
the children’s health.
•
Do not expose the product to direct sunlight for long periods of time and keep it away
from direct heat sources. Store at a dry and ventilated place.
•
Make sure that the child holds the steering wheel firmly with both hands while riding the
toy and does not stand on the seat.
II. WARNING AND RECOMMENDATIONS FOR SAFE USE
1. To be used under the direct supervision of an adult!
2. This ride-on car is suitable for children aged above 36 months, weighing up to 25 kg. Not
to be used by children over that weight as the product cannot support extra weight!
3. The toy is intended for use by one child only in order for injuries to be avoided.
4. The assembly and installation should be performed by an adult, so that the safety of the
children is ensured, because the product contains small or sharp and protruding parts.
5. The batteries must be handled by an adult only.
6. Be careful while riding the car and avoid riding it near to streets, crossroads, all traffic
zones, pools, stairs, dusty and uneven sections and gravel areas. Do not use near to heat
sources – open fires, heating appliances and cookers.
7. If regular checkup of the product is not performed, this may lead to turning over of the
car or falling off of the child.
Check regularly whether the nut and bolt on the steering wheel are fixed tightly and do
not represent any danger.
1. If the product is not assembled properly this may lead to danger.
2. Do not allow the child to ride the kart barefoot, without shoes or with shoes that have
slippery soles.
3. The toy complies with Standard EN71 and meets the essential requirements for “General
safety of the product”.
4. All plastic packaging has to be removed immediately after unpacking product in order to
avoid choking or strangling hazard.
III. CLEANING AND MAINTENANCE OF THE PRODUCT
1. Clean the product regularly.
2. When cleaning the product, do not use corrosive strong detergents or alcohol based or
abrasive detergents.
3.Clean with a soft wet cloth and always wipe the product dry with soft cloth immediately
afterwards.
4. Inspect the product regularly for broken, chipped or damaged parts. If you find any, do
not use the product until the damage is removed.
5. Upon damaging, contact the shop, from which you bought the product or the importer.
6.Do not repair by yourselves and do not modify or alter the product, because this may
endanger the health of your child.
7.Inspect regularly whether the main parts of the car are in good working order (steering
wheel, main body and wheels).
EN
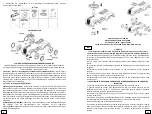
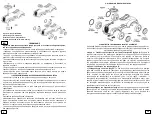
IV. PARTS LIST
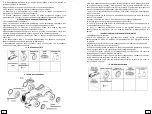
V. ASSEMBLY DIAGRAM
VI. ASSEMBLY INSTRUCTIONS
Please, read the instructions carefully before you start the assembly of the product. Follow
exactly the individual steps for assembly and inspect after each action whether you have
fixed the individual parts tightly.
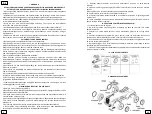
1. Step 1 – Installing the handlebar and steering shaft (Scheme 1): Slide the steering shaft
through the hole in the front part of the car body. Put the handlebar on the upper part of
the steering fork and align the holes for the fixing bolt. Afterwards slide the bolt through
the respective holes at the base of the handlebar. Tighten with a nut and a screwdriver. Do
not overtighten, because this may lead to breaking the bolt or parts of the handlebar.
2. Step 2 - Installing the wheels (Scheme 3):
a) Installing the rear wheels: Install the rear shelf to the car body with two screws and a
screwdriver. One side of the rear axle has no hole for a cotter pin, that is why firstly you
should place a washer on that side and afterwards one rear wheel and a gasket. Slide the
other side of the axle through the respective holes in the car body and place on its end
washer
rear wheel
gasket
fixing cotter pin. Install the rear wheels caps.
b) Installing the front wheels: Slide the front axle through the respective holes in the front
car body. Insert on each side black plastic bushings and the front wheels. Fix then with
cotter pins and place the decorative wheel caps.


