background image


*

 Images are a general description and not necessarily the same as the product you receive.


*

 Features and completeness depending on product type

.


1. 

Control Panel 

2. 

LED Lamp 

3. 

Glass 

4. 

Cassette Aluminum Filter 

5. 

Cassette Aluminum Filter Handle 

6. 

Exhaust 


Part 2: Name of Parts 


Summary of Contents for Avanzare Series

Page 1: ...User Manual Book Downdraft Hood Avanzare Series DX 9943 ...

Page 2: ...m to deliver stylishly designed products equipped with state of the art technology to assist you in your daily activities This is your guidebook containing everything you need to know about our product Please reach out to us if you need further assistance or other information via our Customer Care or our official website www modena com ...

Page 3: ...NTENT PAGE Introduction Part 1 Safety Warning 5 Part 2 Name of Parts 6 Part 3 Installation 7 Part 4 How to Use 9 Part 5 Maintenance 11 Part 6 Problem Solution 13 Part 7 Precaution 14 Part 8 Specification 14 ...

Page 4: ...t hood on gas stoves or other fuels The exhaust hood waste pipe should be separated with an air duct Regulations regarding the air exhaust must be met The unit is not intended to be used by persons including children with a physical sensory or mental disability or lack of experience and knowledge unless they have been given supervision or instructions concerning the use of the appliance by the per...

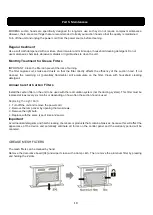
Page 5: ...tion and not necessarily the same as the product you receive Features and completeness depending on product type 1 Control Panel 2 LED Lamp 3 Glass 4 Cassette Aluminum Filter 5 Cassette Aluminum Filter Handle 6 Exhaust Part 2 Name of Parts ...

Page 6: ...n Before installation to a table or desired place you must study the detailed dimensions of this unit this is very important so that there are no errors when installing 1 The cooker hood should be placed at a distance of 15mm from the wall at least See Pic 1 2 If you want to install the unit to be parallel or flush with the stove make a line according to the cut out image below then punch the tabl...

Page 7: ...ert the unit into a carefully punched table Connect the casing hood by 8pcs screw M10 10 the wind direction are up down left right the user can select according to the space of the cabinet See pic 4 5 Fix the pipe on the outlet and use 4pcs screw ST4 14 to fix the PCB box connect the power and finish the installation See pic 5 ...

Page 8: ...uch the power button for 2 seconds again the hood will slide downwards and stop working If you stop the hood without stopping the motor when you open the hood again the hood will work at the speed it works last time Press the power button when the hood is coming upwards or going downwards the hood will stop moving with motor keeping running Press the power button again the hood will move again 3 M...

Page 9: ...od will enter into timer working When the pilot light of timer is flashing slide button to select the timer section There are eight sections of timer button when timer is working they are 5 10 15 20 25 30 35 40 touch the timer button to enter into timer working when confirm the timer section Or enter into timer working automatically 5s later The motor and light are off automatically when finish th...

Page 10: ...ble will accumulate on the filter Clean with household cleaning detergent Annual Care for Carbon Filters Install the carbon filter on the unit to be used with the recirculation system not the ducting system This filter must be replaced at least every six months or depending on how often the suction hood is used Replacing the Light Bulb 1 Turn off the unit and remove the power cord 2 Remove the lam...

Page 11: ...thly If the hood is used for more than 2 hours a day we recommend that you increase the cleaning frequency Depending on the hood use frequency replace the filter in time Always use genuine filters from the manufacturer Attaching Aluminum filters After cleaning attach the charcoal filter to the aluminum filter Then secure with the 4 iron wires Insert the aluminum filter into the cooker hood Then in...

Page 12: ...e contacting MODENA service center when troubleshooting occurs PROBLEM CAUSE SOLUTION Reduced suction power Dirty aluminum acrylic filter Dirty carbon filter Clean the aluminum filter dry it and place it back on the vent hood Replace the carbon filter foam with a new one Motor stop working after a while Safety thermal regulator is active The vent hood is installed too close to the stove Air circul...

Page 13: ...ure the oil reservoir is not exceeding the specified limit If you smell burnt burnt smell from the hood immediately turn off the hood and contact the MODENA Service Center Perform a routine service on your stove every 3 three months because if there are problems problems with your exhaust hood it can be immediately identified and repaired Contact MODENA Service Center MODEL DX 9943 Type Down Draft...

Page 14: ...12 20 ...

Reviews: