Page 4
MOCET IP3092-C/IP3092L-C Communicator Quick User Guide
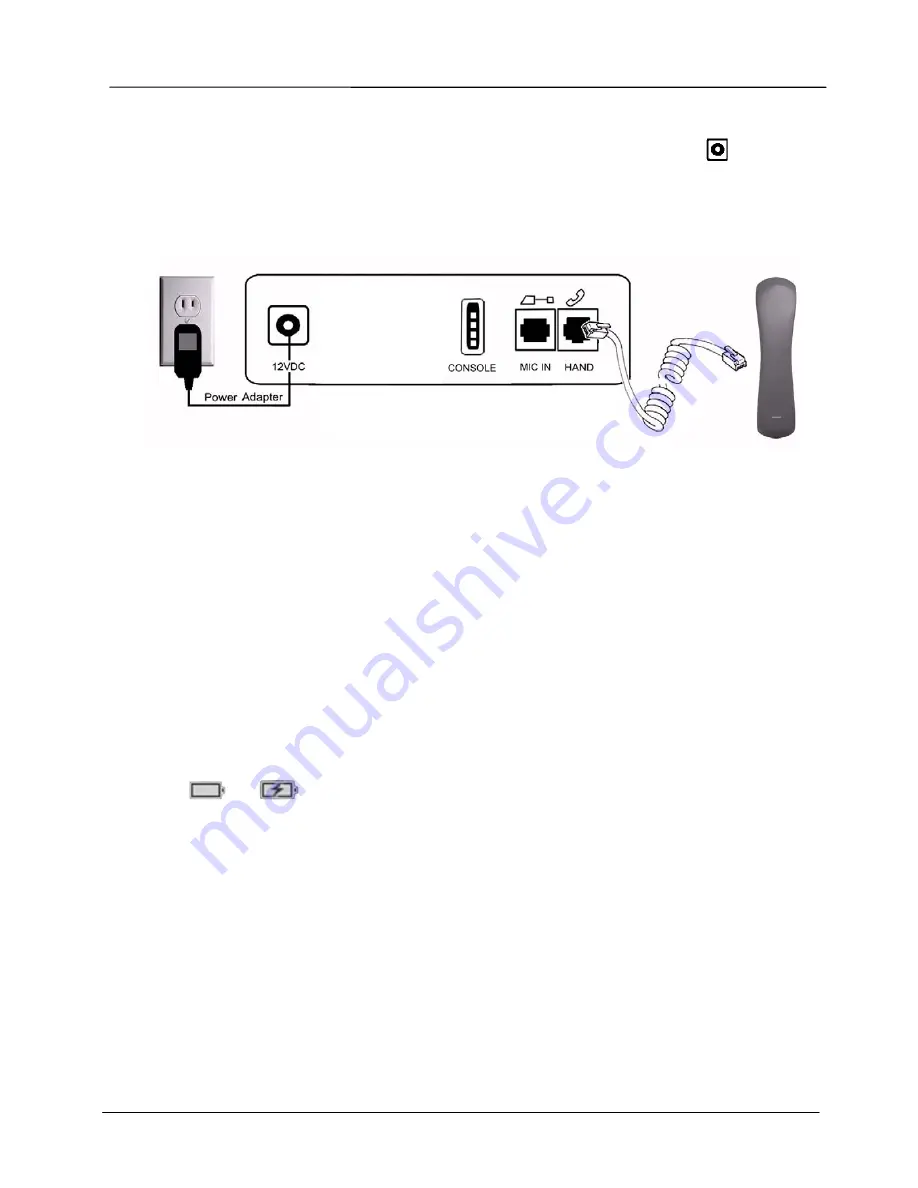
Connect the Power:
- Then plug the barrel plug of the included power adapter to the port
marked
12VDC. Please make sure you use the right power adapter. It shall have a label
showing 12V and 2A.
- Then plug in the other end of power adaptor to the wall power AC power outlet.
Then you can see LEDs on the Communicator will light up momentarily and then
the Communicator will boot.
Figure 2. The Back Panel of the Communicator and How To Connect
Booting Up :
- The Communicator will take about two minutes to boot. When the
Communicator is booting up, the top biggest blue-green LED (MWI) indicator will
be turned on. Please don’t insert the iPad into the Communicator untill the MWI
LED tuned off.
InsertingThe iPad:
- Except iPad 1, please keep the add-on tray in the dock no matter IP3092 (for
iPad 2 and iPad 3) or IP3092L (for iPad 4). To dock the iPad 1, please remove
the add-on tray first. (see figure below).
- After that, simply by sliding your iPad into the front bezel slot will cause the
battery signal showed on the upper right cornor of iPad screen changed from
to
. Then the Communicator is ready for operation now.
[Remarks]:
The Console port is reserved for engineering service only, not for general users.
Appearance & Function Description
Before insert the iPad to the Communicator, please see if you need the add-on tray for
your iPad device (iPad 2, iPad 3, or iPad 4) or not. The figure below shows the Add-on
Tray can be removed or slided in easily
.
Summary of Contents for IP3092-C
Page 15: ...Page 15 MOCET IP3092 C IP3092L C Communicator Quick User Guide 4 iPad 30 Dock 5...
Page 17: ...Page 17 MOCET IP3092 C IP3092L C Communicator Quick User Guide S N S N IP3092 C...
Page 21: ...Page 21 MOCET IP3092 C IP3092L C Communicator Quick User Guide 1 2...
Page 23: ...Page 23 MOCET IP3092 C IP3092L C Communicator Quick User Guide iPad 30 8 Lighting...
Page 25: ...Page 25 MOCET IP3092 C IP3092L C Communicator Quick User Guide S N S N IP3092 C S N...


