10
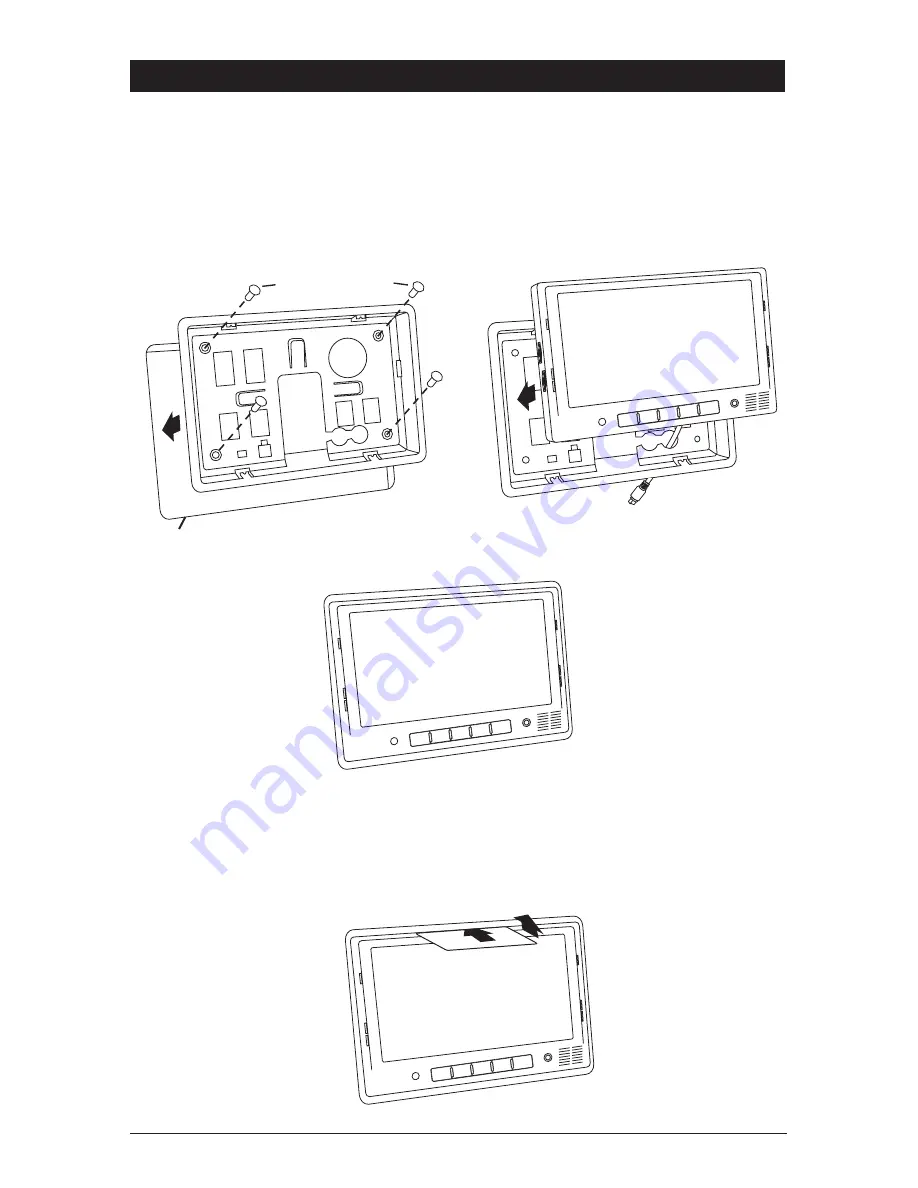
Flush Mounting the Monitor
1. Locate a suitable location for mounting the monitor (In-Dash, In-Wall, Headrest, etc.).
Then cut a 7-3/8” (W) x 5” (H) opening and insert and secure the flush-mount housing.
2. After securing the housing, insert the monitor into the housing.
Do Not Apply Pressure
Directly to the LCD Monitor’s Screen
. Utilize the outer edges to gently push the monitor
into the housing until it snaps into place.
Installation Instructions
Removing the Flush Mounted Monitor
1. Insert the detaching piece as indicated. Press in and lift up and the monitor will be
released from the flush mount.
2. Remove the monitor.
Mounting Screws
(Not Supplied)
Cut a
7
3
/
8
" x 5"
Opening
Do Not
Press on Screen
“Snap”
“Snap”
“Snap”
“Snap”
AUX INPUT
MENU
SRC
AUX INPUT
MENU
SRC
Mounting Screws
(Not Supplied)
Cut a
7
3
/
8
" x 5"
Opening
Do Not
Press on Screen
“Snap”
“Snap”
“Snap”
“Snap”
AUX INPUT
MENU
SRC
AUX INPUT
MENU
SRC


