MobileRobots Inc.
ArmNumJoints
parameter value to 6 and the
auxbaud
value to 0 (9600 baud). With AROS, set the
ArmPort
parameter to 1 if the Pioneer Arm controller is connected via to the controller’s
AUX1
serial
port, or 2 if connected to
AUX2
.
Similarly, with the latest ARCOS-enabled Pioneer robots, set the
ArmPort
parameter to 1 if the Pioneer
Arm controller is connected via to the controller’s
AUX1
serial port, 2 if connected to
AUX2,
or 3 if it’s
attached to serial
AUX3
. In all cases, you need not set the related port’s baud rate since the Arm
servers automatically set the communication rate to 9600 baud.
Also note that an LED attached to the Pioneer Arm controller only flashes on and off when the arm is
properly attached, the Arm servers are enabled, and there are proper communications between the
Pioneer controller and the arm controller.
Arm and Arm Kinematics Demonstrations
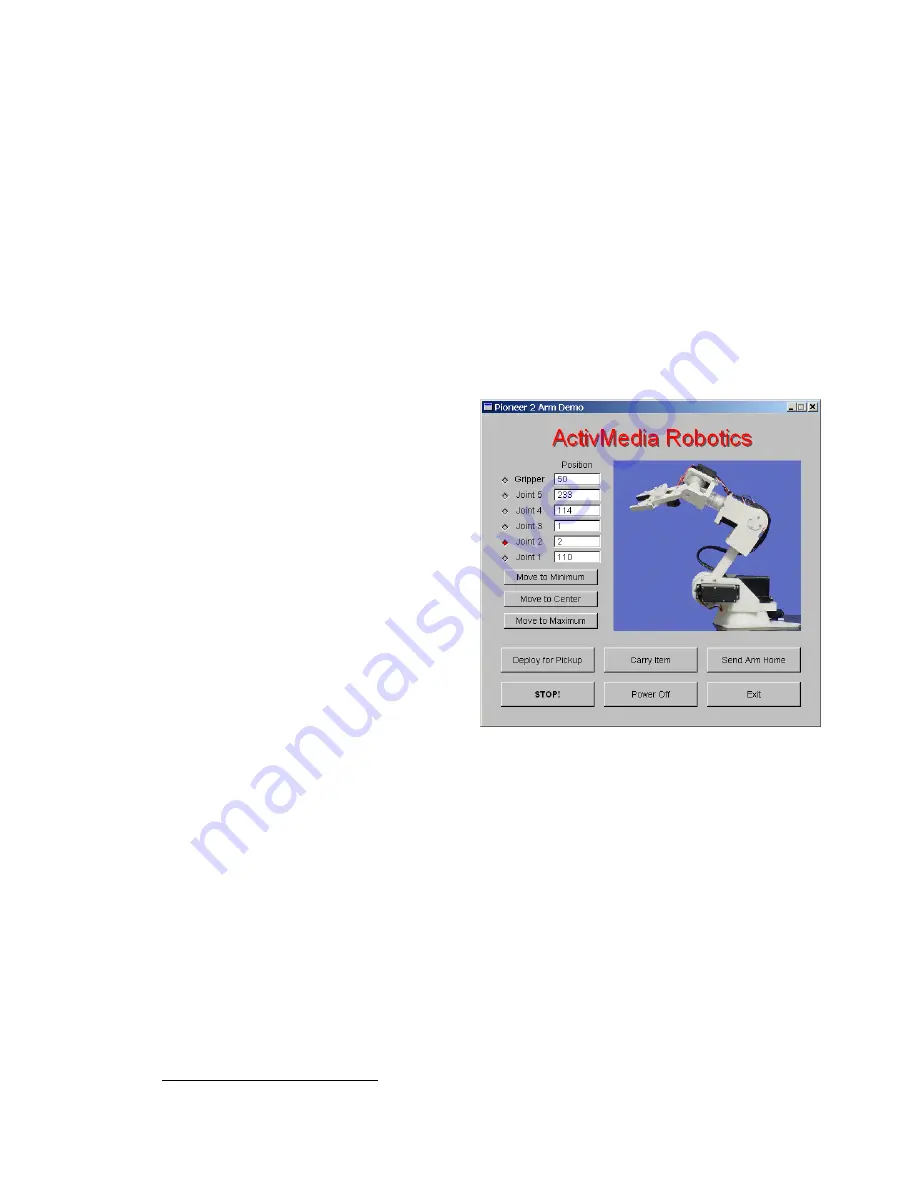
Figure 5. The P2ArmDemo lets you operate the
Pioneer Arm quickly and easily.
Several Pioneer Arm demonstration programs and source files come on the CD-ROM that
accompanies the system. Use the
P2ArmDemo
executable with the keyboard arrows or a joystick to
select and move individual joints. Alternatively, steer the Arm kinematically with
ArmServer
and its
ArmApplet.jar
demonstration GUI
(Windows only). Finally, see how to develop
robot-integrated Arm software with the
ArP2ArmSimple
and
ArAKinDemo
sources in
ARIA.
Start up your robot. Its Pioneer Arm
automatically gets power, too, but the joint
servos should be OFF and the arm limp in its
HOME
position. If not, manually move the
joints until the arm is in that
HOME
position.
P2ArmDemo
On startup, the
P2ArmDemo
program
automatically makes a client connection with
your robot’s controller through the
COM1
(
/dev/ttyS0
with Linux) serial port.
It then
graphically displays the Arm on your PC
screen along with a set of control buttons and
operating values.
Red dots indicate the current control joint.
Change joints by clicking the joystick fire
button, with the up or down arrow key, or by
clicking the mouse. Move the selected joint’s
position with the right or left arrow key or with the joystick (active when fire button pressed). Or click a
control button with the mouse to automatically center or move a joint to its center, home, maximum,
or minimum positions. Press the
STOP!
button or the space bar at any time to stop the Arm from
moving.
Deploy for Pickup
sends the Arm around and to the floor, ready to pick up some item you may
place in its gripper.
Carry Item
sends the Arm up and around to place the item it has in its gripper
on the back of the robot.
The Arm servos automatically power up when you select to operate a joint. The
Power Off
button
automatically homes the Arm to its power off position.
ArmServer and ArmApplet.jar
7
5
See your
Pioneer 2 or Pioneer 3 Operations Manual
for details on how to attach your PC to the robot and make a client-server
connection. If you get a start up error, please make sure the Pioneer Arm is properly attached and configured.


