background image

Installation of the SeaWire Pro 


User Guide SeaWire Pro 


MiWire ApS 


11


STEP 4 

– CABLE WIRING 

Cable wiring considerations: 


Where possible avoid routing the cables near other electrical equipment and cables. 


If possible, all cable routing must be done in a cable duct. 


Do not apply any load to the connectors. 


Cable specification: 


Network cable type 

CAT6 or above, UV- and water resistant, double shielded, 
grounded 

Connector 1 

RJ45 (male) 

Connector 2 

RJ45 (male) 

Length 

The length of the cables depends on the location for 
installment. In the System Configuration section, you will find 
an overview of the set up. Max. length is 100m. 


STEP 5 

– POWERING THE ROUDEMS 

1.  Install the BDU 

in a 19” rack cabinet, plug in the power cable and power with 100-

240VDC.  


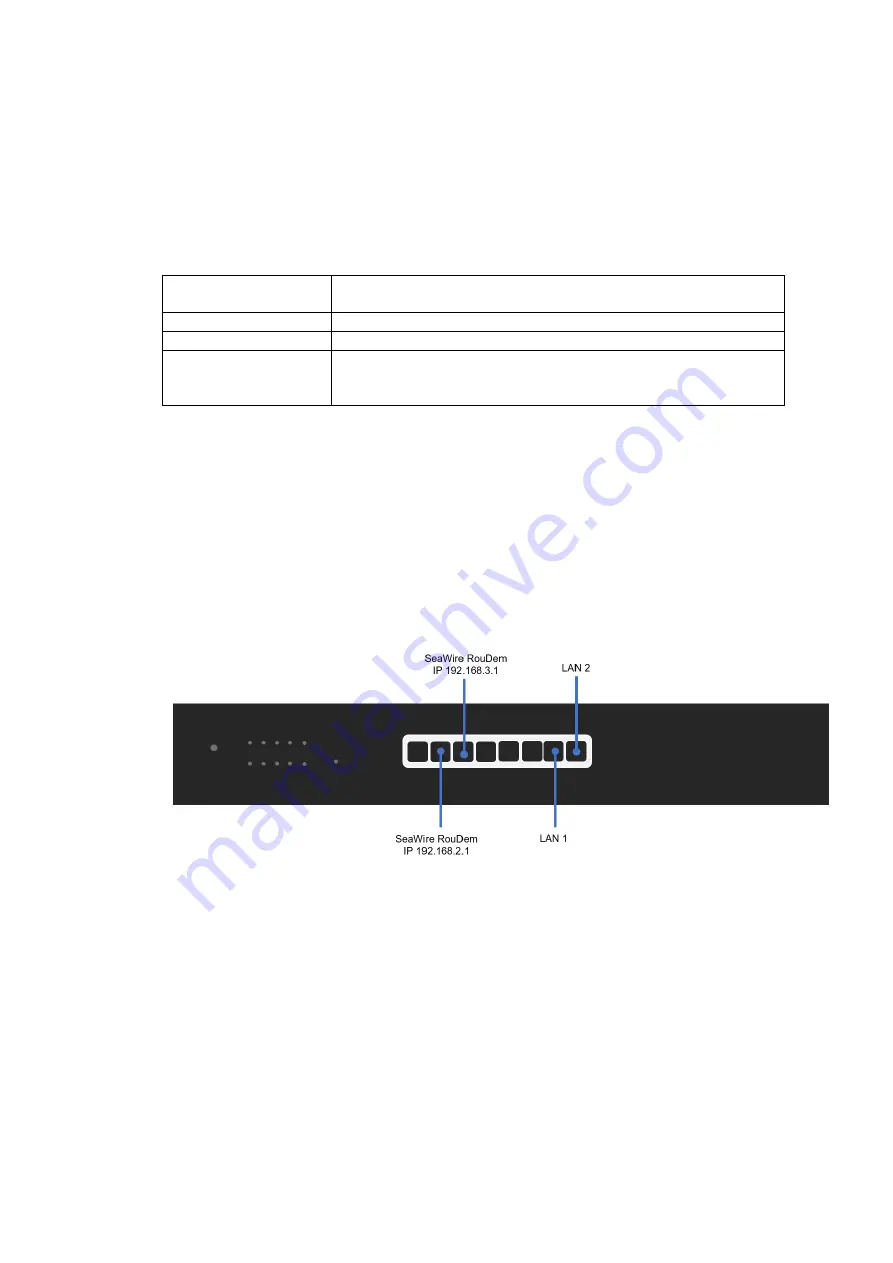
2.  Connect the ethernet cables from both RouDems to the dedicated ports in the BDU. If not 

the RouDems are already turned on or turn on automatically as they are powered, turn 
the RouDems on by pressing the on/off button in the bottom of the RouDem. If you do not 
have access to the on/off button please read the restart/reboot part in the troubleshoot 
section. 


3.  Optional: connect to local LAN/network equipment via the LAN ports in the BDU. 


Battery feature: 

In case of power outage, RouDem is battery powered. Full charging takes 4h 30min after which it 
can operate for at least 8 hours on battery power. Note: the device will not charge at 
temperatures below 10°C and above 45°C. 


Summary of Contents for SeaWire Pro

Page 1: ...PRO User Guide SeaWire Pro UserGuide_SeaWirePro_Rev 1 02 Developed and produced by MiWire ApS Denmark Diplomvej 381 DK 2800 Kongens Lyngby Phone 45 82 820 820 E mail info miwire net ...

Page 2: ......

Page 3: ...fault March 2022 NF Table of Contents Introduction 2 Safety information 2 Required information for the reader 2 Package Content 3 Requirements 4 System Configuration 4 Hardware Overview 5 Ports SeaWire RouDem 5 Ports 19 BDU 5 LED s 6 SeaWire RouDem 6 BDU Pro 7 Installation of the SeaWire Pro 8 STEP 1 Inserting the Micro SIM card 8 STEP 2 Preparing mounting bracket and connecting the ethernet cable...

Page 4: ... The input voltage range is 100 240 VDC CAUTION Contains li ion batteries The product contains li ion batteries Must not be opened or be replaced by unauthorized buddies CONFORMS TO THE FOLLOWING EUROPEAN DIRECTIVES RoHS 2 Directive 2011 65 EU R TTE Directive 1999 5 EC Standards to which conformity is declared EMC ETSI EN 301 489 17 V3 1 1 2017 02 ETSI EN 301 489 1 V2 1 1 2017 02 Draft ETSI EN 301...

Page 5: ...ame Picture Quantity SeaWire RouDem 1x IP 192 168 2 1 1x IP 192 168 3 1 2 Mounting Bracket 2 19 BDU Pro including rack assembly items 1 BDU Power Cable 100 240V 1 Screws M4x16mm 10 Unbraco 4 Key 1 Torx 10 Key 1 Privacy Policy 1 User Guide 1 Registration Information 1 ...

Page 6: ...shielded grounded Connector 1 RJ45 male Connector 2 RJ45 male Length The length of the cables depends on the location for installation In the System Configuration section you will find an overview of the set up Max length is 100m Mounting Depending on the vessel mounting accessories can vary The mounting should take place at the highest spot possible and where possible with a good all round view w...

Page 7: ...on off The LED will flash for on and off PORTS 19 BDU RouDem IP 2 1 PoE port Power over Ethernet The RJ45 port is reserved for the ethernet cable from the RouDem with IP 192 168 2 1 RouDem IP 3 1 PoE port Power over Ethernet The RJ45 port is reserved for the ethernet cable from the RouDem with IP 192 168 3 1 Ethernet port The RJ45 port is for optional LAN connection Ethernet port The RJ45 port is ...

Page 8: ...le if there is no data on the SIM card or APN is wrong Blue When the device is connected to the network the LED will light blue while it is turning around to scan for the best operator towers Green When the device is ready for use the LED will light green It indicates the direction of the operator tower it is connected to It is possible to turn off the LED See how in the section MiWire user interf...

Page 9: ...ckly Flashing Blue Used to locate a device in NMS Alternating Blue White Firmware upgrade in progress RJ45 LED s LED State Status PoE Off No PoE Green 24V 2 Pair Passive PoE Output Blue 24V 4 Pair Passive PoE Output Speed Link Activity Off No Link Amber Link Established at 10 100 Mbps Amber Flashing Link Activity at 10 100 Mbps Green Link Established at 1000 Mbps 1 Gbps Green Flashing Link Activit...

Page 10: ...hat you do not use tweezers pliers or other tools to force the SIM card in out Use the click system to gently insert remove the SIM card by using your fingers by clicking it into place and clicking it out Any resistance other than the smooth pressure of the spring is a warning that something is not correct When installing removing the SIM card the RouDem must be turned off a IMPORTANT Insert the S...

Page 11: ...s the cable through the body and the sealing nut mount the seal on the cable and place the seal back into the claw c Screw on the sealing nut and make sure it is tightened very tight 2 Connect the Ethernet cable to the Ethernet port in the RouDem 3 Affix the mounting bracket to the RouDem with the five screws using the supplied Torx 10 Key IMPORTANT it is important that the mounting bracket is sec...

Page 12: ...pole a mast or another appropriate platform with opportunity to accommodate a pole of Ø38mm 1 5 Place the RouDem where there is a good all round view It is rarely possible to place the RouDem where a completely clear view in all directions are available but as good as possible to obtain best performance The RouDem should always be installed in a horizontal position and upright Where possible insta...

Page 13: ...ngth is 100m STEP 5 POWERING THE ROUDEMS 1 Install the BDU in a 19 rack cabinet plug in the power cable and power with 100 240VDC 2 Connect the ethernet cables from both RouDems to the dedicated ports in the BDU If not the RouDems are already turned on or turn on automatically as they are powered turn the RouDems on by pressing the on off button in the bottom of the RouDem If you do not have acces...

Page 14: ...ernal network equipment e g a router a switch or WiFi access points by using the LAN ports STEP 7 REGISTRATION This step must be performed by the end user of the product When registering the RouDem you can receive the best service and support Follow the instruction on the registration flyer IMPORTANT INSTRUCTION After the two SeaWire RouDem s are installed on the ship and connected to the BDU Pro ...

Page 15: ...if you are connected to a MiWire related network either by WiFi or cable 1 Open MiWire user interface by entering 192 168 2 1 or 192 168 3 1 in a web browser There is a web server for each RouDem 2 Log in with Username admin Password 1234 IMPORTANT for optimum security we recommend changing the password The system will always be delivered from the factory with this default log in 3 The menu bar in...

Page 16: ...c RouDem IMPORTANT If there is no WAN IP Address shown it is most likely because the APN settings are incorrect Go to the Network tab and set the correct APN settings according to the current operator The information can usually be found by looking up the MCC and MNC at the internet Read more about setting the APN in the Network tab MyDefinedAPN WiFi WLAN basic WiFi Radio Turn WiFi ON default OFF ...

Page 17: ...sk Change of netmask 255 255 255 0 default DHCP Start IP Address 10 default Address Limit 100 default IP Range Result of values in Start IP Address and Address Limit DHCP Client List List of registered clients It is possible to block clients from the list WLAN Advanced Channel Change of WiFi channel Select Auto default or between 1 11 Network ...

Page 18: ...ting in the APN List to MyDefinedAPN you can enter the APN Network APN Username If you change the setting in the APN List to MyDefinedAPN you can enter the APN Username APN Password If you change the setting in the APN List to MyDefinedAPN you can enter the APN Password APN Authentication If you change the setting in the APN List to MyDefinedAPN you can change the APN Authentication to None PAP CH...

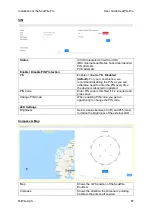
Page 19: ...e PIN as you will otherwise need to enter the PIN every time the device is rebooted or updated PIN Code Enter PIN code in this filed if it is required and press save Change PIN Code When enabling PIN code you get an opportunity to change the PIN code LED Settings Brightness Select a value between 0 off and 255 max to define the brightness of the external LED Compass Map Map Shows the GPS position ...

Page 20: ...e commands Reboot You will lose connection to the device during reboot It takes a few minutes for the device to reboot Shutdown You will lose connection to the device if you shut it down Power on the device manually by pressing the button under the device or by removing and re inserting the cable in the PoE adapter three times Reset to factory settings This will reset the RouDem to its factory set...

Page 21: ... 6 2xCA 2x2 MIMO VoLTE FDD Max 300Mbps DL Max 50Mbps UL TDD Max 226Mbps DL Max 28Mbps UL DC HSDPA Max 42Mbps DL HSUPA Max 5 76Mbps UL LTE FDD B1 B3 B5 B7 B8 B20 B28 B32 LTE TDD B38 B40 B41 B1 B3 B5 B8 Class 3 23dBm 2dB for LTE Antenna Directional Omnidirectional 3 10 dBi 800 2700 MHz 3 4 5 dBi 800 2700 MHz WiFi Standards Max Coverage outdoors Max Datarate 802 11 b g n 2 4GHz 300m 984ft 300 Mbps In...

Page 22: ...ashing Then turn it on again If the RouDem is installed so that you cannot reach the on off button reboot the RouDem via the MiWire user interface 192 168 2 1 or 192 168 3 1 by pressing Reboot on the Admin page Connect to the user interface with WiFi or via a cable from the PoE adapter to a PC If this does not work then take the RouDem cable out of the PoE adapter and then put it back in again Rep...

Page 23: ... your provider if the problem persists Check whether the SIM card indicator is green If not this may be because the SIM card is not seated correctly Try removing the SIM card and putting it back again GENTLY The installation examples do not fit with my type of boat ship First we are sorry The installation examples are for inspiration Read the section about Installation Considerations to make your ...

Page 24: ... label which is found under the RouDem on the box or on the registration flyer Alternatively log on MiWire user interface and read out the serial number or IMEI number If the RouDem is offline it is a great help for the support if a TeamViewer session can be established through a PC and another internet connection with a cable from the PC to the BDU The product does not require any scheduled maint...

Reviews: