background image

MIVARDI


|


13

Rc MENU AND USAGE INSTRUcTIoNS

Main menu of the Rc: 

• 

Use the  “

d

” or “

e

” button to enter the menu and then scroll through the items and select them.

• 

Activate the currently selected menu item by pressing the power button. This will trigger a specific action or enter a 
submenu.

• 

Navigate in the submenu with the “

d

” or “

e

” buttons.

• 

Press the power button to confirm the selected submenu option.

• 

After confirmation, the selection is saved and the main menu is displayed.

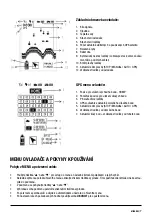
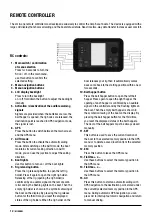
Main screen of the remote controller: 

1.  Signal monitor
2.  Water depth
3.  Water temperature
4.  RC battery status
5.  Boat battery status
6.  Number of available GPS satellites
7.  Detected fish
8.  Bottom contour
9.  Symbolic drawing of the boat (It shows the status of the bait 

hoppers, rig holders and boat lights)

10. Sailing direction
11. Currently used sailing mode (STOP / MANUAL / AUTO / GPS)
12. Current distance between the boat and the saved „HOME“ 

point

GPS menu:

1.  Memory position to save the „HOME“ destination point
2.  Memory positions for destination points
3.  GPS coordinates of the boat 
4.  GPS  coordinates  of  the  currently  used  destination  point              
5.  Sailing mode (STOP / MANUAL / AUTO / GPS)
6.  Distance between the boat and the „HOME“ point
7.  Currently used destination point and the distance between 

this point and the boat

Summary of Contents for Carp Scout LA

Page 1: ...v ného nastavení nemusí lodička korektně fungovat EN The company MIVARDI s r o hereby declares that the product is in compliance with Directive 1999 5 EC Important Before using the product read this manual carefully It will help you to set up all functions and use them correctly when opera ting the boat Without the correct settings the boat may not work correctly DE MIVARDI s r o erklärt hiermit d...

Page 2: ...2 MIVARDI Obsah Content CZ Návod k použití 3 EN This instruction manual X DE Gebrauchsanweisung X ...

Page 3: ...úrovních C1 C2 C3 od nejnižší k nejvyšší citlivosti Zobrazení aktuálního profilu a orientační tvrdosti dna Upozornění Echolot funguje pouze ve vodě a bude ukazovat chybné údaje pokud je použit mimo vodu Při použití ve vodě opět bude správně fungovat Echolot spolehlivě funguje a korektně měří hloubku ve vodě hlubší než 2 m Režimy ovládání plavby MANU manuální ovládání Směr plavby ovládáte ručně pom...

Page 4: ... lodičky Připojte dodávanou rozdvojku k oběma bateriím a k nabíječce Nabíječku pak připojte k síti Pozor Nabíječka nabíjí pouze pokud jsou obě baterie lodičky připojené Nikdy nenabíjejte pouze jednu baterii Nabíjení dálkového ovládání Baterie dálkového ovládání je uložena uvnitř ovladače a je zcela bezúdržbová Pro nabití baterie zapojte nabíjecí konektor nabíječky do nabíjecího USB vstupu na dálko...

Page 5: ...ický návrat při výpadku řízení ztrátě signálu Echolot Zvukový signál při detekci ryby Měření hloubky Zobrazení reliéfu dna Rozsah měření hloubky 2 30 m 4 hloubkové rozsahy 2 30 m 4 hloubkové rozsahy Stupně citlivosti echolotu C1 C2 C3 C1 C2 C3 Orientační doba jízdy na baterie Olověnné baterie 10Ah 60 80 min 60 80 min Lithiové baterie 10Ah 75 90 min 75 90 min Lithiové baterie 20Ah 120 180 min 120 1...

Page 6: ...cku provádět korekce směru plavby 8 Tlačítko pozičních světel Slouží k zapnutí vypnutí pozičních světel 9 Ovládání závěsů montáží Stisknutím otevřete levý závěs na montáž Dalším stisknutím otevřete pravý závěs Otevření každého závěsu je signalizováno zvukovým signálem na ovladači rozblikáním pozičních světel lodičky a znázorněno na symbolickém nákresu lodičky na displeji ovladače Třetím stisknutím...

Page 7: ...bu UKONCIT pro opuštění menu Základní obrazovka ovladače 1 Síla signálu 2 Hloubka 3 Teplota vody 4 Stav baterií ovladače 5 Stav baterií lodičky 6 Počet aktuálně viditelných a používaných GPS satelitů 7 Nalezené ryby 8 Reliéf dna 9 Symbolický nákres lodičky zobrazuje stav komor závěsů montáží a pozičních světel 10 Směr plavby lodičky 11 Aktuální režim plavby STOP MANUAL AUTO GPS 12 Vzdálenost lodič...

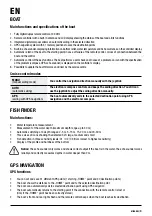
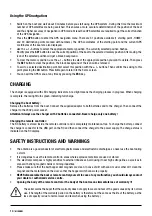
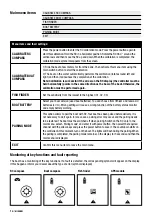
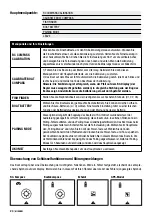
Page 8: ...končila úspěšně pokud šipka na displeji ovladače ovladač musí být držen vodorovně ukazuje stejným směrem jako příď lodičky V opačném případě musí být kalibrace provedena ještě jednou Citlivost echolotu Nastavte citlivost od nízké po vysokou výběrem C1 C2 C3 Baterie lodičky Lithiové nebo olověné baterie Li Q Režim párování Párování dálkového ovládání s lodičkou Párování bylo provedeno při výrobě ne...

Page 9: ...hree sizes of icons showing the detected fish large medium and small Fish detection in three sensitivity levels C1 C2 C3 from lowest to highest sensitivity Display of the profile and hardness of the bottom Notice The echo sounder only works and shows correct output if the boat is in the water The echo sounder works reliably and correctly measures depths in water deeper than 2 m Cruise control mode...

Page 10: ...n indicating full charge Charging the boat battery Remove the batteries from the boat Connect the supplied adaptor to both batteries and to the charger Then connect the charger to the 230V power socket Attention Always use the charger with 2 batteries connected Never charge only one battery Charging the remote controller The RC battery is stored inside the remote controller and is completely maint...

Page 11: ...return in case of control failure signal loss Fish finder Audible signal when a fish is detected Depth measurement Bottom relief Depth measurement range 2 30 m 4 depth levels 2 30 m 4 depth levels Sensitivity steps C1 C2 C3 C1 C2 C3 Approximate battery life Lead acid batteries 10Ah 60 80 min 60 80 min Lithium batteries 10Ah 75 90 min 75 90 min Lithium batteries 20Ah 120 180 min 120 180 min Name Qt...

Page 12: ...med by an audible signal on the remote cont roller and by the flashing lights on the boat Then the empty rig holder is shown in the symbolic drawing of the boat on the display By pressing the rig release button for the third time you reset the displayed status of the rig holders When the rig holder on the boat releases your rig then it automatically comes back come back to the starting position wi...

Page 13: ...th 3 Water temperature 4 RC battery status 5 Boat battery status 6 Number of available GPS satellites 7 Detected fish 8 Bottom contour 9 Symbolic drawing of the boat It shows the status of the bait hoppers rig holders and boat lights 10 Sailing direction 11 Currently used sailing mode STOP MANUAL AUTO GPS 12 Current distance between the boat and the saved HOME point GPS menu 1 Memory position to s...

Page 14: ...same direction as the bow of the boat Otherwise the calibration must be performed again FISH FINDER Set the sensitivity from the lowest to the highest C1 C2 C3 BOAT BATTERY Select your boat version used boat batteries You can choose from lithium and lead acid batteries Li Q Wrong setting will cause a wrong function of the battery status monitor and empty battery warning PAIRING MODE This option al...

Page 15: ...ei Stufen C1 C2 C3 von der niedrigsten zur höchsten Empfindlichkeit Anzeige des aktuellen Profils und der Bodenhärte Anmerkungen Der Fischfinder funktioniert nur im Wasser und zeigt fehlerhafte Werte an wenn er außerhalb des Wassers verwendet wird Bei Verwendung im Wasser funktioniert es wieder einwandfrei Das Echolot arbeitet zuverlässig und misst die Tiefe in Gewässern die tiefer als 2 m sind ko...

Page 16: ...ßen Sie den mitgelieferten Splitter an beide Batterien und an das Ladegerät an Schließen Sie dann das Ladegerät an das Stromnetz an Vorsicht Das Ladegerät lädt nur wenn beide Bootsbatterien angeschlossen sind Laden Sie niemals nur eine Batterie auf Aufladen der Fernbedienung Die Batterie der Fernbedienung befindet sich im Inneren des Controllers und ist völlig wartungsfrei Um den Akku aufzuladen s...

Page 17: ...hl der GPS Navigationspunkte 30 30 Automatischer Rückkehr zum Startpunkt bei Ausfall der Lenkung Signalverlust Echolot Tonsignal bei Fischerkennung Bodenstruktur Anzeige Bereich der Tiefenmessung 2 30 m 2 30 m Empfindlichkeitsstufen des Echolotes C1 C2 C3 C1 C2 C3 Akkulaufzeit Blei Säure Batterien 10Ah 60 80 Minuten 60 80 Minuten Lithium Batterien 10Ah 75 90 Minuten 75 90 Minuten Lithium Batterien...

Page 18: ...fnen Das Freigeben des Rigs Öffnen des Righalters wird durch ein akustisches Signal auf der Fernbedienung und durch das Blinken der Lichter am Boot bestätigt Dann wird der leere Righalter in der symbolischen Zeichnung des Bootes auf dem Display angezeigt Durch ein drittes Drücken der Rigfreigabetaste setzen Sie den angezeigten Status der Righalter zurück Wenn der Righalter auf dem Boot Ihr Rig fre...

Page 19: ...rwachung 2 Wassertiefe 3 Wassertemperatur 4 Status der RC Batterie 5 Status der Bootsbatterie 6 Anzahl der verfügbaren GPS Satelliten 7 Gefundene Fische 8 Kontur des Meeresbodens 9 Symbolische Zeichnung des Bootes sie zeigt den Status der Köderbehälter Rig Halterungen und Bootsbeleu chtung 10 Fahrtrichtung 11 Aktuell verwendeter Segelmodus STOP MANUELL AUTO GPS 12 Aktuelle Entfernung zwischen dem ...

Page 20: ...r Bug des Bootes zeigt Andernfalls muss die Kalibrierung erneut durchgeführt werden FISH FINDER Stellen Sie die Empfindlichkeit von der niedrigsten bis zur höchsten Stufe ein C1 C2 C3 BOAT BATTERY Wählen Sie Ihre Bootsversion gebrauchte Bootsbatterien Sie können zwischen Lithium und Blei Säure Batterien Li Q wählen Eine falsche Einstellung führt zu einer falschen Funktion der Batteriestatusüberwac...

Page 21: ...MIVARDI 21 ...
Page 22: ...Mivardi s r o Tlustého 2401 4 193 00 Praha 9 Česká republika Tel 420281921962 Servisní oddělení Service center Servicecenter Mivardi s r o Třebovská 47 789 85 Mohelnice Česká republika Tel 420583431886 e mail info fish pro cz www mivardi com ...

Reviews: