EN-31
ENGLIS
H
Advanced features
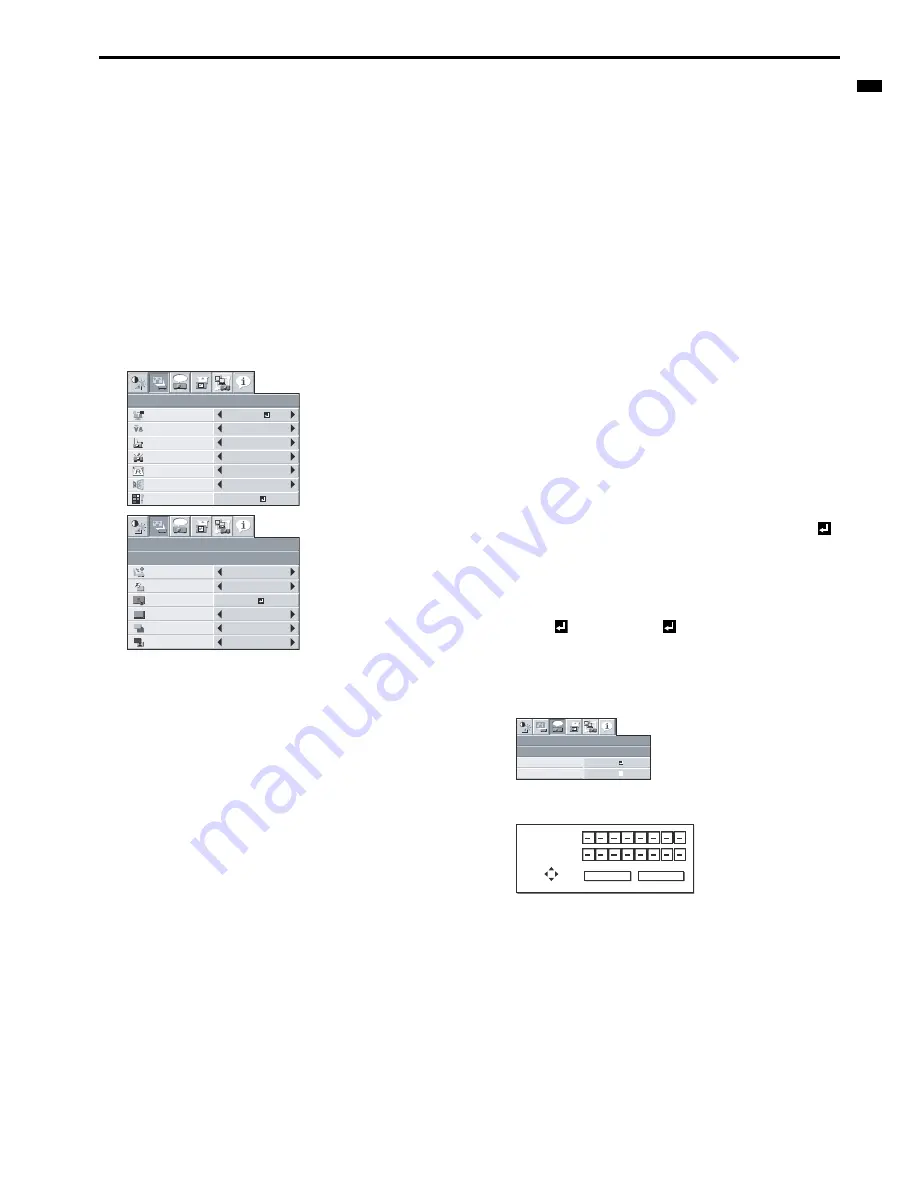
Displaying a user-defined image during startup or mut-
ing
You can display your desired image as the startup screen (or splash
screen). Using the menu, you can also use it as the background that is
displayed while the video is muted or no signal is input.
Important:
•
You can't select IMAGE CAPTURE when PASSWORD FUNC-
TION in the FEATURE menu is set to SPLASH ID SCREEN to
activate the password lock.
•
You can't select IMAGE CAPTURE when the component video
signal is input.
Procedure
1.
Press the COMPUTER button to select the image input to the
COMPUTER/COMPONENT VIDEO IN terminal.
2.
Display your desired image.
3.
Display the INSTALLATION menu.
4.
Select IMAGE CAPTURE by pressing the
S
or
T
button.
5.
Press the ENTER button.
•
When the capture starts, the captured image will be dis-
played.
•
When you press ENTER button once, any button doesn't
function until the capture completes.
•
When image resolution is lower than XGA (1024 x 768), the
image is captured by adjusting its resolution to XGA.
•
When image resolution is higher than XGA (1024 x 768), the
image area of XGA is only captured.
Important:
•
You can't change the new startup screen back to the original
screen. (Even when you select RESET ALL in the FEATURE
menu, the factory default screen is no longer effective.) When you
want to change the startup screen again, capture another image.
•
The captured images will be deleted at the same time as pressing
the ENTER button. If you pressed ENTER button wrongly, try to
capture the same images again.
•
The captured image is displayed from the next startup. If the cap-
tured image isn't displayed, check to see if SPLASH SCREEN in
the INSTALLATION menu is set to OFF. (See page 22.)
•
To display the captured image while the video is muted, set AV
MUTE MODE in the INSTALLATION menu to IMAGE. (See page
22.)
•
When BACK COLOR in the INSTALLATION menu is set to
IMAGE, the captured image is displayed while no signal is input.
•
Some images can't be captured correctly because of their signal
type.
Freeze
To stop the motion in the image temporarily (or to dis-
play a still image):
Press the FREEZE button on the remote control.
•
The image freezes temporarily.
To resume the motion in the image:
Press the FREEZE button on the remote control again.
Important:
•
Do not keep displaying a still picture for an extended period of
time, as the afterimages may linger on the screen.
Password function
This projector provides the password function that is intended to pre-
vent wrong operations by children and set controlled access for speci-
fied users.
DISPLAY INPUT ............When the projector is turned on, the star-
tup screen (or splash screen) appears and
stays on the screen until the password is
entered. When the password is entered,
the startup screen switches to the regular
operation screen.
MENU ACCESS ............All the buttons except for the POWER but-
ton on the projector are disabled. (The
buttons on the remote control are
enabled.) You can use this mode to pre-
vent wrong operations by children and set
controlled access for specified users.
SPLASH ID SCREEN ....IMAGE CAPTURE and SPLASH
SCREEN in the menu become unselect-
able. SPLASH SCREEN is set to ON
automatically.
To enable the password function:
1.
Display the FEATURE menu.
2.
Press the
S
or
T
button to select PASSWORD FUNCTION.
3.
Press the
W
or
X
button to change the mode among DISPLAY
INPUT
, MENU ACCESS
.
•
When the password has already been set, the mode never
changes. Press the ENTER button to cancel the password
function and try again.
4.
Press the ENTER button.
•
The screen for setting the password function appears.
5.
Press the ENTER button.
•
The screen for entering a password appears.
6.
Enter a 4 - 8 digit password using the
S
,
T
,
W
or
X
buttons on
the remote control as shown below.
(
S
=1,
X
=2,
T
=3,
W
=4)
7.
Press the ENTER button.
•
To cancel the procedure, press the MENU button.
8.
Enter the password again for confirmation using the same steps.
9.
Press the ENTER button.
•
If the entered passwords are incorrect, an error message
appears.
•
To cancel the procedure, press the MENU button.
LAMP MODE
OFF
AUTO KEYSTONE
OFF
IMAGE
REVERSE
WALL SCREEN
BEIGE
STANDBY MODE
STANDARD
STANDARD
AUDIO INPUT
AUTO
opt.
INSTALLATION
OK
ADVANCED MENU
opt.
INSTALLATION
ADVANCED MENU
AUTO POWER
OFF
OFF
OFF
AUTO POWER
ON
IMAGE CAPTURE
ON
SPLASH
SCREEN
ON
BACK COLOR
BLUE
AV MUTE MODE
BLACK
GO
FEATURE
MENU ACCESS
LOCK
OK
opt.
UNLOCK
OK
PASSWORD
CONFIRM
1
3
2
4
O K : ENTER
CANCEL : MENU


