10
6.3. Function settings
6.3.1. Function setting on the unit (Selecting the unit functions)
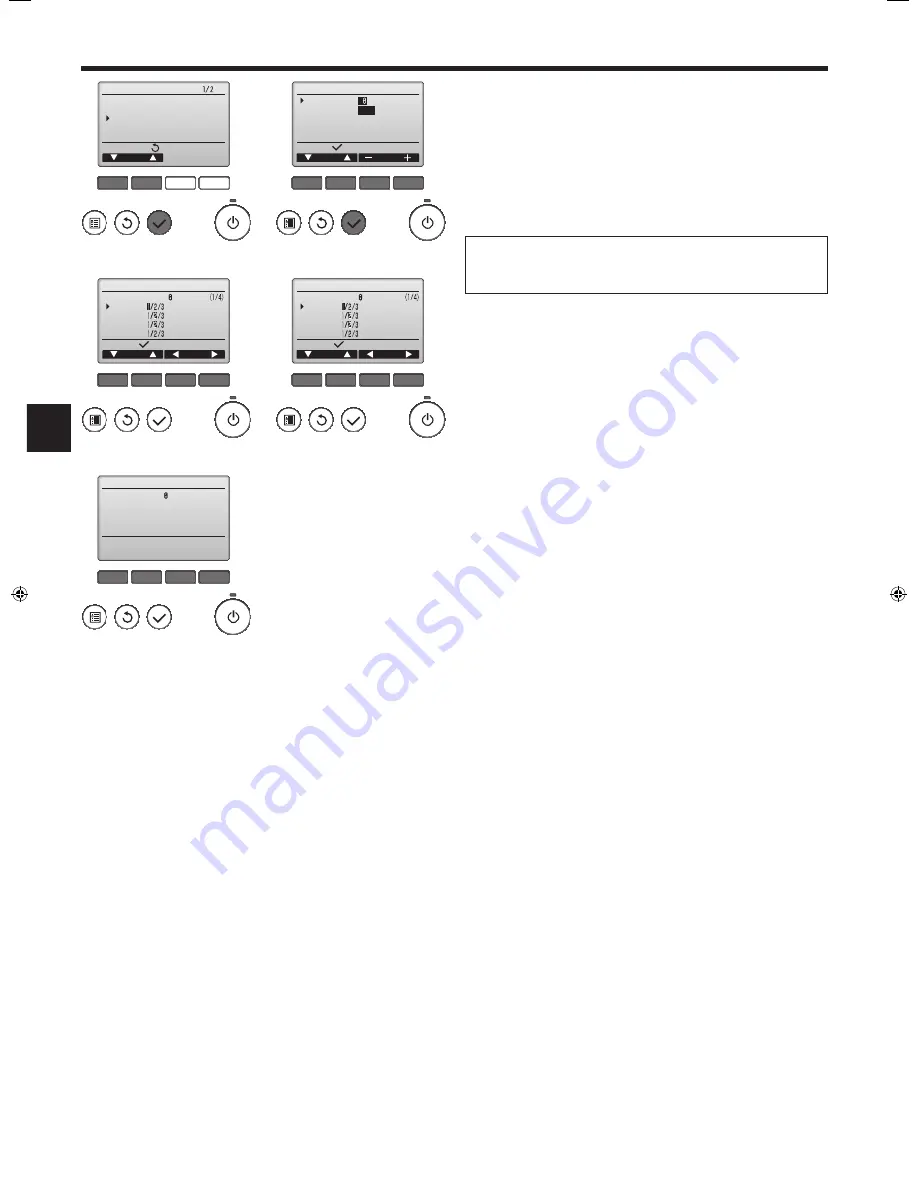
1) For wired remote controller
1
(Fig. 6-5)
• Select “Service” from the Main menu, and press the [SELECT] button.
• Select “Function settings” with the [F1] or [F2] button, and press the [SELECT]
button.
2
(Fig. 6-6)
• Set the indoor unit refrigerant addresses and unit numbers with the [F1]
through [F4] buttons, and then press the [SELECT] button to confirm the cur-
rent setting.
<Checking the Indoor unit No.>
When the [SELECT] button is pressed, the target indoor unit will start fan opera-
tion. If the unit is common or when running all units, all indoor units for the se-
lected refrigerant address will start fan operation.
3
(Fig. 6-7)
• When data collection from the indoor units is completed, the current settings
appears highlighted. Non-highlighted items indicate that no function settings
are made. Screen appearance varies depending on the “Unit No.” setting.
4
(Fig. 6-8)
• Use the [F1] or [F2] button to move the cursor to select the mode number, and
change the setting number with the [F3] or [F4] button.
5
(Fig. 6-9)
• When the settings are completed, press the [SELECT] button to send the set-
ting data from the remote controller to the indoor units.
• When the transmission is successfully completed, the screen will return to the
Function setting screen.
6. Electrical work
F1
F2
F3
F4
Service menu
Cursor
Main menu:
Test run
Input maintenance info.
Function setting
Check
Self check
F1
F2
F3
F4
Function setting
Cursor
Address
Monitor:
Ref. address
Unit No.
Grp.
/1/2/3/4/All
Fig. 6-5
Fig. 6-6
F1
F2
F3
F4
Function setting
Cursor
Cursor
Request:
Ref. address
Mode 1
Mode 2
Mode 3
Mode 4
Grp.
F1
F2
F3
F4
Function setting
Cursor
Cursor
Request:
Ref. address
Mode 7
Mode 8
Mode 9
Mode 10
Unit # 1
Fig. 6-7
Fig. 6-8
F1
F2
F3
F4
Function setting
Ref. address
Sending data
Grp.
Fig. 6-9
RG79D506K08.indb 10
3/28/2016 12:00:18 PM


