햳
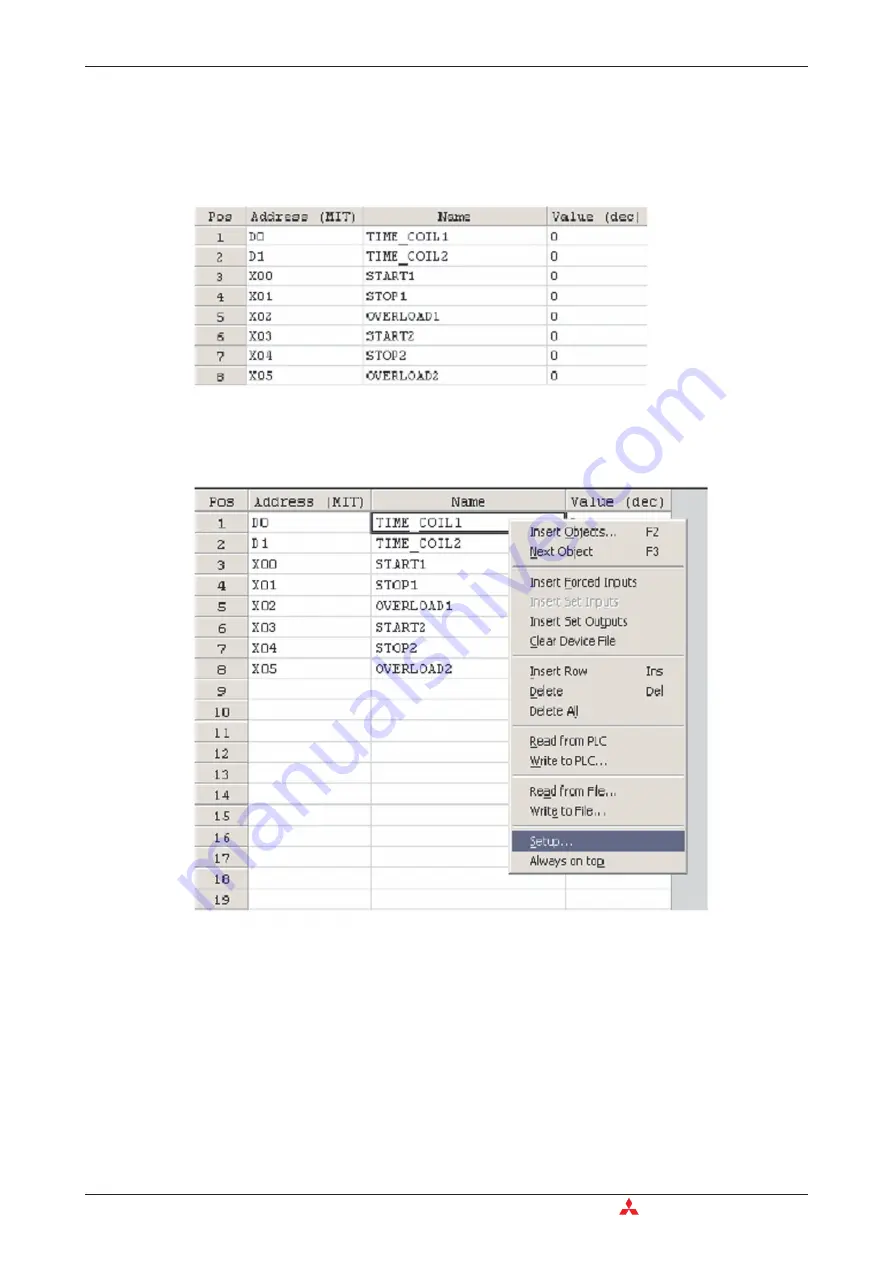
Click in the Mitsubishi Address left hand column and type in the required device, any identi-
fier name will be automatically shown together with the current value. Column widths can
be altered. In the head of the table, move the cursor over the left border of the column you
want to alter. Then press the left mouse button and move the border to the left or right.
Release the left mouse button at the desired position.
7.1.1
Customising the EDM
햲
Right Clicking the mouse button, displays the following window. Select
Setup
.
Entry Data Monitoring
Advanced Monitoring Functions
7 - 2
MITSUBISHI ELECTRIC
Summary of Contents for FX2N-32CAN
Page 1: ...MITSUBISHI ELECTRIC FACTORY AUTOMATION Programmable Logic Controllers GX IEC Developer ...
Page 2: ......
Page 4: ......
Page 6: ......
Page 10: ...IV MITSUBISHI ELECTRIC ...
Page 18: ...Modular PLC Training Hardware Course Overview and Requirements 1 2 MITSUBISHI ELECTRIC ...
Page 176: ...Device Edit 8 4 MITSUBISHI ELECTRIC ...
Page 190: ...Assigning DUT Variables to Function Blocks Data Unit Types DUT 10 10 MITSUBISHI ELECTRIC ...
Page 198: ...Array Example Single Dimension Array Arrays 11 8 MITSUBISHI ELECTRIC ...
Page 219: ...Sequential Function Chart SFC SFC Elements Training Manual GX IEC Developer 14 3 ...
Page 230: ...Structured Text Program Example IEC Structured Text 16 4 MITSUBISHI ELECTRIC ...
Page 278: ...PLC Components Glossary Appendix A 18 MITSUBISHI ELECTRIC ...
Page 283: ......


