


18
19
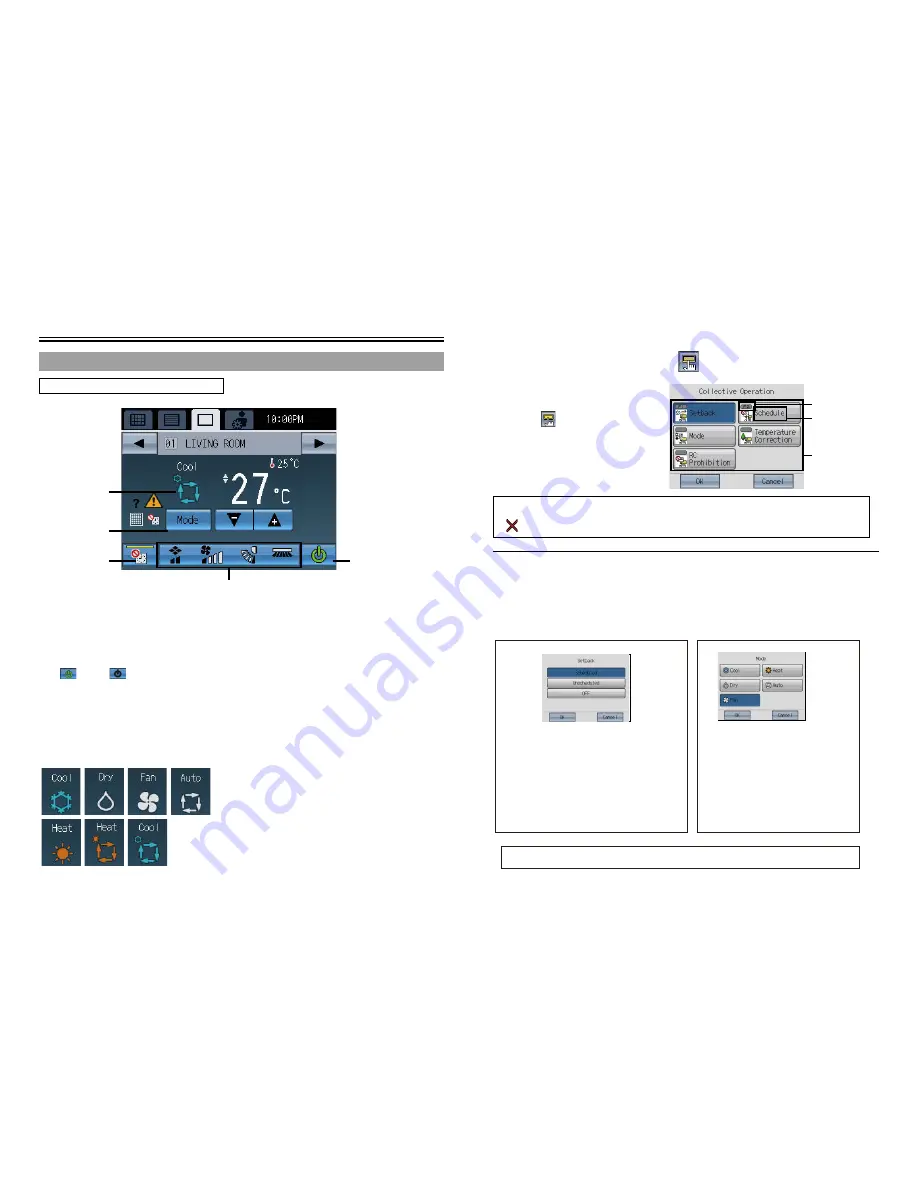
Basic Operations
Operation Screen (Group screen)
Mode
(useable only while the unit is in operation)
Touch
2
to access the modes in order of "Cooling, Dry, Fan, Auto, and Heating."
The selected mode will appear in the area labeled
1
.
ON/OFF operation
Touching
3
allows the indoor units in the displayed group to start/stop.
When interlocked ventilation units (LOSSNAY) are connected, the ventilation units work in
conjunction with indoor units.
ON:
OFF
:
*Refer to P51 for Auto mode cooling/heating settings.
*To operate an indoor unit in the heating (cooling) mode
while the indoor unit is already operating in the opposite
mode, the operation mode cannot be changed until all of
the indoor units operate in the same mode or stop. In this
case, the mode
1
will blink.
*Available mode varies depending on the model.
Modes that are unavailable do not appear.
*The operation mode which is restricted by this controller or
other controllers cannot be selected.
Basic operations (GROUP screen)
1
2
5
3
4
Auto heating
display
Auto cooling
display
Operating the Air conditioning unit group
[Green]
[Black]
Collective Operation Panel
This panel has the functions that can be
executed collectively. (Setback, Schedule, Mode,
Temperature Correction, RC Prohibition)
Touching the
icon at the left bottom of the
icon on the GRID or the LIST screen will bring up
the Collective Operation panel.
Each button has an indicator and the function
name.
The indicators on the buttons show which
functions are assigned to which buttons.
Indicator
Function
Collective
Operation button
▪ Before using the Collective Operation buttons, the groups to execute collective settings on must be selected,
and the parameters must be set from Main Menu>Operation Setting>Collective Operation Setting.
▪ If
appears on an icon of a given function, the function is not available.
Performing Collective Operation
1
On the GRID or the LIST screen, touch the button that brings up the Collective Operation Panel.
2
Select the Collective Operation button on the Collective Operation panel.
3
Press OK on the Collective Operation panel.
(Go to
4
if Setback or Mode was selected. Otherwise, the setting is complete.)
4
If Setback or Mode was selected, take the following steps.
When Setback is selected
When Mode is selected
Select the desired item, and touch OK.
▪ Scheduled: Scheduled operation is enabled. The units will
operate according to the Setback Control settings.
(P35)
▪ Unscheduled : Scheduled operation is disabled. The units will
operate according to the Collective Operation
settings (Setback). (P39)
▪ OFF
: The Setback function will not be executed.
* Regardless of how the above settings are made, the Setback
function will not be executed if the operation switch is on.
▪
Touch OK on the popup window.
▪
Select a mode on the window that will appear.
▪
Press OK.
* A blinking indicator on a button indicates that the function that corresponds to the button cannot be
collectively executed. Check the settings for the “Collective Operation Setting.”


