3. TV Features
21
For assistance call 1(800) 332-2119
3 D Video, continued
Notes on Using 3D Video Settings
3D signals and 3D settings affect some TV functions.
Switch to a non-3D source to regain full TV operation.
If
Source Format
is set to
Automatic
or one of the
named 3D formats
OR
Source Format
is set to
Off
and
the 3D video source is HDMI 1.4a compliant (picture may
still appear as 2D), the following limitations apply:
•
Picture adjustments are limited. To make picture
adjustments while watching normal 2D images from
the device, temporarily set
Source Format
to
Off
to
make the full range of adjustments accessible.
• The
FORMAT
key is disabled while receiving a 3D
signal.
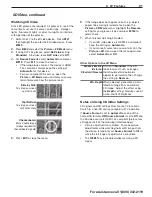
Other Options in the 3D Menu
Glasses Emitter
External
Standard/Reverse
Start with
Standard
, if the 3D
looks incorrect such as images
that should extend outwards
appear to go inwards, then change
the setting to
Reverse
.
2D+ Depth
When selected, generates a simu-
lated 3D image from an ordinary
2D image. Adjust the effect using
the
Depth
setting. Requires use of
active-shutter 3D glasses.
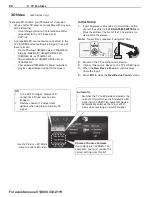
Watching 3D Video
Active 3D glasses are required. All glasses in use at the
same time must use the same control type. Halogen
lights, fluorescent lights, or direct sunlight can interfere
with operation of the glasses.
1.
Switch the TV to the 3D video device. Press
INPUT
then highlight the icon for the 3D video device. Press
ENTER
.
2.
Press
MENU
and select the
Picture > 3D Mode
menu.
3.
If using DLP Link glasses, select
DLP Link
setting
Standard
. Otherwise, leave
DLP Link
set to
Off
.
4.
For
Source Format
, select
Automatic
and press
ENTER
. Press
EXIT
to close the menu.
•
If the image looks correct, the device is HDMI
1.4a compliant; always keep the setting at
Automatic
for this device.
•
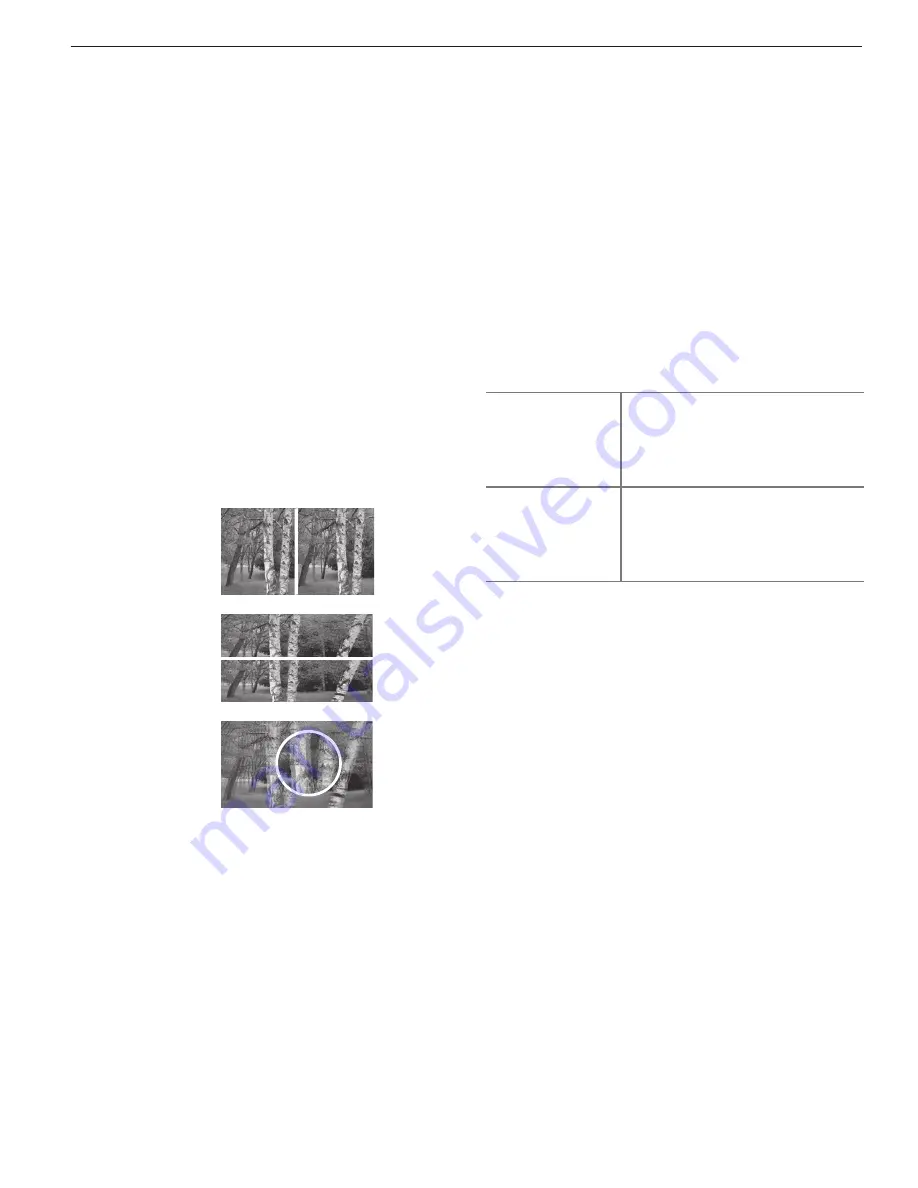
For non-compliant 3D sources, open the
Picture > 3D Mode
menu and select a source
format based on how the picture looks:
Side by Side
Two images, screen
split vertically
Top/Bottom
Two images, screen
split horizontally
Checkerboard
Blurry double image
(always required for
checkerboard signals)
5.
Press
EXIT
to close the menu.
6.
If the image does not appear correct (e.g., objects
appear to be moving in instead of out), open the
Picture > 3D Mode
menu. Highlight the
Reverse
setting for your glasses type and press
ENTER
to
add a check.
7.
When finished watching 3D video:
•
If your 3D video device is HDMI1.4a compliant,
keep the setting on
Automatic
.
•
If you manually selected a source format in the
Picture > 3D
menu, open the menu again and
select
Automatic
or
Off
.
Summary of Contents for 3D DLP C12 Series
Page 39: ......


