32
NP180/160 Series Setup Manual
3.
Advanced setting (when necessary)
The following items can be customized as necessary including the active power peak saving function (p. 33).
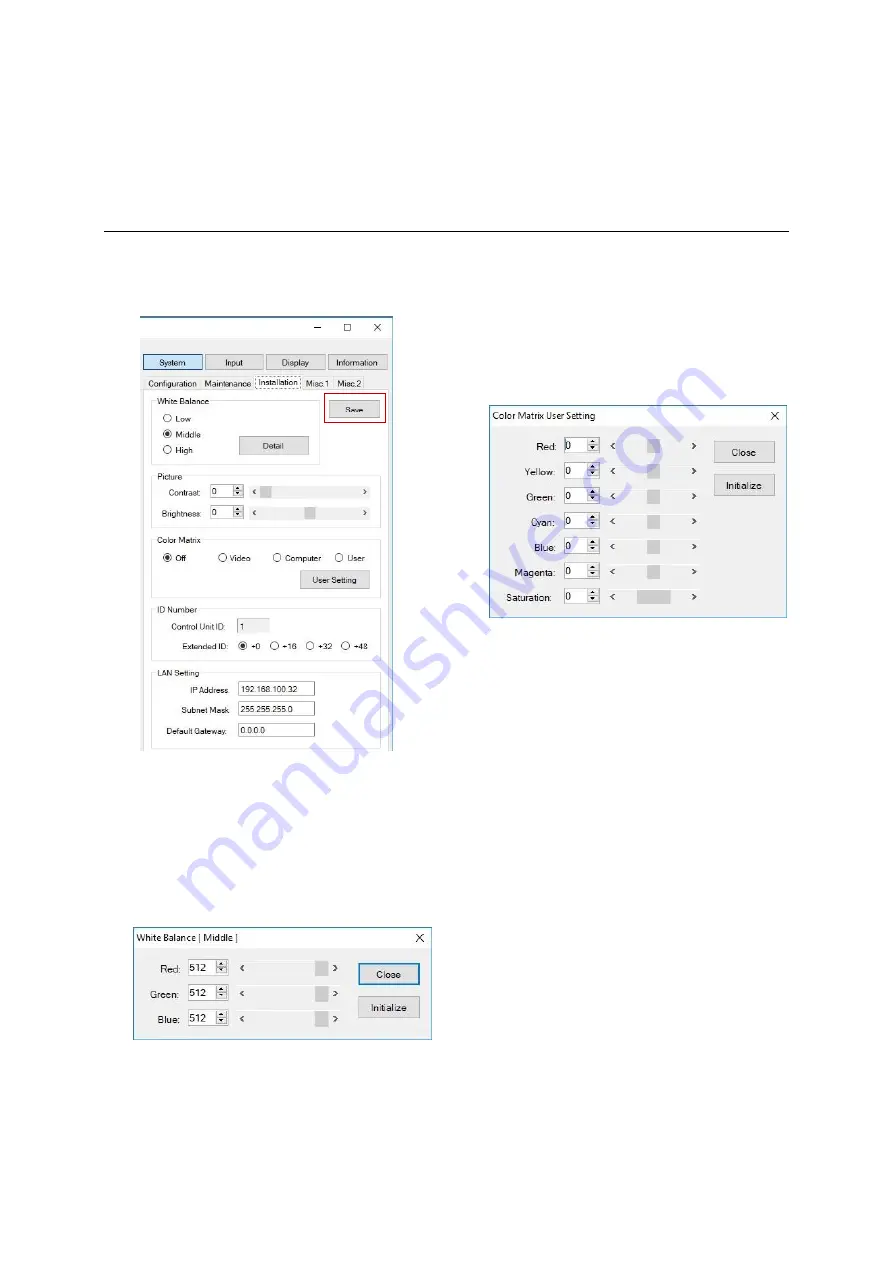
Detailed system memory setting
Surely click the “Save” button after you change the
settings to store them in the control units (p. 28).
Installation tab
White balance
Color temperature can be selected among 3 preset
memories, High, Middle and Low. The initial setting
is Middle.
Each preset memory can be customized in the
“Detail” menu. For lower color temperatures,
keep R-GAIN higher and decrease G-GAIN and
B-GAIN values accordingly.
Picture
It adjusts the contrast and brightness by control unit
display area. The initial settings are 100 and 0
respectively.
Contrast and brightness menus in input memory
(p. 36) control them by input signal.
Color matrix
Hue of colors can be controlled. There are 2 preset
memories, “computer” and “video”. The “User”
menu can customize the hue in the “User setting”
menu. The initial setting is OFF.
ID number
If you connect over 16x control units, you can
allocate extended ID numbers on them. Choosing
“+16” adds 16 on the number that has been set with
the DIP switch on the control unit (p. 20), as ID 1
turns to ID 17. The ID can be set up to 64. The initial
setting is +0.
LAN setting
The IP address on each control unit can be changed.
Before changing, Wallaby needs to communicate
with the unit with the original IP once. To establish
the new connection, cycle the power of the control
unit.
The last byte of the IP address can be set in the
range of 0 to 255, which follows the DIP switch
setting (p. 20) by every 16. The DIP switch sets the
low 4 bits in the last byte.
For instance, even if you enter any number
between 32 and 47 in Wallaby, the actual last byte
will be the number that has been set with the DIP
switch.
Likewise, if you enter 50 in Wallaby, the actual last
byte will be a number of 48 to 63 depending on
the DIP switch setting.
Summary of Contents for 12NP180 Series
Page 50: ......


