background image

7

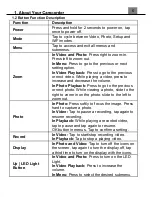
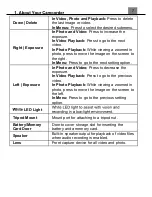
Down | Delete

In Video, Photo and Playback:

Press to delete 

the last image or video.

In Menus:

Press to select the desired submenu.

Right | Exposure

In Photo and Video:

Press to increase the 

exposure.

In Video Playback:

Press to go to the next 

video.

In Photo Playback:

While viewing a zoomed in 

photo, press to move the image on the screen to 
the right.

In Menu:

Press to go to the next setting option.

Left | Exposure

In Photo and Video:

Press to decrease the 

exposure.

In Video Playback:

Press to go to the previous

video.

In Photo Playback:

While viewing a zoomed in 

photo, press to move the image on the screen to 
the left.

In Menu:

Press to go to the previous setting 

option.

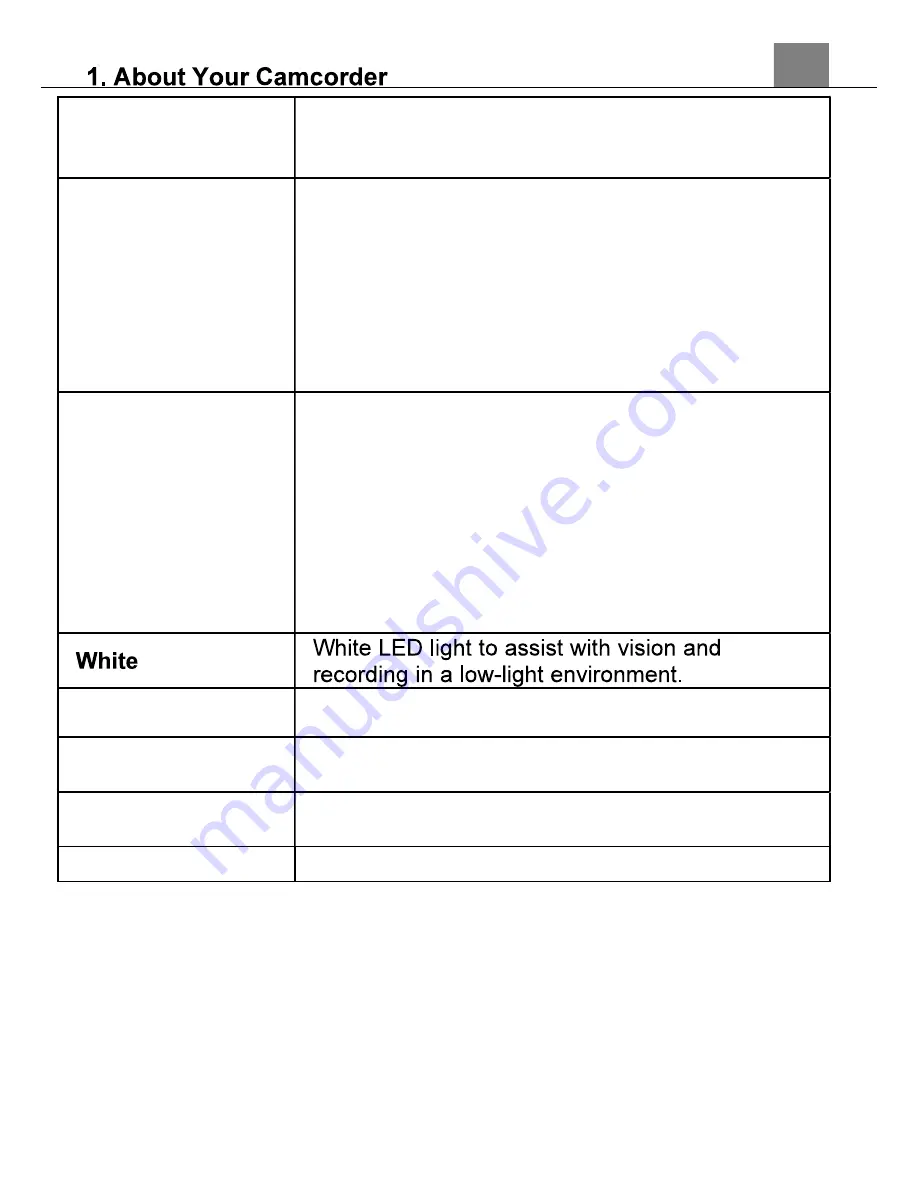
LED Light

Tripod Mount

Mount port for attaching to a tripod nut.

Battery/Memory 
Card Door

Door to cover storage slot for inserting the 
battery and a memory card.

Speaker

Built-in speaker output for playback of video files 
when audio recording is enabled.

Lens

Front capture device for all video and photo.

Summary of Contents for MN4K100Z

Page 1: ...MN4K100Z User Manual ...

Page 2: ...ful interference to radio or television reception which can be determined by turning the equipment off and on the user is encouraged to try to correct the interference by one or more of the following measures Reorient or relocate the receiving antenna Increase the separation between the equipment and receiver Connect the equipment into an outlet on a circuit different from that to which the receiv...

Page 3: ... the camcorder strap with care and never place the strap around the neck of an infant or child Wrapping the strap around a neck may cause suffocation Do not subject the LCD screen to impact To prevent the risk of fire or electric shock do not expose this appliance to rain or moisture Battery Information Turn off the camcorder before installing or removing the battery Use only the provided batterie...

Page 4: ...es Otherwise it may cause fire or electric shock Do not attempt to repair disassemble change or transform the adapter Avoid sudden changes in temperature which may cause condensation on the Do not touch the plug with wet hands Otherwise it may cause electric shock Do not use the travel voltage converter or AC DC power inverter Otherwise it may cause damage overheating malfunction or fire to the ca...

Page 5: ...t Shoe Mount 9 LED Mode Indicator 16 Right Exposure Button 3 Speaker 10 Mode Button 17 Left Exposure Button 4 Display Button 11 Record Button 18 OK Button 5 Zoom 12 Port Door 19 Menu 6 Shutter 13 Microphone 7 LED Indicator 14 Up LED Light Button 1 Lens 2 Remote Control Sensor 3 LED Light ...

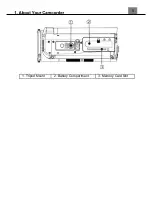
Page 6: ...5 1 Tripod Mount 2 Battery Compartment 3 Memory Card Slot ...

Page 7: ...wing a photo slide to the right to zoom in on the photo slide to the left to zoom out Photo In Photo Press softly to focus the image Press hard to capture a photo In Video Tap to pause a recording tap again to resume recording In Playback While playing a recorded video tap to pause and tap again to resume OK button in menus Tap to confirm a setting Record In Video Tap to start stop recording video...

Page 8: ...ing option Left Exposure In Photo and Video Press to decrease the exposure In Video Playback Press to go to the previous video In Photo Playback While viewing a zoomed in photo press to move the image on the screen to the left In Menu Press to go to the previous setting option LED Light Tripod Mount Mount port for attaching to a tripod nut Battery Memory Card Door Door to cover storage slot for in...

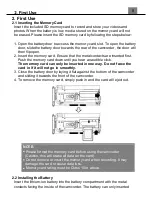
Page 9: ...n audible click The memory card can only be inserted in one way Do not force the card in if it will not go in smoothly 3 Close the battery door by laying it flat against the bottom of the camcorder and sliding it towards the front of the camcorder 4 To remove the memory card simply push in and the card will eject out 2 2 Installing the Battery Insert the lithium ion battery into the battery compar...

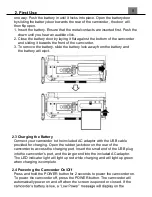
Page 10: ... the battery will eject 2 3 Charging the Battery Connect your camcorder to the included AC adaptor with the USB cable provided for charging Open the rubber jack door on the rear of the camcorder to access the charging port Insert the small end of the USB plug into the camcorder s port and the larger end into the included AC adaptor The LED indicator light will light up red while charging and will ...

Page 11: ...o connect the camcorder to your computer open the rubber jack door on the rear of the camcorder to access the USB port Insert the small end of the USB plug into the to the USB port on your computer Once connected show MSDC Use the ZOOM button to select your desired mode and press the PHOTO button to enter into that mode 2 7Connecting to a TV The camcorder can also be connected to a TV When connect...

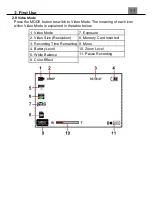
Page 12: ...de The meaning of each icon within Video Mode is explained in the table below 1 Video Mode 7 Exposure 2 Video Size Resolution 8 Memory Card Inserted 3 Recording Time Remaining 9 Menu 4 Battery Level 10 Zoom Level 5 White Balance 11 Pause Recording 6 Color Effect ...

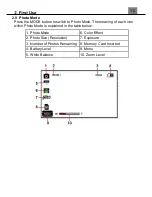
Page 13: ... Photo Mode The meaning of each icon within Photo Mode is explained in the table below 1 Photo Mode 6 Color Effect 2 Photo Size Resolution 7 Exposure 3 Number of Photos Remaining 8 Memory Card Inserted 4 Battery Level 9 Menu 5 White Balance 10 Zoom Level ...

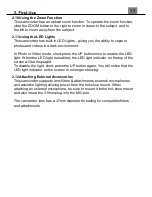
Page 14: ... LED light When the LED light is enabled the LED light indicator on the top of the screen will be displayed To disable the light short press the UP button again You will notice that the LED light indicator on the screen is no longer showing 2 12Attaching External Accessories This camcorder supports lens filters attachments external microphones and assistive lighting utilizing power from the hot sh...

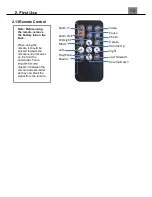
Page 15: ...eft Play Stop Rewind 2 13Remote Control Note Before using the remote remove the battery tab on the back When using the remote it should be pointed towards the remote control receiver on the front the camcorder There objects in between the remote and camcorder as they can block the signal from the remote ...

Page 16: ...o select Setup and press the PHOTO or OK buttons to enter the menu 3 Select using the ZOOM UP or DOWN buttons and press the PHOTO or OK buttons to enter the submenu 4 Press the ZOOM LEFT or RIGHT buttons to navigate the menu and press the PHOTO or OK buttons to confirm your selected setting 2 7K 1080P 720P 480P A higher resolution and faster frames per second rate will produce a higher quality and...

Page 17: ...bmenu 4 Press the ZOOM LEFT or RIGHT buttons to navigate the menu and press the PHOTO or OK buttons to confirm your selected exposure mode 3 2 1 0 1 2 3 5 Press the MENU button to exit the submenu 3 1 5 Settings Date Stamp This setting allows you to imprint a date time onto your recorded video files Once a video file is recorded with the imprint the imprint cannot be removed 1 In Video Mode press ...

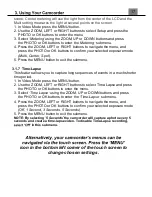
Page 18: ...e Lapse This feature allows you to capture long sequences of events in a much shorter time period 1 In Video Mode press the MENU button 2 Use the ZOOM LEFT or RIGHT buttons to select Time Lapse and press the PHOTO or OK buttons to enter the menu 3 Select Time Lapse using the ZOOM UP or DOWN buttons and press the PHOTO or OK buttons to enter the Time Lapse submenu 4 Press the ZOOM LEFT or RIGHT but...

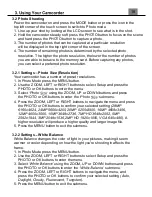
Page 19: ...er the menu 3 Select Photo using the ZOOM UP or DOWN buttons and press the PHOTO or OK buttons to enter the Photo submenu 4 Press the ZOOM LEFT or RIGHT buttons to navigate the menu and press the PHOTO or OK buttons to confirm your selected setting 28MP 6160x4624 24MP 5600x4200 20MP 5200x3900 16MP 4608x3456 12MP 4000x3000 10MP 3648x2736 7MP HD 3648x2052 5MP 2592x1944 3MP 2048x1536 2MP HD 1920x1080...

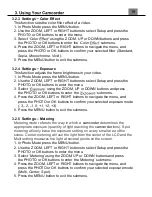
Page 20: ...to enter the submenu 4 Press the ZOOM LEFT or RIGHT buttons to navigate the menu and press the PHOTO or OK buttons to confirm your selected exposure mode 3 2 1 0 1 2 3 5 Press the MENU button to exit the submenu 3 2 5 Settings Metering Metering mode refers to the way in which a camcorder determines the appropriate exposure quantity of light reaching the camcorder lens Spot metering will only base ...

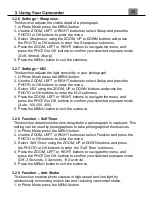
Page 21: ...he ISO submenu 4 Press the ZOOM LEFT or RIGHT buttons to navigate the menu and press the PHOTO or OK buttons to confirm your selected exposure mode Auto 100 200 400 5 Press the MENU button to exit the submenu 3 2 8 Function Self Timer This function determines the time delay before a photograph is captured This setting can be used by photographers to take photographs of themselves 1 In Photo Mode p...

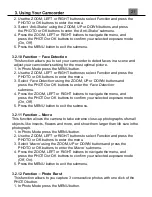
Page 22: ...uttons to enter the Face Detection submenu 4 Press the ZOOM LEFT or RIGHT buttons to navigate the menu and press the PHOTO or OK buttons to confirm your selected exposure mode On Off 5 Press the MENU button to exit the submenu 3 2 11 Function Macro This function allows the camera to take extreme close up photographs of small objects like insects flowers and more and show them larger than life size...

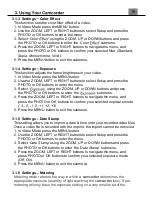
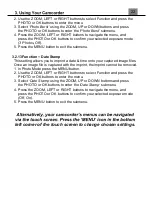
Page 23: ...etting allows you to imprint a date time onto your captured image files Once an image file is captured with the imprint the imprint cannot be removed 1 In Photo Mode press the MENU button 2 Use the ZOOM LEFT or RIGHT buttons to select Function and press the PHOTO or OK buttons to enter the menu 3 Select Date Stamp using the ZOOM UP or DOWN buttons and press the PHOTO or OK buttons to enter the Dat...

Page 24: ...ons to start playing a recorded video press the PHOTO or OK buttons again to pause the video and press the RECORD button to stop the video 5 While a video is playing use the ZOOM UP or DOWN buttons to increase or decrease the playback volume In Video Playback Mode the following options are available 3 3 1 1 Delete This function is used to delete videos Videos can be deleted singly or all at once D...

Page 25: ...OM buttons to cycle through the captured photos stored on the memory card 2 To enter into a photo press the PHOTO or OK buttons 3 Use the ZOOM button to see the previous or next recorded photo 4 While viewing a photo press the icon on the screen to zoom into an image 5 While zoomed in use the ZOOM button to zoom in or out of the photo using the touch screen use your finger to drag the photo to vie...

Page 26: ...n the camcorder 1 In Photo Mode press the MENU button 2 Use the ZOOM LEFT or RIGHT buttons to select Playback and press the PHOTO or OK buttons to enter the menu 3 Use the ZOOM LEFT or RIGHT buttons to select Slide Show and press the PHOTO or OK buttons to enter Slide Show Mode 4 Press the PHOTO or OK buttons to start the slide show and press the PHOTO or OK buttons again to pause 5 Press the MENU...

Page 27: ...or DOWN buttons to select Beep and press the PHOTO or OK buttons to enter the Beep Sound submenu 2 Press the ZOOM LEFT or RIGHT buttons to select your desired setting Off On Then press the PHOTO or OK buttons to confirm your selection 3 Press the MENU button to exit the submenu 4 You can also press the MENU button to exit the submenu without making a selection 3 4 3 Set Date and Time This function...

Page 28: ...ns to enter the submenu 2 Press the ZOOM LEFT or RIGHT buttons to navigate the menu and then press the PHOTO or OK buttons to confirm your selected setting Off 3 Minutes 5 Minutes 10 Minutes 3 4 6 Format Memory Card The format setting erases all photos videos and data stored on your memory card 1 In Setup Mode use the ZOOM UP or DOWN buttons to select and press the PHOTO or OK buttons to enter the...

Page 29: ...28 then press the PHOTO or OK buttons to confirm your selection Yes No 3 Press the MENU button to exit the submenu without making a selection left corner of the screen to change chosen settings ...

Page 30: ...ct WIFI and press the PHOTO or OK buttons to enter WIFI mode The Network Name SSID and the password will be displayed on the screen 2 To close the wireless menu press the PHOTO button 3 The status LED will blink BLUE while searching for a WiFi connection 4 Open your phone wireless menu turn all wireless settings on and connect to the network named MN4K100Z then join the network password is 1234567...

Page 31: ...30 7 app to launch remote operation of the camcorder 8 pp to connect to your camcorder ...

Page 32: ...Video App Your MN4K100Z will now be operable via your smartphone It will initially default to the video recording function To change to Photo Mode press the camera icon in the bottom of your phone screen Video Mode Photo Mode ...

Page 33: ...artphone screen While a video is recording remotely a red dot will blink the camcorder screen and the letters REC will flash on reen 2 The video resolution can be changed on the app by pressing the button in the bottom left corner of the screen Video resolution can be set at 640x480P30 1280x720P120 1920x1080P60 and 2560x1440P30 ...

Page 34: ...smartphone screen When a photo is taken the LED status indicator on the rear of the camcorder will flash red once 2 The photo resolution can be changed on the app by pressing the button in the bottom left corner of the screen Photo resolution can be set at 28MP 24MP 20MP 16MP 12MP 10MP 7MP HD 5MP 3MP 2MP HD VGA ...

Page 35: ...y card on the app press the photo gallery button in the bottom right corner of your 2 Tap the photo or video file you wish to view From this screen media can be saved to your smartphone and deleted If a photo or video is deleted on the app it will also be removed from the SD card in the camcorder ...

Page 36: ...5 3 5 2 4 Changing Camcorder Settings on the App Camcorder settings can also be changed on the app Press the icon in the top right corner of your s From here a number of settings including can be changed ...

Page 37: ...60fps 1920x1080 720p 120fps 1280x720 VGA 30fps 640x480 Auto 100 200 400 3 5 Inch IPS High Resolution Touch Screen LCD White LED constant OFF 3 Minutes 5 Minutes 10 Minutes Auto Daylight Cloudy Fluorescent Tungsten Wi Yes with app integration Macro Photo Burst Face Detection Color Filters Anti Shake Time Lapse Yes for external MIC or Assistive Lighting Mounting SD SDXC Maximum 128GB 10 pin Mini USB...

Page 38: ...nds Inc under license 441 1100 www minoltadigital com www elitebrands com Copyright 2022 Elite Brands Inc re having difficulties with your camcorder or would like further assistance please call our toll free technical support hotline at 800 441 1100 Please be sure to have your camcorder handy when calling ...

Page 39: ......

Reviews: