18
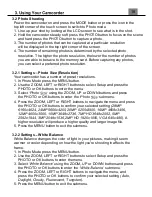
3.2 Photo Shooting
Power the camcorder on and press the MODE button or press the icon in the
top left corner of the touch screen to switch to Photo mode.
1. Line up your shot by looking at the LCD screen to see what is in the shot.
2. Hold the camcorder steady, soft press the PHOTO button to focus on the scene
and hard press the PHOTO button to capture a photo.
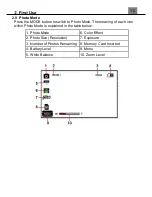
3. The number of photos that can be captured at a particular resolution
will be displayed in the top right corner of the screen.
4. The number of remaining photos is determined by the selected photo
resolution. The higher the photo resolution, the lower the number of photos
you are able to be save to the memory card. Before capturing any photos,
you can select a preferred photo resolution.
3.2.1 Settings
Photo Size (Resolution)
Your camcorder has a number of preset resolutions.
1. In Photo Mode press the MENU button.
2. Use the ZOOM, LEFT or RIGHT buttons to select Setup and press the
PHOTO or OK buttons to enter the menu.
3. Select
Photo
using the ZOOM, UP or DOWN buttons and press
the PHOTO or OK buttons to enter the
Photo
submenu.
4. Press the ZOOM, LEFT or RIGHT buttons to navigate the menu and press
the PHOTO or OK buttons to confirm your selected setting
(28MP
6160x4624, 24MP 5600x4200, 20MP 5200x3900, 16MP 4608x3456,
12MP 4000x3000, 10MP 3648x2736, 7MP HD 3648x2052, 5MP
2592x1944, 3MP 2048x1536, 2MP HD 1920x1080, VGA 640x480)
. A
higher resolution will produce a higher quality and larger image file.
5. Press the MENU button to exit the submenu.
3.2.2 Settings
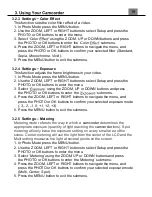
White Balance
White Balance changes the color of light in your pictures, making it seem
warmer or cooler depending on how the light you're shooting in affects the
frame.
1. In Photo Mode press the MENU button.
2. Use the ZOOM, LEFT or RIGHT buttons to select Setup and press the
PHOTO or OK buttons to enter the menu.
3. Select
using the ZOOM, UP or DOWN buttons and press
the PHOTO or OK buttons to enter the
submenu.
4. Press the ZOOM, LEFT or RIGHT buttons to navigate the menu, and
press the PHOTO or OK buttons to confirm your selected setting
(Auto,
Daylight, Cloudy, Fluorescent, Tungsten)
.
5. Press the MENU button to exit the submenu.


