


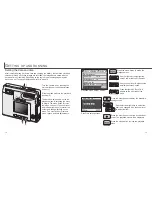


Changing image size affects the number of
pixels in each image. The greater the image
size, the larger the file size. Choose image
size based on the final use of the image -
smaller images will be more suitable for web
sites whereas larger sizes will produce higher
quality prints. Image size must be set before
the picture is taken. Image size is set in the
basic section of the recording-mode menu
(p. 28).
Three image sizes are available: 1600 X 1200
(UXGA), 1280 X 960 (SXGA), and 640 X 480
(VGA). Image size is defined by the image’s
horizontal and vertical dimensions in pixels.
The selected image-size setting is displayed
on the LCD monitor by the horizontal
dimension only.
If the image size is changed, the frame counter will display the approximate number of
images that can be recorded at that setting on the installed memory card. One memory
card can contain images with differing sizes.
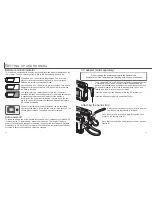
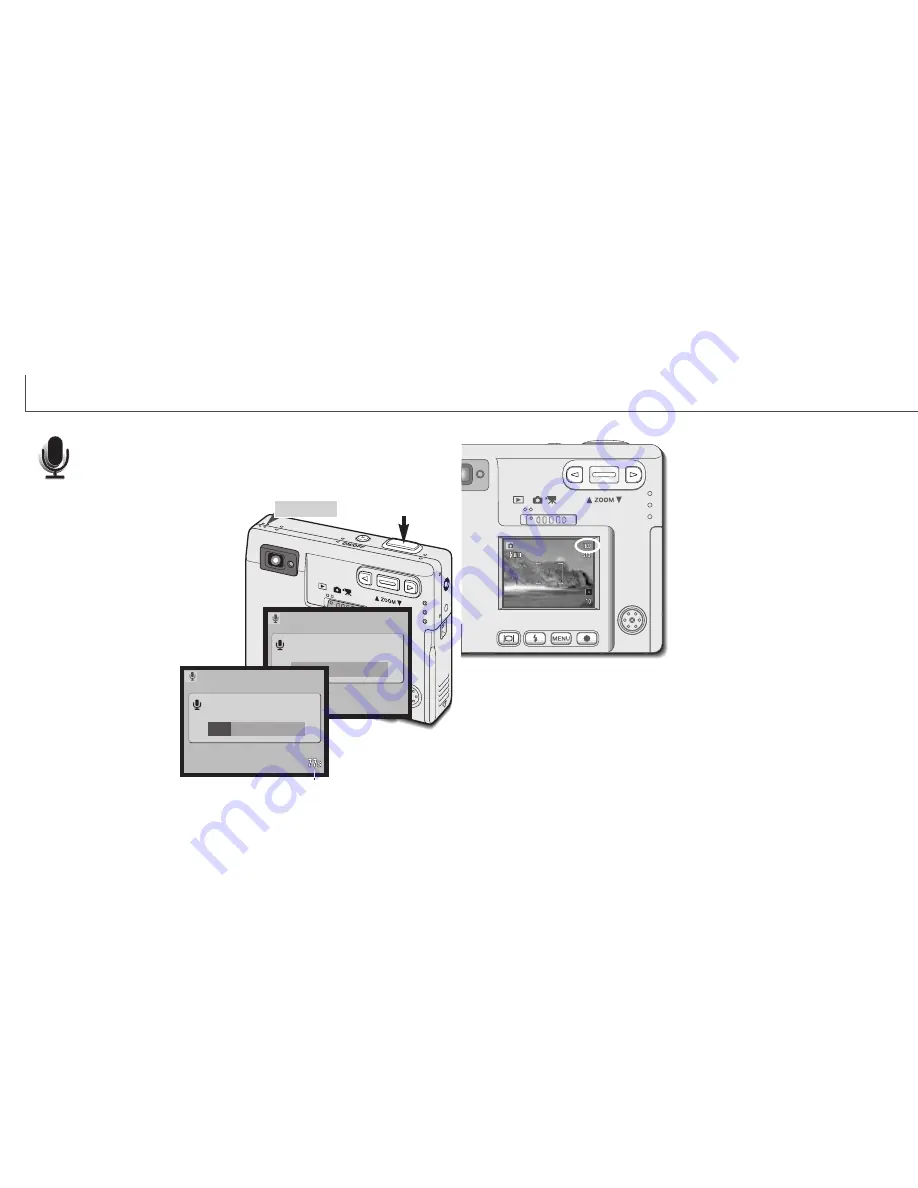
Ninety seconds of audio can be recorded without an image. The audio-
recording drive mode is selected in the basic section of the recording-mode
menu (p. 28). When the function is active, the live view is replaced with a
blue screen.
Approximately 842 seconds of audio can be stored on one 8MB memory card. Audio is
recorded at approximately 8KB/s.
To begin recording, press the shutter-release
button (1). A bar graph (2) will display the
amount of recorded time. The recording will
stop when the shutter-release button is
pressed again or the ninety-second limit has
elapsed.
When making audio recordings, be careful
not to touch or cover the microphone. The
quality of the recording is proportional to the
subject to microphone distance. For best
results, hold the camera
approximately 20cm (8in) from
your mouth.
34
35
R
ECORDING MODE
Audio recording
Image size
PressShutterButtonToRecord.
Recording audio.
1
2
Remaining recording time
Stand-by
Recording
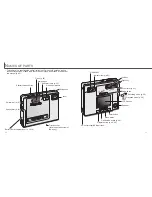
Microphone
Press shutter to stop.
Summary of Contents for DiMAGE image Viewer Utility
Page 1: ...INSTRUCTION MANUAL E...


