background image

57

56

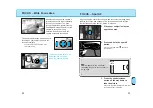
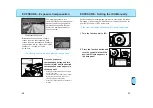
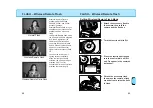
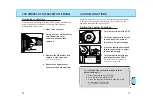
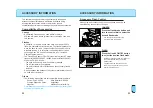
Use only the center metering
segment to lock the exposure
settings without locking the focus.
The exposure remains locked until
the spot/AE lock button is
released.

• Pressing the spot/AE lock button sets

the flash to slow sync mode (p67).

EXPOSURE – Spot Metering

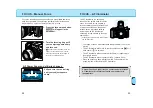
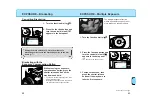
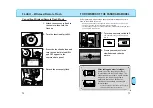
2. Press and hold the spot/AE

lock button.

and the locked exposure will be

displayed in the viewfinder.

3. Recompose the scene as

desired, then press the
shutter-release button all the
way down to take the picture.

• The exposure is held until the spot/AE lock

button is released.

1. Place the spot-metering area

on the subject whose
exposure you want to lock.

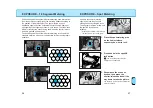
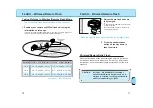
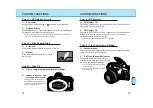
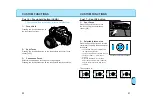
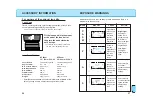
EXPOSURE – 14 Segment Metering

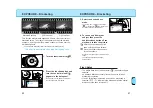
Fourteen-Segment Honeycomb-Pattern Metering uses information
from the autofocus system to set the metering pattern according to
the position of the main subject. The light metered by each
applicable segment is then evaluated to determine the degree of
spot-lighting or backlighting present in your scene. The focus-area
indicator displays the sensor being used when the shutter release
button is pressed partway down.

Fourteen-Segment Honeycomb-Pattern Metering is the camera’s
standard metering mode and is appropriate for most photographic
situations.

Summary of Contents for 505 2

Page 1: ...ppears in the data panel 3 Press the exposure compensation button and turn the control dial to select the aperture Refer to the flash range table on page 26 to determine the aperture setting and the flash range M MODE MANUAL 1 Press the flash mode button to pop up the built in flash will appear in the data panel M Mode Flash When the built in flash is up or an attached accessory flash is on it wil...

Page 2: ...xposure 6 Press and hold the shutter release button to take the picture The shutter remains open as long as the button is pressed Do not use the Wireless Controller IR 1N with this camera Permanent damage will occur Attaching the Remote Cord 1 Flip the remote control terminal cover up 2 Insert the plug into the terminal To reduce image blur attach either the Remote Cord RC 1000S or RC 1000L sold s...

Page 3: ...ked until the spot AF button is released will appear in the viewfinder indicating the center focus sensor is being used Wide focus area uses the camera s three focus sensors to automatically focus on your subject The wide focus area provides greater framing flexibility and makes it easier for the camera to focus on moving subjects Wide focus area is the camera s standard focus mode FOCUS Wide Focu...

Page 4: ...tor will not operate with 3x 1x Macro Zoom When an accessory flash is attached its AF illuminator will be active in place of the camera s AF illuminator Custom Function 9 p82 lets you cancel the built in flash s AF illuminator if it will interfere with your subject or is inappropriate FOCUS Manual Focus 1 Press the focus mode button will appear in the data panel 2 Turn the focusing ring until your...

Page 5: ...til the spot AE lock button is released 1 Place the spot metering area on the subject whose exposure you want to lock EXPOSURE 14 Segment Metering Fourteen Segment Honeycomb Pattern Metering uses information from the autofocus system to set the metering pattern according to the position of the main subject The light metered by each applicable segment is then evaluated to determine the degree of sp...

Page 6: ...ation lets you adjust the metered exposure 3 stops in 1 2 stop increments The metering system in this camera averages the readings from each active metering segment to determine an exposure that will achieve an average middle grey tone on the film EXPOSURE Exposure Compensation Press the exposure compensation button and turn the control dial until the desired compensation value appears in the data...

Page 7: ...frame of the series The exposure settings will change automatically Flash Notes 3 Select the desired drive mode The drive mode is initially set to single or continuous whichever was set with exposure bracketing last EXPOSURE Bracketing 1 Turn the function dial to 2 Press the function button and turn the control dial until appears in the data panel appears in the frame counter after the function bu...

Page 8: ...keting 1 Turn the function dial to Cancelling Bracketing 2 Press the function button and turn the control dial until OFF appears in the data panel Sliding the main switch to LOCK in the middle of a bracketing series resets the bracketing series to the first frame Bracketing with the Exposure Compensation Button While pressing the exposure compensation button press the shutter release button all th...

Page 9: ...if all of the exposures have dark backgrounds and the subjects of the exposures will not overlap Metering Multiple Exposures Compensate the exposures as follows Number of Exposures Exposure Adjustment 1 Turn the function dial to EXPOSURE Multiple Exposure blinks in the data panel indicating the next exposure will be the last in the series To take more than 2 exposures repeat steps 1 and 2 until ME...

Page 10: ...displayed in the viewfinder Slow shutter Sync Conventional Flash FLASH High Speed Sync Attach the 5400HS flash and set it to standard mode The camera will automatically switch to HSS mode and H will appear in the viewfinder and data panel HSS cannot be used under fluorescent lights Flash and color meters cannot meter the flash when high speed sync is selected The maximum sync speed for this camera...

Page 11: ...the Minolta 5400HS 5400xi and 3500xi accessory flashes Wireless Remote flash lets you experience the creative control available with an accessory flash In Wireless Remote flash mode the off camera flash is triggered by a coded signal from the camera s built in flash when you press the shutter release button When proper exposure has been received another signal cuts the accessory flash off You can ...

Page 12: ...eless Remote Ratio Flash CAUTION Set CUSt 8 Spot AE Lock to setting 1 when Wireless Remote flash mode is on If setting 2 is selected test firing the flash will activate slow shutter sync p82 FLASH Wireless Remote Flash Taking Pictures in Wireless Remote Flash Mode The off camera flash will provide all of the exposure 1 Position your camera and 3500xi flash unit using the information on this page I...

Page 13: ...es on a roll of film The top and bottom parts of the film will not be exposed The imprinting position for the quartz data back is automatically changed when panorama format is selected 1 Turn the panorama switch to P The viewfinder changes to a panorama format 2 Frame your subject in the viewfinder and take the picture A B After taking panoramic images Attach one of the supplied panorama format st...

Page 14: ...ing conditions Do not use the data back when temperatures exceed the operating range of 0 to 50 C 32 to 122 F Exposing the Date Time Before taking the picture Mode button Select button Adjust button Print indicator 1 Press the mode button to choose the data imprinting format M will appear above the month 2 Use the select button SEL to move between different parts of the displayed data The selected...

Page 15: ...unction button and slide the main switch from LOCK to ON will blink in the data panel Using the custom functions you can tailor selected camera settings to suit your shooting style or preferences The functions you can customize are explained on pages 78 82 76 1 Open the back cover 3 Remove the old battery and replace it with a new one The side should face up 2 Using a coin or similar object turn t...

Page 16: ...is released The TTL exposure system will ensure correct exposure Push the built in flash down to select flash cancel CUSTOM FUNCTIONS 1 AF priority Shutter will not release until or appears in the viewfinder Cust 1 AF Release Priority Cust 2 Film Rewind Start 2 Release Priority Shutter releases even if the focus cannot be confirmed Use Release priority when photographing moving subjects When conti...

Page 17: ...rea Locations Cust 7 Spot AF button 1 Spot Focus Press the Spot AF button to lock the focus using the center focus sensor p53 Wide focus area Left local focus area Center spot focus area Right local focus area The sequence is CUSTOM FUNCTIONS The mounted lens must have a focus hold button Cust 6 Focus hold button LENS 1 Focus Hold Pressing the focus hold button on the lens locks the focus 2 Spot F...

Page 18: ...focus The AF illuminator does not fire when flash cancel is selected Cust 9 AF Illuminator built in flash 2 AF Illuminator cancelled The built in flash s AF illuminator will not fire Other flash functions will operate normally An attached accessory flash s AF illuminator will not be cancelled 1 Press to activate Spot area is used for metering until the spot button is released Cust 8 Spot AE Lock b...

Page 19: ...MC series lenses manual focus cannot be used with this camera Compatibility of Accessories Flashes All Minolta i si and HS series flash units and the Vectis SF 1 flash are compatible with this camera The flash will always fire when the flash unit is on Unless Custom Function 5 is set to Autoflash setting 1 In this case the flash will fire only when necessary when it is on and the camera is in Full...

Page 20: ...sure ACCESSORY INFORMATION Fit the lens hood into the mount at the end of the lens barrel then turn the hood clockwise until it stops To store the hood reverse it attach it to the lens then replace the lens cap Flare is non image forming light that degrades image quality A lens hood improves image quality by reducing flare Remove a lens hood before using the camera s built in flash Lens Specificat...

Page 21: ... button to return the camera to autofocus mode Subject is too close Check the minimum focus distance for your lens 24 54 Shutter cannot be released Focus cannot be confirmed Camera is attached to a microscope or telescope Use focus hold or manual focus Contact a Minolta service facility for information 24 54 Flash fires when the shutter release button is pressed partway down The AF illuminator is ...

Page 22: ... STORAGE Operating Temperature and Conditions This camera is designed for use from 20 to 50 C 4 to 122 F Never leave your camera where it may be subjected to extreme temperatures such as the glove compartment of a car Data panel response time will be slow at colder temperatures The display will temporarily darken at higher temperatures but will restore when the temperature normalizes Never subject...

Page 23: ...at a rate of 2 rolls month Dimensions WxHxD 135 0 x 90 0 x 58 5mm WxHxD QD model 135 0 x 90 0 x 61 0mm WxHxD Weight 375g w o camera battery QD model 385g w o camera battery SPECIFICATIONS Camera Type 35mm SLR with built in flash autoexposure AE and action predictive autofocus AF Lens Mount Minolta A type bayonet mount Viewfinder SLR roof mirror type 90 field of view Magnification 0 75X Shutter Typ...

Page 24: ... 1 B 2550 Kontich Belgium Minolta Schweiz AG Riedstrasse 6 CH 8953 Dietikon Switzerland Minolta Svenska AB Albygatan 114 S 171 54 Solna Sweden Finland Branch Niittykatu 6 PL 37 SF 02201 Espoo Finland Minolta Portugal Limitada Av do Brasil 33 A P 1700 Lisboa Portugal Minolta Corporation Head Office 101 Williams Drive Ramsey New Jersey 07446 U S A Los Angeles Branch 11150 Hope Street Cypress CA 9063...

Reviews: