


What’s Next?
11
What’s Next?
You have now completed the hardware setup of your printer. There are
some more important steps:
1
If your language is other than English, refer to “Selecting a Message
Window Language” on page 14. Select the message window language
you prefer. If you print via the parallel or USB port, skip to step 3
2
Set your IP address in one of the following ways:
a. If your network supports DHCP (Dynamic Host Configuration Protocol),
your IP address will be automatically assigned by the DHCP server when
you attach and power up your printer (refer to the NIC User’s Manual).
b. You may manually change the printer’s IP (Internet Protocol) address.
Refer to “Manually select an Ethernet IP Address” on page 15.
3
Connect the printer to your computer or a network.
4
Insert the Utilities and Documentation CD-ROM and follow the instruc-
tions on the screen to install a printer driver and printer utilities (refer to
“Software Installation” in the User’s Guide).
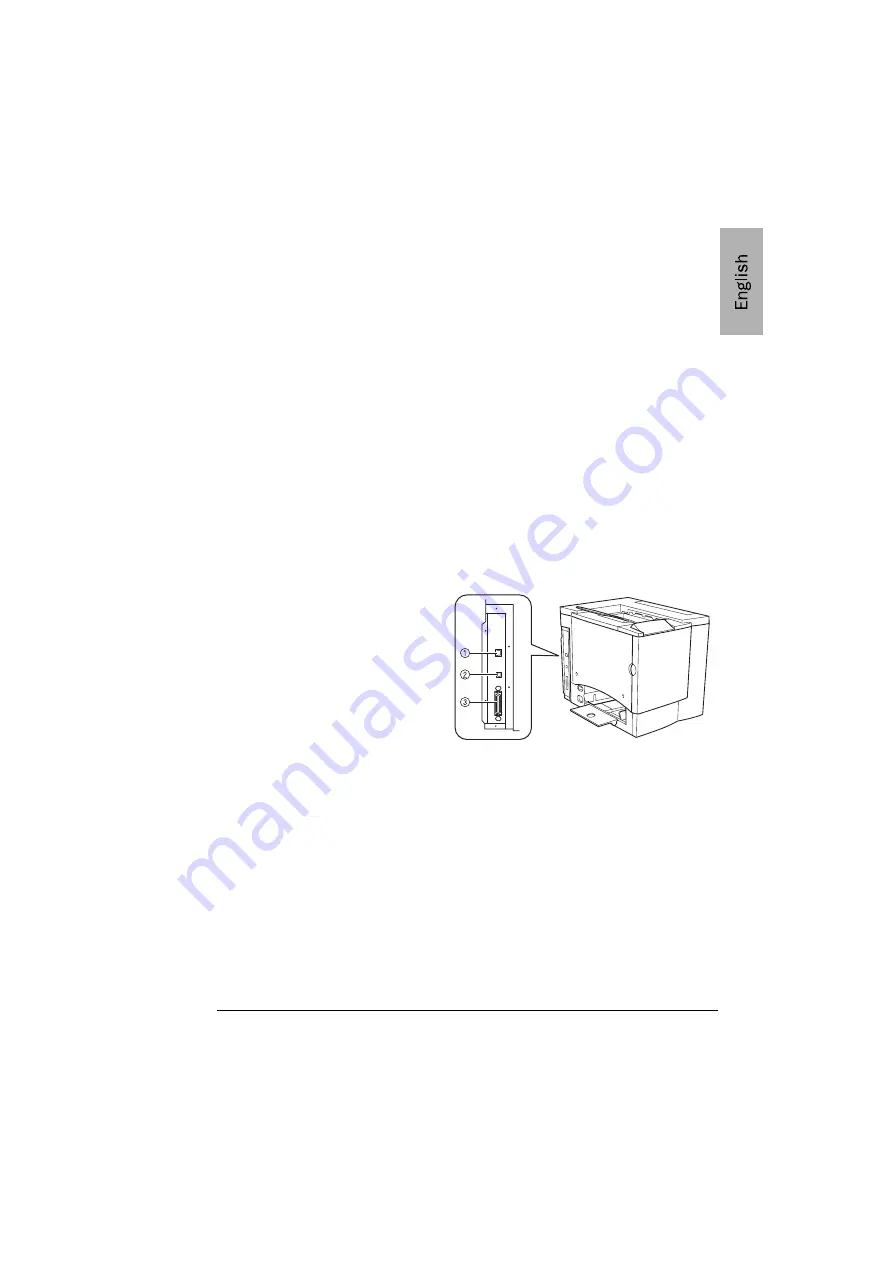
About the interface panel
Ethernet Port
Use a twisted-pair (RJ45)
Ethernet cable when
connecting the Ethernet port
on the printer to a 10BaseT/
100BaseTX network
connection.
USB Port
Use a USB cable (Type B)
when connecting the USB port on the printer to the USB port on your
computer.
Parallel Port
Use a Centronics IEEE 1284 bidirectional parallel cable when connecting the
parallel port on the printer to the parallel port on your computer.


