5
5
Operating Procedure
6.
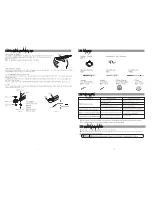
Replacement of Carbon Brush (Curl Cord)
5-2.
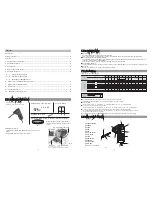
Operation of Hand Switch
The hand switch is for selection of the station to use and start/stop operation
5-1.
Connecting to Powerpack
Connect the curl cord properly with the powerpack.
Minimo One Series Ver.2 handpieces cannot be connected with the previous version powerpack including
Procedure of replacement of carbon brushes
Procedure of replacement of a curl cord
Pull the curl cord out of the powerpack.
Remove the grip nut with a spanner (21mm).
Pull the curl cord connector out of the main body.
Hold the resin part of the curl cord and pull out straight.
Remove the screws fixing the carbon brushes and pull out the carbon brushes.
Set new carbon brushes as they were and tighten them with the screws.
Put the grip in and tighten with the screw.
(Put the grip in while caring the hand switch cord.)
Tighten the grip nut with the spanner.
①
②
③
⑥
⑦
⑧
⑩
①
②
③
-
-
⑥
⑧
-
fig-8
fig-9
-
-
fig-9
fig-10
Main Body
Curl Cord
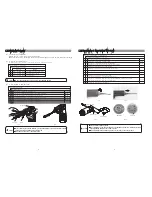
Replacement of Belt Arm
Replacement of Belt
Pull the curl cord out of the powerpack.
As dismounting the belt, Just pull straight out the beltarm.
①
④
①
-
図 -6
Insert the new one.(Be sure not to be upside down.)
⑤
-
図 -6
Squeeze the knob and lift the belt up to unhook it.
⑥ ④
fig-5
fig-6
-
<カーボンブラシの交換>
長期間使用していると、モーターの回転が断続的に不安定になったり、あるいは回転しなくなったりすることがあり
ます。このような場合にはカーボンブラシを交換してください。
※カーボンブラシは両側同時に交換してください。
1)カールコードを外します。
2)グリップナット⑪をスパナ(19mm)で外し、グリップ固定ネジ⑧を取り外してからグリップを外します。
3)右図を参照しながらカーボンブラシを交換してください。
※手元スイッチのコードに注意しながらグリップを取り付けてください。
Hook the belt around the drive pulley then, Squeeze the knob.
② ②
Hook the other side of the belt around the top pulley.
③ ③
図 -5
図 -5
-
5-3.
Replacement of Belt(Belt Arm)
Remove the screw fixing the grip and take off the grip.
⑤ ⑤
Fit the curl cord socket with the pins on the main body and insert on the straight.
(If you replace the curl cord, do so at this time.)
⑨ ⑦
fig-10
-
-
Remove the screw for grounding from the grip.
④ ④
-
6
When a station is not selected
When a station is selected
Operation
Movement
Press the hand switch.
Press the hand switch.
Press the hand switch.
The DC Motor output light is on.
The motor starts to run.
The motor stops.
①
②
③
-
①
②
■
When changing Sentan Tools, do not press the hand switch.
Caution
Drive Pulley
Top Pulley
Knob
■After replacing the carbon brushes, give the handpiece a trial run, increasing rotation
speed gradually and make sure how it works.
■Pull the curl cord out of the control pack.
Caution
■
Use equivalent carbon brushes.
■After replacing the carbon brushes, give the handpiece a trial run, increasing rotation
speed gradually and make sure how it works.
■When replacing carbon brushes, pull the curl cord out of the control pack.
Caution
Carbon Brush
Carbon Brush
Hand Switch
fig-8
fig-7
fig-7


