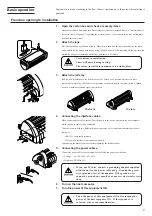
background image

21

*

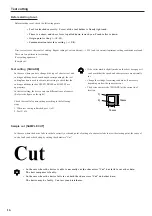
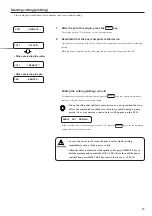
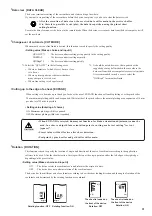
Data clear  [DATA CLEAR]

The device terminates cutting of the current data, and starts cutting of new data.

If you want to stop cutting of the current data before the device completes it, you have to clear the data received.

• After the execution of data clear, the received data will remain in the receiver buffer.

It is, therefore, possible to cut (plot) the data in repetition using the plural sheet

cutting function.

Execute the data clear and set the device in the remote mode. When the device receives new data from the host computer, it will

cut the new data.

*

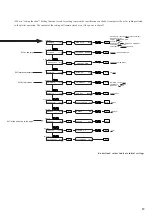
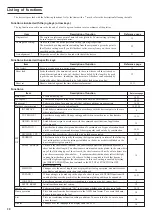
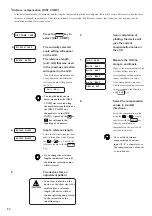
Change-over of cut mode  [CUT MODE]

When smooth curve or fine finish is desired, this function is used to specify the cutting quality.

• Setting value (Make a choice and input it)

QUALITY*1

:

The device conducts cutting giving priority to the cutting quality.

NORMAL

:

The device conducts cutting normally.

HIGHspd*2

:

The device conducts cutting quickly.

*

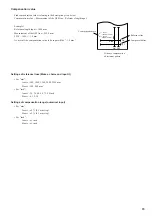
Cutting up to the edge of a sheet. [EXPAND]

When cutting is to be made up to the edge of a sheet, the use of EXPAND function will enable plotting over the pinch roller.

Thus maximum plotting width can be expanded. While inside of the pinch roller is the normal plotting area, expansion of 10 mm

per side, total 20 mm, is possible.

• Setting value (Entering of choice.)

ON: Maximum plotting width is expanded.

OFF: Maximum plotting width is not expanded.

• When EXPAND is selected, dummy cut function for blade orientation adjustment cannot be

used. In order to adjust blade orientation prior to cutting, make test cutting "test cut

[square]".

• Preset value will be effective after sheet detection.

• Footprint by pinch roller and grid roller will remain.

*

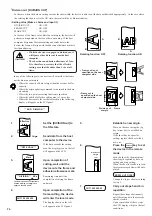
Rotation  [ROTATION]

This function is used to specify the location of origin and direction of the axis of coordinates according to the application

software to be used. After the sheet detection, Carriage will stop at the origin point on either the left edge or the right edge,

depending on the preset value.

• Setting value (Make a choice and input it)

ON

: The device rotates the coordinate axis and relocates the origin at a time.

OFF

: The device does not perform rotation of the coordinate axis.

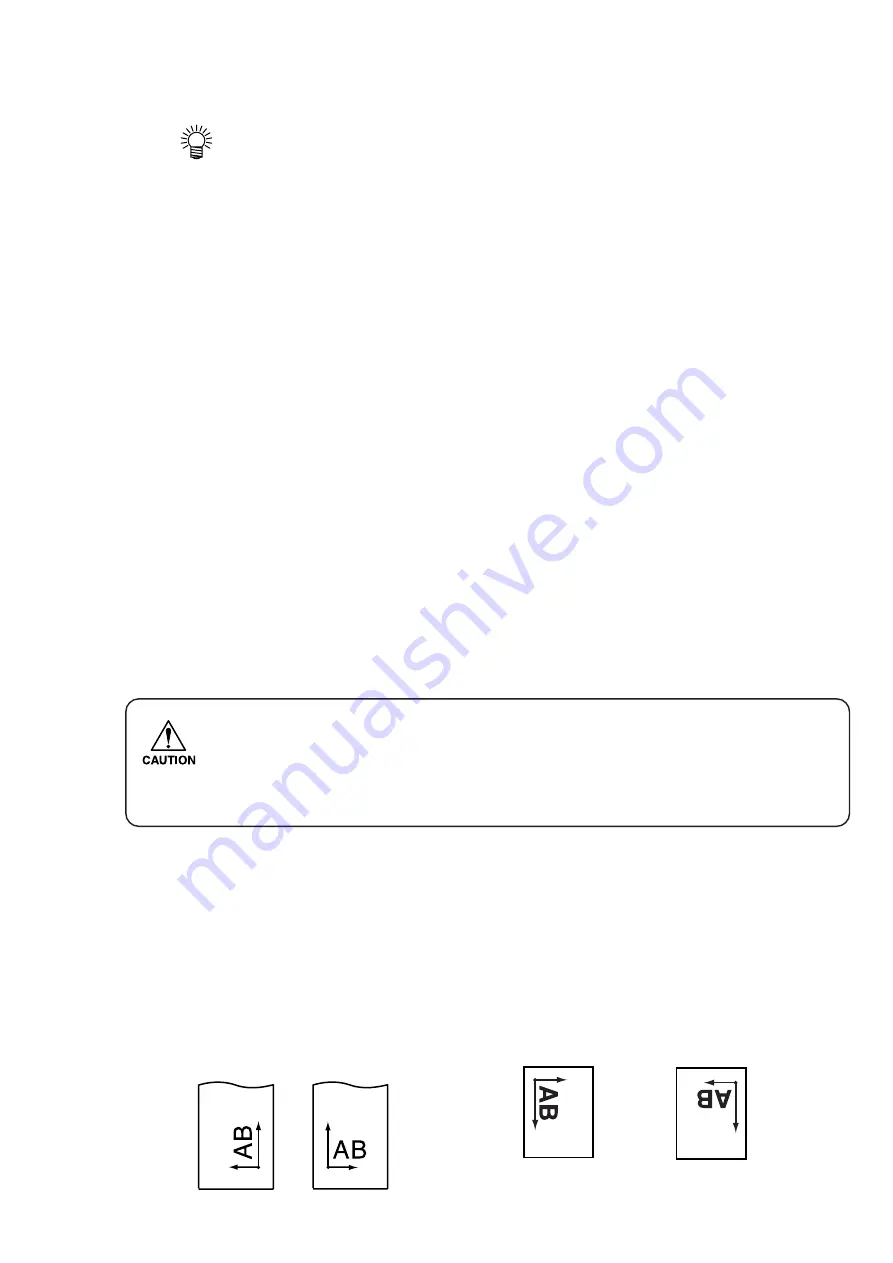
The device has four different axis of coordinates according to how the sheet loading direction and the angle of rotation of the

coordinate axis determined by the rotating function are combined.

Origin

Rotating function: OFF

Origin

The sheet is loaded on

the front of the device.

Rotation: OFF

The sheet is loaded on

the front of the device.

Rotation: ON

A(X)

B(Y)

Origin

A(Y)

B(X)

Origin

Rotating function: ON

*1: Select the “QUALITY” in the following cases:

• Where a character of which size is 10 mm or less

is to be cut

• Where a picture pattern or character that have

many sharp curves is to be cut

• Where fine cutting is to be performed

*2: It should be noted, however, that a pattern with a

rugged edges may be finished in the case where the
data sent from the host computer is excessively minute.
It is recommended in such a case to select the

“HIGHspd” for smoother finish.

Summary of Contents for CG-60st

Page 1: ...RATION MANUAL MIMAKI ENGINEERING CO LTD TKB Gotenyama Building 5 9 41 Kitashinagawa Shinagawa ku Tokyo 141 0001 Japan Phone 81 3 5420 8671 Fax 81 3 5420 8687 URL http www mimaki co jp CUTTING PLOTTER D200417 ...

Page 2: ...tion Manual to avoid danger Be sure to carefully read this Operation Manual fully under stand the description and make yourself familiar to the operation of the device so as to ensure safe use of the device Limited application The device is intended to be used for cutting sheets PVC sheets fluorescent sheets reflective sheets etc and plotting and pouncing on drawing paper Never use the device in a...

Page 3: ...this manual the cursor location that flashes on and off is given with crosshatched Keys are represented as given below both in the illustrations and the text keys END ENTER FEED FUNCTION REMOTE SHEET SET TOOL TABLE OF CONTENTS Foreword 2 Precautions 2 Safety labels 2 How to use the operation manual 3 Checking the accessories 4 Configuration of the main unit 4 Front of the main unit 4 Rear of the m...

Page 4: ...the tool PINCH ROLLER SETTINGS Mark The marks indicate the locations at which the pinch rollers are set Platen The sheet moves along the platen Grid roller The grid rollers operate in combination with the pinch rollers to feed out the sheet Pen line rubber The device performs cutting or plotting on the pen line rubber RS 232C interface connector The RS 232C compatible interface connector It is con...

Page 5: ...cable is connected to the AC inlet Power switch It turn on off the power Roll stay Roll stays support the roll bars Insert the roll bar through the roll sheet Place it on the roll stay Roll bar A roll sheet is placed on the two roll bars Roll holder Put roll sheet from both left and right side During cutting prevent moving to both side ...

Page 6: ...stablish tool conditions 10 REMOTE Remote key It is used to change over the operation mode between the REMOTE mode and LOCAL mode If this key is pressed while the device is in operation the device will be brought to a halt To restart the device repress the key After the detection of a sheet Before the detection of a sheet Detects the width and top end of the sheet In the case where a cut sheet is ...

Page 7: ...ight sides similarly 4 Connecting the interface cables When connecting the cables turn off first the power to the device and that to the host computer which the power cable is to be connected The device comes with two different kinds of interfaces Select either one that matches the host computer RS 232C compatible interface 8 bit parallel interface Centronics compatible Consult with the dealer or ...

Page 8: ...eives 800 Kbytes data under the remote mode When the device received certain data and has not received additional data for two seconds or more Guide for the case where the operating procedure of the 8 bit parallel interface is set to BUFFER In the case where the host computer offers high speed data transfer and it is desired to reduce the time of the host computer occupied by data transfer In the ...

Page 9: ... detection Normally tool conditions appear on the display panel Under the local mode all keys are effective to enable setups The device is able to receive data sent from the host computer however it will not perform cutting plotting Example of display Remote mode The device performs cutting under this mode The REMOTE key and REMOTE keys are effective If you press the REMOTE key during cutting the ...

Page 10: ...ol holder tightened without a tool inside If done the tool holder will deform and it will be difficult to insert the tool Attaching ball point pen on the market As for the ball point pen on the market use the ones with 8 9mm diameter Picture quality may vary depending on the pen used 1 Put the cap on the pen adapter 2 Insert the pen into the pen adapter Insert the pen all the way until the pen tip...

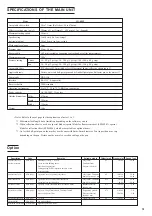
Page 11: ...otating grid rollers can shave the skin or the rotating grid rollers and platen can catch fingers between them Leaf 50 to 711 mm 24 Roll sheet 50 to 670 mm mm inch Sheet width Normal 586 mm x 3 m 586 mm x 51 m Expand 606 mm x 3 m 606 mm x 51 m Maximum cutting area Setting value for origin point switching center Setting value for origin point switching right bottom 10 mm 5 mm or more 10 mm 5 mm or ...

Page 12: ...d less than 5mm it may cause the sheet to get out of its place during sheet feed Set the pinch roller to align with mark of the grid roller Roll stay can be set either in the front or rear of the main body P 7 4 Lower the sheet set lever 5 Press key when the roll sheet is set from the front or press key when the roll sheet is set from the rear to select ROLL Initial operation will be made after de...

Page 13: ...4 Lower the sheet set lever 5 Press key when origin point is set to be on the front side of the sheet or press key when origin point is set to be in the back side of the sheet to select LEAF The device performs the sheet detection then performs a dummy cutting Display panel will indicate the image as shown below The device is not able to detect a leaf sheet of which length is 3 m or more You can f...

Page 14: ... holder center Change the offset value depending of the sheet thickness or the type of blade Change the offset value depending on the sheet thickness or the type of blade If the setting is not appropriate the following symptom may appear If the offset amount is increased square shaped characters will be cut plotted If it is decreased round edged characters will be finished For the cutter supplied ...

Page 15: ... the origin point setting press REMOTE key Then the display will change and the system will be in the remote mode After that data will be transmitted from the host computer New origin 1 Put the machine into local mode 2 Press the TOOL key The cursor will flash on SPEED When the TOOL key is pressed again the tool conditions change 3 By pressing the or key the SPEED can be changed 4 Press the ENTER ...

Page 16: ...e test cutting the device cuts two different types of squares Refer to the figure on the right Check the result of square cutting according to the following steps 1 When test cutting is finished peel 1 off 2 Peel 2 off If the cutter mark is slightly made on the sheet base paper it can be said that the speed and cutter pressure are optimally set Change the settings for cutting conditions if necessa...

Page 17: ...vice during cutting press the REMOTE key once Another press on the same key will allow the device to resume cutting If any function that initiates some action or any operation that can affect the command coordinate system is executed during a pause period the error message shown below will appear on the LCD In the event that the error message appears on the LCD press the REMOTE key to cut the rema...

Page 18: ... range A axis 5 0 1mm step B axis 5 0 1mm step A axis 500 1000 1500 2500mm B axis 200 400mm Japanese English German French Spanish Italian Portuguese Cutting based on the same data is repeated for multiple number of times Transmittied data is cleared Distance is adjusted Test cut Squeare is made Test cut Sample cut is made In the function menu flow chart section major functions of basic operation ...

Page 19: ... OFF 1 0 0 1 DIVISION CUT ON OFF FRAME CUT ON OFF MARK CUT ON OFF NORMAL QUALITY HIGHspd BAUD RATE 9600 CUT MODE NORMAL CENTER ORIGIN ROTATION OFF DIVISIONCUT OFF PRIORITY PANEL SHEETSENSOR OFF STEP mm 1 0 MM INCH MM MM INCHI ENTER ENTER ENTER ENTER ENTER ENTER ENTER ENTER ENTER ENTER ENTER ENTER EXPAND OFF ENTER ENTER ENTER ENTER ENTER ENTER ENTER ENTER Cut mode Origin select Rotation Division cu...

Page 20: ...eet width with divided appropriately PROPRITY This function is used to specify the setting that is given priority in terms of the following tool setting values either the setting established on the device or that established on the host computer is given priority SHEET SENSOR Turns off the sheet sensor function The sheet sensor detects the presence absence of a sheet and the sheet length Two sheet...

Page 21: ...lade orientation adjustment cannot be used In order to adjust blade orientation prior to cutting make test cutting test cut square Preset value will be effective after sheet detection Footprint by pinch roller and grid roller will remain Rotation ROTATION This function is used to specify the location of origin and direction of the axis of coordinates according to the application software to be use...

Page 22: ... 0 0 0 0 0 0 0 0 CUT1 20 050 0 30 0 0 258 0 CUT AREA When the cut area is desired to be nullified Press SHEET SET key and set the sheet once again See pages 12 and 13 Point UL Cut area specified Origin θ θ θ θ θ range is 45 θ θ θ θ θ 45 Outside of this range will be treated as operational error 1 Set the Origin 2 Press either one of the keys Press FUNCTION key Then p will be displayed at the right...

Page 23: ...e data While performing No COPIES function the device will not receive the data from host computer In the event that any error appears on the LCD refer to page 28 1 Send the data to be copied from the computer and perform normal cutting 2 Press the REMOTE key to switch the Local mode 3 Set the origing at the location where copying is to be done 4 Press the FUNCTION key several times select the No ...

Page 24: ...or the calculation method of correction value 1 Press the FUNCTION key to select DIST COMP 2 The currently selected scale setting will appear on the LCD 3 The reference length unit mm that was used in the previous correction will appear on the LCD If no distance compensation has been performed the minimum reference length will appear on the LCD The length display shown below means that the DIST CO...

Page 25: ...ue to be input will be 1 0 mm Settings of reference lines Make a choice and input it For mm A axis 500 1000 1500 2000 2500 mm B axis 200 400 mm For inch A axis 24 36 48 60 72 96 inch B axis 6 12 18 Settings of compensation range numerical input For mm A axis 5 0 1 mm step B axis 5 0 1 mm step For inch A axis 1 inch B axis 1 inch Reference line Distance compensation adjustment pattern Compensated l...

Page 26: ... case where the rotating function is set to the ON state the result will be as illustrated below Setting value Make a choice and input it A B A B Rotating function OFF Rotating function ON Division cut margin Frame cut is not specified on the host computer side Frame cut is specified on the host computer side DIVISION CUT ON OFF FRAME CUT ON OFF MARK CUT ON OFF In the case of the frame cut or divi...

Page 27: ... device taking care not to warp it Cause 2 The lifting lowering of the tool is faulty Remedy 2 Turn the power off and lift lower the tool holder by hand If the tool holder does not go up but remains in the lower position call your distributor on the phone for maintenance The device cannot detect a sheet NO SHEET Cause 1 A transparent sheet or a sheet of which wrong side is black is used Remedy 1 S...

Page 28: ...nt of received data is too large for the device to perform the No COPIES function The sheet is too short in terms of the feeding direction The device has executed an improper operation while it is put on hold X motor has been applied with an over load Y motor has been applied with an over load An overcurrent error in the motor in the lengthwise direction of the sheet has been detected An overcurre...

Page 29: ...r the remote mode during the division cut without establishing an origin or replacing the sheet This message appears in the following cases In the case where the device has received data that contains the origin updating command ZT PG In the case where the sheet width is 1 cm or less In the case where the sample cutting data exceeds the sheet width Message Cause Action A press on the REMOTE key wi...

Page 30: ...e 2 Turn the adjusting knob to adjust the protruding amount of the blade 3 Tighten the locknut to secure the adjusting knob 1 Loosen the locknut 1 Loosen the locknut 2 Turning the adjusting knob draw out the cutter from the holder 3 Replace the blade with a new one using tweezers or the like Lock nut Adjusting knob Lock nut Adjusting knob Adjusting the blade tip of the cutter Adjust the protruding...

Page 31: ...pecial blade for fluorescent sheet SPB 0007 special blade for reflection sheet SPB 0006 which are available as optional items 3 As for the ball point pen on the market use the ones with 8mm 9mm diameter Pen tip position may vary depending on the pen Picture quality may also vary depending on the pen Option Description Code Remarks Suitable media Offset mm Pressure g Speed cm General vinyl use SPB ...

Page 32: ... protection against harmful interference when the equipment is operated in a commercial environment This equipment generates uses and can radiate radio frequency energy and if not installed and used in accordance with the instruction manual may cause harmful interference to radio commnications Operation of this equipment in a residential area is likely to cause harmful interference in which cause ...

Reviews:

Related manuals for CG-60st