background image

PC Configuration

31

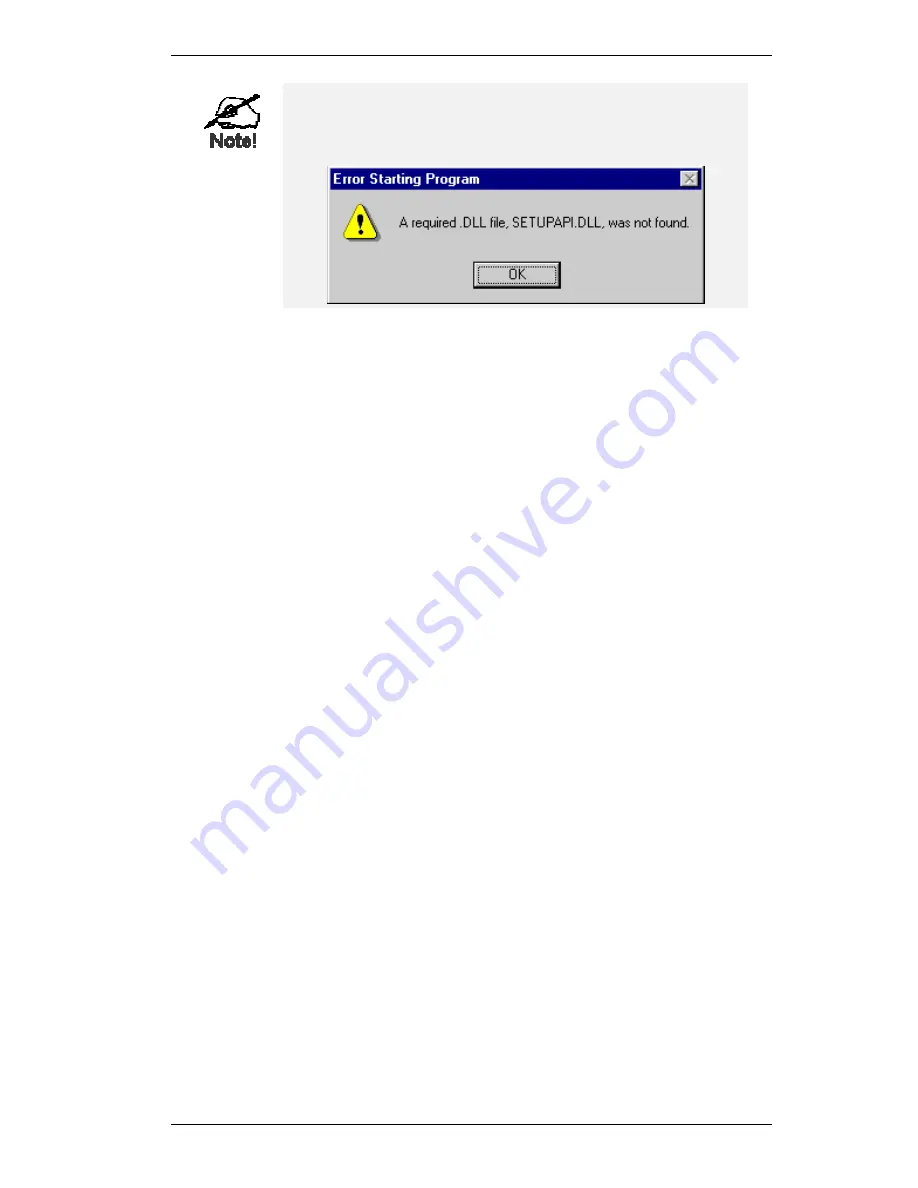
If you see the following error message, either install Internet
Explorer 4 or later, or follow the procedure in the "Trouble
Shooting - Printing" section of Appendix A.

7.


A pop-up message will inform you if the port has been created successfully, and then the
Windows 

Add Printer

 wizard will start.


Select the correct Printer Manufacturer and Model, or use the "Have Disk" option if
appropriate.


If desired, change the Printer name so it indicates the device used (e.g. HP2100 on
SCA43600)


If prompted about Sharing, do NOT enable Sharing.

8.


Installation is now complete. You can now print using this printer.


To install additional Printers, repeat steps 6 and 7.


Use the 

Start

 menu to run this program in future. The default installation is 

Start -

Programs - Broadband Internet Router - Add Port

.

Management


Print jobs can be managed like any Windows printer. Open the 

Printers

 folder (

Start -

Settings - Printers

) and double-click any printer to see the current print jobs.


If the printer attached to the Wireless Gateway is changed, just run this program again, and
select the correct printer.


To delete a port created by this setup program, use the Windows 

Delete Port

 facility:


Right-click any printer in the 

Printers

 folder, and select 

Properties

.


Locate the 

Delete Port

 button. This button is on the 

Details

 or 

Ports

 tab, depending on

your version or Windows.


If the Wireless Gateway's IP Address is changed, and you can no longer print, delete the
port (see procedure above) and re-install it.

Port Options

The options for the 

Print Port Driver

 are accessed via the Windows 

Port Settings

 button.

Use 

Start - Settings - Printers

 to open the Printers folder, then right-click the Printer, and select

Properties

. The 

Port Settings

 button is on the 

Details

 or 

Port

 tab, depending on your version of

Windows.

An example screen is shown below:

Summary of Contents for ShAir Office MIL-W0311

Page 1: ...ShAir Office Multi Function Internet Wireless Gateway Models MIL W0311 MIL W1311 Broadband Internet Access Wireless Access Point Dial in RAS Print Server User s Guide...

Page 2: ...5 DHCP 40 Overview 40 What DHCP Does 40 Using the Wireless Gateway s DHCP Server 40 Using another DHCP Server 40 To Configure your PCs to use DHCP 41 CHAPTER 6 SERIAL PORT 42 Overview 42 Serial Port S...

Page 3: ...ing 83 Dial in Access 86 APPENDIX B ABOUT WIRELESS LANS 88 Modes 88 BSS ESS 88 Channels 89 WEP 89 Access Control 90 Wireless LAN Configuration 90 APPENDIX C AT COMMANDS 91 AT Commands 91 Standard AT C...

Page 4: ...e the printer attached to the Wireless Gateway RAS Dial in Access Remote users can use the Wireless Gateway to connect to the LAN and access LAN resources including the Wireless Gateway s printer and...

Page 5: ...e PPPoE PPP over Ethernet if your ISP uses this method Fixed or Dynamic IP Address On the WAN connection the Wireless Gateway supports both Dynamic IP Address IP Address is allocated on connection and...

Page 6: ...esources Dial back Support For additional security the Dial back feature can be used to hang up and re dial the remote user Both fixed and roaming options are supported Configuration Management Easy S...

Page 7: ...vides an impregnable barrier against malicious attacks Package Contents The following items should be included The Wireless Gateway Unit Wireless PCMCIA Card Power Adapter Quick Installation Guide CD...

Page 8: ...is transmitted or received via the serial RS232 port Rear Panel Figure 2 Rear Panel Serial Port RS232 Serial Port If you have an analog modem or ISDN TA connect it here Printer Port Standard parallel...

Page 9: ...be used to clear ALL data and restore ALL settings to the factory default values To Clear All Data and restore the factory default values 1 Power Off 2 Hold the Reset Button down while you Power On 3...

Page 10: ...Gateway OFF 2 Set DIP switch 1 ON 3 Turn the power to the Wireless Gateway ON 4 Operate DIP switch 1 in the following sequence you have 15 seconds to complete the sequence OFF ON OFF 5 The Wireless G...

Page 11: ...g modem or ISDN TA for serial port usage To use the Wireless Access Point all Wireless devices must be compliant with the IEEE802 11b specifications For shared access to the attached printer the follo...

Page 12: ...cable 5 Connect Modem optional If you wish to use an Analog modem or ISDN TA use a standard serial cable to connect it to the Serial port on the Wireless Gateway 6 Connect Printer Cable Use a standar...

Page 13: ...n Learn more about using DHCP on the internal LAN Chapter 5 DHCP Configure and use the Serial RS232 port either for Internet access or for Dial in Chapter 6 Serial Port Configure various options Set a...

Page 14: ...onnecting to the Wireless Gateway To establish a connection from your PC to the device 1 After installing the Wireless Gateway in your LAN start your PC If your PC is already running restart it 2 Star...

Page 15: ...g Leave the User Name blank Enter the password for the Wireless Gateway as set on the Options screen Navigation Data Input Use the menu bar on the left of the screen and the Back button on your Browse...

Page 16: ...to change these values LAN Settings There is no need to change the LAN settings unless You wish to use a different IP Address range You already have a DHCP Server or a Router on your LAN See Chapter 5...

Page 17: ...value to your ISP if requested If you did not provide this value when first connected there is no need to provide it now LAN Device IP Address IP address for the Wireless Gateway as seen from the loca...

Page 18: ...ss The DNS Domain Name Server IP Address provided by your ISP If required additional DNS entries can be made on the Options screen PPPoE If your ISP uses PPPoE enable this checkbox and enter the data...

Page 19: ...a you have entered on this screen Remember to save before changing to another screen Cancel Cancel any changes you have made since the last Save operation Once this screen is completed the Wireless Ga...

Page 20: ...link on the main menu to reach the Wireless screen An example screen is shown below Figure 6 Wireless Screen Data Wireless Screen Configuration Regulatory Domain It is illegal to use this device in an...

Page 21: ...ys transmit data en crypted using their default key The key number 1 2 3 4 is also transmitted The receiving station will use the key number 1 2 3 4 to determine which key value to use for decryption...

Page 22: ...ay be shown with separators or between each pair of characters Do NOT enter the separators or in this field Access Permission For Wireless Stations listed above This setting determines what type of ac...

Page 23: ...tus Screen LAN Device Name This shows the name of the device IP Address The IP Address of this device as seen by other devices on the Internal LAN Network Mask The Network Mask Subnet Mask for the IP...

Page 24: ...reserved for a particular PC using the Access Control PCs screen The Access Control feature is described in Chapter 10 System System Data This is identical to the data shown on a Diagnostic Printout a...

Page 25: ...rnet indicates an attempt by a LAN user WLAN user or dial in user to access the Internet using a protocol and or port number which was blocked LAN or WLAN indicates a connection attempt from the Inter...

Page 26: ...ice as seen by devices on the WAN This device has 2 IP Addresses one for the local LAN and another for the WAN port Network Mask The Network Mask for the above IP Address Default Gateway IP address of...

Page 27: ...s on the WAN This device has 2 IP Addresses one for the local LAN and another for the WAN port Network Mask The Network Mask Subnet Mask for the IP Address above PPPoE Link Status This indicates wheth...

Page 28: ...PPP Attempting to login to ISP s Server and establish a PPP connection PPP up successfully Able to login to ISP s Server and establish a PPP connection Idle time out reached The connection has been i...

Page 29: ...less Gateway s serial RS232 port The first step is to check the PC s TCP IP settings The Wireless Gateway uses the TCP IP network protocol for all functions so it is essential that the TCP IP protocol...

Page 30: ...the radio button Obtain an IP Address automatically This is the default Windows settings Restart your PC to ensure it obtains an IP Address from the Wireless Gateway Using Specify an IP Address If you...

Page 31: ...DNS is selected If the DNS Server Search Order list is empty enter the DNS address provided by your ISP in the fields beside the Add button then click Add Figure 13 DNS Tab Win 95 98 If your LAN has a...

Page 32: ...ption when prompted Do you want to set up an Internet mail account now 7 Click Finish to close the Internet Connection Wizard 8 Then simply use your Browser FTP client or other Internet client to conn...

Page 33: ...indows Server or each client PC Print jobs will be spooled queued on the Windows Server and can be managed using the standard Windows Server tools Print Port Driver Setup The following procedure is fo...

Page 34: ...int jobs can be managed like any Windows printer Open the Printers folder Start Settings Printers and double click any printer to see the current print jobs If the printer attached to the Wireless Gat...

Page 35: ...dows NT 4 0 Server or Windows 2000 No software needs to be installed Windows NT 4 0 Server Configuration To use LPD printing Microsoft TCP IP Printing must be installed and enabled This can be checked...

Page 36: ...o enable it use this procedure 1 In Control Panel select Add Remove Programs then Windows Components 2 Select Other Network File and Print Services then click the Details button Figure 16 Adding LPD L...

Page 37: ...tup for LPD LPR Printing After configuring the Windows Server client PCs on the LAN can install the new printer The following procedure is for Windows 95 98 ME Windows NT4 0 and Windows 2000 workstati...

Page 38: ...indows You can use the standard Windows Dial up Networking software normally used for Internet access The procedure is as follows 1 Ensure your modem is installed and working 2 Select My Computer then...

Page 39: ...tion 1 In the Dial up Networking window double click the connection to start the dial in process 2 When prompted for a user name and password enter the Name and Password assigned to you this is done o...

Page 40: ...a LaserWriter or compatible is strongly recommended If the printer connected to the Wireless Gateway is NOT a LaserWriter ensure that The Printer Object Type on the Wireless Gateway s Printer Port sc...

Page 41: ...ttons if available OR restart your system LPD Printing on Linux The procedure below may vary according to your version of Linux and X windows shell 1 In your X Windows shell select Control Panel then...

Page 42: ...d on the Options Printer Port screen Wireless Station Configuration This section applies to all Wireless stations wishing to use the Wireless Gateway s Access Point regardless of the operating system...

Page 43: ...in an IP Ad dress automatically instead of DHCP Client The Wireless Gateway can act as a DHCP server Using the Wireless Gateway s DHCP Server This is the default setting The DHCP Server settings are o...

Page 44: ...DHCP 41 To Configure your PCs to use DHCP This is the default setting for TCP IP under Windows 95 98 ME See Chapter 4 Client Configuration for the procedure to check these settings...

Page 45: ...provide RAS Dial in access to your LAN If used for Internet access the WAN Ethernet Port cannot be used Both Internet Access and Dial in Access can be enabled simultaneously but if the modem is in us...

Page 46: ...he speed which is equal to or below the fastest Serial line speed NOT Phone line speed of your modem Available speeds range from 4 8K to 460 8K bps Internet Access Enable Internet Access Use this to e...

Page 47: ...nnect because the telephone line is in use Reducing the Disconnect after Idle Time setting for Internet Access to 1 minute may help See Dial in Users later in this Chapter for details of creating and...

Page 48: ...configure your modem or ISDN The Initial String can only be changed for the Other modem type See Appendix C AT Commands for further details about the required Initial String settings and standard AT c...

Page 49: ...nd you changed the Initial String you can NOT use Save You must use Save as Other instead Save as Other Assign the data shown on screen to the Other modem type regardless of the modem selected on the...

Page 50: ...e access the Internet through the Wireless Gateway just like LAN users The Dial in user can print to the printer connected to the Wireless Gateway just as if they were on the LAN Controlling Dial in A...

Page 51: ...Users This lists all users who do not have Dial in access If you have not created any users this list will contain the pre defined guest user Use the Create button on this screen to create new users a...

Page 52: ...field then click the Create button You will then see the User Details screen where you can enter the other details for this user User Details Screen This screen is displayed in the following situatio...

Page 53: ...must be terminated by the remote user Call back Select the desired option Disabled The user can simply dial in the Wireless Gateway will not hang up and call back Roaming After providing their name a...

Page 54: ...p Button This button will display Dial if there is no connection and Hang up if a connection exists Use this to dial the ISP or terminate an existing connection If the Serial Port is Disabled this but...

Page 55: ...dem This setting can be changed on the Serial Port screen Log Connection Log This displays connection details See below for a description of the most common items in this log Connection Log This shows...

Page 56: ...occur at the end of a session or an error condition Try to hang up Attempting to get the modem to hang up Time out There was no response from the modem No carrier No answer The number dialed did not a...

Page 57: ...reen Password Once a password is entered it is required in order to change the device configuration Pass words are case sensitive and can be up to 8 alphanumeric characters no spaces or punctuation To...

Page 58: ...Trivial FTP can be used to upgrade the firmware in the Wireless Gateway However this is not normally required there is a Windows utility available for this purpose Remote Management This feature allo...

Page 59: ...tic routing table Configuration is only required if your LAN contains other routers Refer to Chapter 8 Routing for further details about Router configuration and using the Router screen Printer Port T...

Page 60: ...ogical Printers No L1 L2 L3 There are 3 Logical Printers Ports named L1 L2 and L3 These names can not be changed and must be used when select ing the logical printer from your Unix system Pre string H...

Page 61: ...tware Router enable RIP on the Wire less Gateway and ensure the following Windows 2000 settings are correct Open Routing and Remote Access In the console tree select Routing and Remote Access server n...

Page 62: ...the first 3 fields of this Destination IP Address The 4th last field can be left at 0 Network Mask The Network Mask used on the remote LAN segment For class C networks the standard Network Mask is 25...

Page 63: ...lled on the same LAN segment as the Wireless Gateway This router requires that the Default Route is the Wireless Gateway itself Typically routers have a special entry for the Default Route It should b...

Page 64: ...Address 192 168 0 100 Wireless Gateway s local Router Interface LAN Metric 1 Entry 2 Segment 2 Destination IP Address 192 168 2 0 Network Mask 255 255 255 0 Standard Class C Gateway IP Address 192 16...

Page 65: ...atures are provided Special Internet Applications URL Filter Virtual Servers DMZ This chapter contains details of the configuration and use of each of these features Advanced Internet Screen This scre...

Page 66: ...e to function correctly At any time only one 1 PC can use each Special Application Special Applications Screen This screen can be reached by selecting Special Internet Applications An example screen i...

Page 67: ...provider Select Entry Name This drop down list shows all Special Applications which have been defined Get Data Button After selecting the desired entry click this button to view its current settings...

Page 68: ...is sent to you Buttons Clear Form Clears all data ready for input of a new entry Add Add a new entry to the Special Applications database using the data shown on screen The name shown in the drop dow...

Page 69: ...s the address of the site e g www microsoft com Path This specifies a certain file on the Server e g public docs index html Parameters This is the data which is sent submitted to the Server when you s...

Page 70: ...trash com or simply a string e g ads Any URL which contains ANY entry ANYWHERE in the URL will be blocked Buttons Delete Delete All Use this buttons to delete the selected entry or all entries as requ...

Page 71: ...illustration both Internet users are connecting to the same IP Address but using different protocols To Internet users all virtual Servers on your LAN have the same IP Address This IP Address is allo...

Page 72: ...n WAN IP Address Current IP Address This shows the IP Address which Internet users must use to connect to any of your Virtual Servers To Internet Users ALL of your Virtual Servers have the same IP Add...

Page 73: ...that its IP Address is NOT within the address range allocated by the DHCP Server Reserve an IP Address for the Server PC in the DHCP Server using the Access Control PC screen For each entry the PC mu...

Page 74: ...Address This shows the IP Address which Internet users must use to connect to any of your Virtual Servers To Internet Users ALL your Virtual Servers have the same IP Ad dress This IP Address is alloca...

Page 75: ...d in the drop down list regardless of whether its details are shown on screen Update Update the Virtual Server entry selected in the drop down list using the data shown on screen List All List all Use...

Page 76: ...Firewall in this device is disabled creating a security risk You should use this feature only if the Special Applications feature is insuffi cient to allow an application to function correctly This fe...

Page 77: ...HCP Server using the Access Control PC screen WAN IP Address WAN IP Address This is the IP Address that Internet users must use to connect to the DMZ PC This IP Address is allocated by your ISP It is...

Page 78: ...s is optional Access Control Log This log is accessed from the Access Control Log on the Status screen It shows the attempted accesses which have been blocked This log can be used to track the operati...

Page 79: ...y Group 1 Select the group from the drop down box 2 Enter the required data as described below If necessary click Clear Form to remove the existing in formation shown on screen 3 Click the Save button...

Page 80: ...TCP Packets to Discard and UPD Packets to Discard column Packet Filter Table Applications to Block Any items checked will be blocked Users will not be able to use the application TCP Packets to Discar...

Page 81: ...ed below 3 Click Add Note The name shown in the drop down list is ignored Delete an entry 1 Select the entry from the drop down list 2 Click Delete Modify Edit an entry 1 Select the entry from the dro...

Page 82: ...CP server set on the Device Internal LAN Port screen Security Group Select the security group for this PC If you only wish to reserve an IP Address and are not using the security access control featur...

Page 83: ...ered out by entering the following data TCP Filters Name Enter a descriptive name for this entry Port No Enter an integer representing the Port Number for this type of packet This information can norm...

Page 84: ...ould be set to 255 255 255 0 to match the Wireless Gateway In Windows you can check these settings by using Control Panel Network to check the Properties for the TCP IP protocol Internet Access Proble...

Page 85: ...s Station access permission on the Wireless Gateway s Wireless screen is set to Only allow access if on this list then each Wireless station must have its address correctly entered To see if radio int...

Page 86: ...sing Windows 95 and the Printing software installed and ran but when I selected a port and clicked Add the printer was not installed Solution 2 Try installing the printer using the standard Windows to...

Page 87: ...Gateway User Guide 84 7 Click the Add Port button On the resulting screen select Other then Shared Port as the port to add as shown below 8 Click OK to see the Print Port Configuration screen as show...

Page 88: ...Problem 3 On my Macintosh the Wireless Gateway s printer is not listed Solution 3 Check the following Ensure the network connection is working If you can connect to the Wireless Gateway for configura...

Page 89: ...ndix C for more information on AT commands If the call is answered but no connection is established then ei ther the modems are unable to negotiate a connection or the login to the Wireless Gateway ha...

Page 90: ...r if the Wireless Gateway s DHCP Server is Disabled In this situation the DHCP Server must still allocate an IP Address to the Dial in user To set this IP Address 1 Connect to the Wireless Gateway 2 O...

Page 91: ...e only with Wireless Stations which are set to Infrastructure mode BSS ESS BSS A group of Wireless Stations and a single Access Point all using the same ID SSID form a Basic Service Set BSS Using the...

Page 92: ...PC s wireless card does NOT automatically scan all wireless channels then you must manually set it to the Channel used on the Access Point WEP WEP Wired Equivalent Privacy is a standard for encrypting...

Page 93: ...guration To allow Wireless Stations to use the Access Point the Wireless Stations and the Access Point must use the same settings as follows Mode On client Wireless Stations the mode must be set to In...

Page 94: ...DN TA uses the commands above then the Initial String would be as follows AT F B1 K3 C1 D2 S0X4 Notes The command AT F is used to set the modem to the factory default settings to ensure a consistent s...

Page 95: ...ile Then click OK and exit 6 Use Dial up Networking to make your on line connection normally A log file MODEMLOG TXT will be created in your Windows directory 7 Use Notepad or another editor to read a...

Page 96: ...22 for 1200 bps communication B1 Select Bell 212A for 1200 bps communication ATD Dial number and options that follow P Pulse dial T Tone dial Pause for a specified time Return to command state after...

Page 97: ...AT Vn ATS0 n Number of rings required before modem answers n 0 disables auto answer ATSr b n Set bit b of S register r to n n 0 or 1 ATSr b Inquiry bit b of S register r ATSr n Set S register r to val...

Page 98: ...ing Cn Carrier Detect operations C1 Carrier Detect tracks presence of carrier Dn Data Terminal Ready DTR operations D2 DTR off causes modem to hang up F Load the default factory settings Kn Data flow...

Page 99: ...ming support Printer Port 1 parallel printer port Serial Port 1 RS232 9 pin male port LEDs 9 Power Adapter 12 V DC External FCC Statement This device complies with Part 15 of the FCC Rules Operation i...

Page 100: ...4835GHz Industrial Scientific Medical Band Channels Maximum 14 Channels depending on regulatory authorities Data Rate 11 5 5 2 1 Mbps Coverage Area Closed Space 25m 11Mbps 100m 5 5Mbps or lower Power...

Reviews: