background image

21

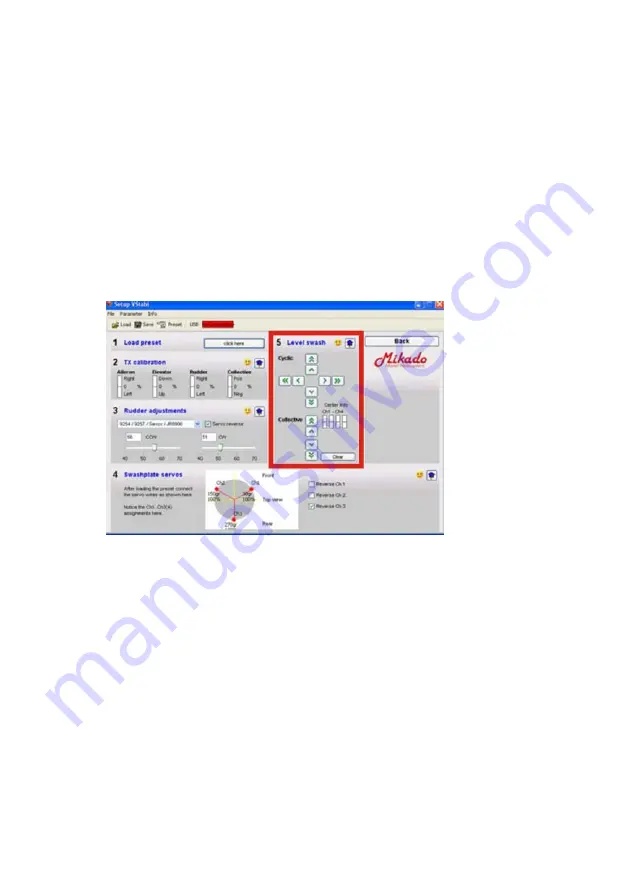
Step 5: Adjust the Swashplate

To achieve a geometrically correct mechanical setup of the swash
plate with perfectly aligned servo arms, it is necessary to adjust the
push rods.

The swash plate needs to be centered and level within the pitch travel
range. Fine-tuning can be done with the collective buttons in step 5,
located below the cyclic buttons. Then ensure that the swash driver
is in mid position of its travel range and level with the axis of the
spindle shaft.

Now that the swash plate is exactly centered and level, you can
adjust the control rods to the blade holders. The rods need to be of
equal length and the blade grips need to be exactly at 0° position.

Now double-check the collective travel. If the direction is is incorrect,
the reason may be that the bladeholders are not properly installed
and need to be turned by 180°. Check back with the assembly manual,
if nessecary.

Maximum and minimum collective pitch needs to be measured by
using a pitch gauge.  The pitch maximum and pitch minimum values
need to be obtained in setup mode.

Summary of Contents for VBAR

Page 1: ...Manual V4 05 VBar...

Page 2: ...t phone 49 0 331 237490 email info mikado heli de This manual must be read in its entirety before installing and operating the V Bar System CONTENTS 1 General Information 3 2 Mounting the VBar on your...

Page 3: ...to a conventional rotor head We will mention just a few of the important ones here Firstly as the digitally controlled rotor head has fewer mechanical components weight and air drag are reduced Second...

Page 4: ...ger persons animals or things You must refer to the safety recommendations included in section 15 of this manual 2 Installation The VBar System includes the following components Central Unit Gyro Sens...

Page 5: ...ree individual sensor elements one for elevator one for aileron and one for the rudder The first two of these sit in perpendicular fashion with respect to each other This is why the gyro sensor must b...

Page 6: ...not use the VBar in this helicopter For mounting the gyro sensor it is recommended that you use the piece of adhesive foam included with the VBar kit V Bar power supply very important Please note With...

Page 7: ...nd software which allows for programming it via a PC or Laptop You can also use a mobile phone blue tooth module Mikado item no 4056 or the special VBar control panel Mikado item no 4145 You can switc...

Page 8: ...ly compatible with the most common Windows operation systems There is one exception namely the 64 bit version of Windows Vista If you are using Windows Vista 64 bit or an Apple MAC or Linux System ple...

Page 9: ...puter using the USB cable Now turn on your transmitter and receiver Your Windows program will recognize the new hardware and you will see this window After about 5 seconds the VBar is ready to accept...

Page 10: ...e set to 100 and servo centers at mid position Also make sure all subtrims are set to zero and all servo directions to normal Reset dual rate to 100 and expo to linear Turn off any tail mixers that ap...

Page 11: ...Tail Servo FUTABA Receiver Aileron Servo right Aileron Servo left Elevator Servo Channel 6 Channel 2 Channel 4 Channel 1 B Connecting the VBar with a Satellite Reciever There are two types of Satelli...

Page 12: ...re automatically loaded onto your PC when installing the Mini VBar PC software Now you must select the use of the satellites and their type in the PC software and activate their use as receivers To do...

Page 13: ...tl no more than two seconds Then start the binding procedure on your radio During binding the LEDs in your satellites will flicker Once the binding process is completed the LED lights will remain on w...

Page 14: ...e defined set up options here you need to carry out a few extra steps Then in each section click on the little blue doctors hat where applicable for additional set up options By clicking the smiley yo...

Page 15: ...ate equipment What s important later is the correct alignment of the sensor and the direction of the swash plate movement Otherwise the preset will not function correctly If there is no Preset for you...

Page 16: ...g further adjustments To ensure correct and troublefree operation of the entire system the transmitter needs to be calibrated The stick inputs must match certain directions center positions and overal...

Page 17: ...ervo is not listed please contact our support team on the online VBar site www vstabi de to obtain the appropriate setting In your VBar software you can adjust the servo direction and the limits for b...

Page 18: ...click on the little blue doctors hat The red ball in the diagram represents the nose of the helicopter Turn the heli around its vertical axis by 90 degrees The ball must move in the same direction a...

Page 19: ...blade rotation the compensation moves the tail boom to the left and the nose will be moved to the right And for counterclockwise main blade rotation the model s nose will be moved to the left while t...

Page 20: ...In setup mode all servos are decoupled from control This enables mechanical adjustments because the control loop is rendered inactive Now set all sticks to center position Mount the servo arms as clo...

Page 21: ...ge and level with the axis of the spindle shaft Now that the swash plate is exactly centered and level you can adjust the control rods to the blade holders The rods need to be of equal length and the...

Page 22: ...eparations you must install the 3 axis gyro sensor It has to be mounted in accordance with the tool tip The important aspects are placement and alignment The sensor needs to be aligned exactly horizon...

Page 23: ...t check both positive and negative Collective pitch Elevator up and down andAileron right and left You must also check the sensors are moving the swash plate in the right direction Elevator To do so m...

Page 24: ...te box At the flight line turn on your heli with the collective stick at full positive Use throttle hold to prevent the motor from starting until you are ready to fly Wait until you see a double twitc...

Page 25: ...adjusts the maximum agility of the heli on both the elevator and aileron axis If your heli reacts to fast reduce the value If your heli reacts to sluggishly increase the value The bar Gyro Gain contr...

Page 26: ...should not be so high that the tail starts wagging But with VBar a much lower value can translate into an excellent tail performance 11 Tail Settings 12 Bank Switching If you want to compare different...

Page 27: ...Control Panel The VBar Control Panel contains the set up menu for the pre installed setups as well as for the Expert software The menus are structured very similar to how it is done in the PC softwar...

Page 28: ...ity about what you are doing you must stop immediately you must have that question completely resolved first You must also stop building or operating the model if you find that the manual is unclear t...

Page 29: ...swashplate parameters You can do this without using the software simply by lifting up the helicopter at its rotor head after it has been turned on and initialized To test effective direction simply mo...

Page 30: ...If you do not want to use a Mikado rotor head in your helicopter you need to check a few mechanical points in the rotor head before using the VBar 1 The blade holders must be installed such that the...

Page 31: ...LOGO 14 600 item no 4042 VBar rotorhead upgrade for LOGO 14 20 24 600 item no 4053 VBar rotorhead w 12mm blade holders LOGO 10 500 item no 4041 V Bar rotorhead upgrade for LOGO 10 500 item no 4052 Co...

Page 32: ...on max 150mA Operating temperature 15 to 60 Celsius Processors 2 DSP 32 60 Mhz 1 Absolute Limit Exceeding these values may cause damage Mikado Modellhubschrauber Friedrich Klausing Str 2 14469 Potsdam...

Page 33: ...clude that the problem s origin is easy to fix This saves you time and cost If you do need to send in the VBar for check up or repair please send both the main unit and the gyro Please include a phone...

Page 34: ...city Motor and Speed Controler Gyro sensor mounting soft or hard how many pads Damage report Which unit is defect Mainboard O Gyro Sensor O How did the defect occur Please describe the malfunction If...

Reviews: