Operating instructions
for the G880dishwasher
To prevent accidents and reducethe risk of damaging the machine,
ö
read the Operating Manual
before
installing or using
the machine.
M.-Nr. 04 873 731
Page 1: ...Operating instructions for the G880 dishwasher To prevent accidents and reduce the risk of damaging the machine ö read the Operating Manual before installing or using the machine M Nr 04 873 731 ...
Page 2: ...2 ...
Page 3: ...g the Water hardness level 16 Checking the programmed Water hardness level 17 Selector settings 17 Filling the salt reservoir 18 Salt indicator 19 Bypassing the Salt indicator lamp 19 Adding rinse aid 20 Setting the dosage 21 Loading the dishwasher 22 Loading examples 23 Upper basket 23 Bottom basket 23 Cutlery tray 24 Adjustable cup racks 25 Coffee bar 25 Adjusting the upper basket 26 Items not s...
Page 4: ...are 35 Cleaning the filters in the wash cabinet 35 Cleaning the spray arms 37 Cleaning the drain pump and non return valve 38 Cleaning the water intake filter 39 Cleaning the wash cabinet 40 Cleaning the door and the door seal 40 Cleaning the control panel 40 Cleaning the door panel 40 Problem solving guide 41 After sales service 43 Accessories 44 Dishwasher installation 47 Electrical connection 6...
Page 5: ...e installa tion The front is designed to accept a custom made panel matching the exist ing kitchen cabinets Installation directions can be found in the Installation chapter 2 U dishwashers The built under U dishwashers use the integrated i dishwashers as the basic machine By using a GDU decor kit the i dish washer can be converted into a U model dishwasher GDU installation instructions are in clud...
Page 6: ...ddle spray arm 5 Middle spray arm 6 Water hardness selector 7 Lower spray arm 8 Four height adjustable levelling legs 9 Combination filter 10 Salt reservoir 11 Dual compartment detergent dispenser 12 Rinse aid reservoir with dosage selector 13 Data plate Note Lower basket is not shown Guide to the appliance 6 ...
Page 7: ...ntrol panel 14 On Off button 15 Door release 16 Child safety lock 17 Top Solo button 18 Check indicator lamps 19 Program sequence display 20 Program and temperature selector knob Guide to the appliance 7 ...
Page 8: ...ding model only install the dishwasher under a continuous countertop which is secured to the cabinetry The dishwasher must be electri cally grounded Install the dish washer as per the included Installation instructions Use only powder detergents and liquid rinse aids recommended for dishwashers Never use gels or liquid detergents Do not use commercial or indus trial grade detergents as these may c...
Page 9: ...om service or dis carding it This will help protect child ren from injury or accidentally locking themselves in Under certain conditions hy drogen gas may be produced in a hot water system that has not been used for two weeks or more HYDROGEN GAS IS EXPLOSIVE If the hot water system has not been used for such a period turn on all hot water faucets and let the water flow from each for several minut...
Page 10: ...r uniquement le lave vais selle sous un comptoir continu qui est fixé à des meubles adjacents Vous devez mettre le lave vaisselle à la terre Installer le lave vaisselle en observant les instructions pour l in stallation ci jointes Utiliser uniquement des détersifs et des produits de rinçage recom mandés pour les lave vaisselle Ne pas utiliser de détersifs de qualité commerciale ou industrielle pui...
Page 11: ...vaisselle Enlever la porte et débrancher le lave vaisselle avant de le faire rép arer ou de le jeter afin d empêcher les enfants de se blesser ou de s enfermer dans l appareil par accident Dans certaines conditions un sys tème d eau chaude qui n a pas été utilisé pendant plus de 2 semaines peut dégager de l azote L AZOTE EST EXPLOSIF Si le système d eau chaude n a pas été utilisé pend ant une tell...
Page 12: ...ine has been made child resistant as outlined in the Import ant safety instuctions before disposing of the appliance Energy saving washing These dishwashers are exceptionally ef ficient in their use of water and elec tricity You can make the most of your appliance by following these tips Make full use of the baskets without overloading the dishwasher for the most economical washing For small loads...
Page 13: ...ed program will not start for approximately 7 minutes During these 7 minutes the Water Softener reactivation program will run and the Softener indicator lamp will be on Add the correct amount of detergent Generally one to two tablespoons of detergent will be adequate for most wash loads Not enough or too much detergent can lead to poor wash re sults Cleaning results vary between deter gents If you...
Page 14: ... To close the door Push the baskets in Lift the door and push until it clicks into position Child safety lock The child safety lock is designed to deter children from opening the dish washer door Use the provided key to turn the child safety lock to the desired set ting Horizontal setting The door is locked Vertical setting the door can be opened Opening and closing the door 14 ...
Page 15: ...g the adjacent table To ensure a steady supply of soft ened water the built in water sof tener must be 1 Correctly set 2 Reactivated with salt when depleted Where the water hardness fluctuates e g 8 17 gr gal always set the ma chine to the higher value 17 in this example Programming Table gr gal ppm Program knob setting water hardness selector setting 1 4 20 70 NORMAL 65 150 6 5 6 90 110 NORMAL 55...
Page 16: ...process Ignore the Salt and Rinse aid lamps Using the Table on the previous page set the Program selector knob to the position that corresponds to your water hardness level then press the Top Solo button to lock in the selection Example For a water hardness of 6 gr gal set the Program selector knob to NORMAL 55 130 then press the Top Solo button Return the Program selector knob to the STOP positio...
Page 17: ...programmed hardness level is reached When the STOP position is reached turn off the machine Selector settings The water hardness selector in the wash cabinet is factory set to posi tion 6 This needs to be changed if your water hardness level is between 36 65 gr gal refer to following table gr gal ppm water hardness selector setting 1 35 20 630 6 36 47 650 850 4 48 65 860 1170 5 66 70 1190 1260 6 f...
Page 18: ... sure that only water softener reacti vation salt of the proper grain size is used To fill the salt reservoir Remove the lower basket Unscrew and remove the salt reser voir cap Before adding salt for the first time Fill the reservoir with approximately 2 quarts 2 l of water Place the funnel provided over the salt reservoir Carefully fill with salt As it is filled water will run out Clean any exces...
Page 19: ...d The Salt 9 indicator lamp has also been designed for future program up dates PC See the After Sales Ser vice section for further details Bypassing the Salt indicator lamp In order to bypass the salt indicator lamp you will need a screwdriver and needle nose pliers Remove the salt reservoir cap Looking into the salt reservoir you will see the top of the float chamber on the right hand side b Usin...
Page 20: ...vertently filling the rinse aid reservoir with detergent will always damage the reservoir Only pour liq uid rinse aid formulated for residen tial dishwashers into the reservoir Adding rinse aid Add Rinse Aid before the first use and anytime the Rinse Aid indica tor lamp comes on Press the button in the direction of the arrow until the flap springs open Adding rinse aid 20 ...
Page 21: ...ear it click shut Failure to close it all the way will allow water to enter the reservoir during the wash program Wipe up any spilled rinse aid The flap will remain closed during nor mal operation Setting the dosage The dosage selector comes factory set to 3 It can be adjusted from 1 to 6 de pending on your requirements This set ting dispenses approximately 3 ml rinse aid per program Use a higher ...
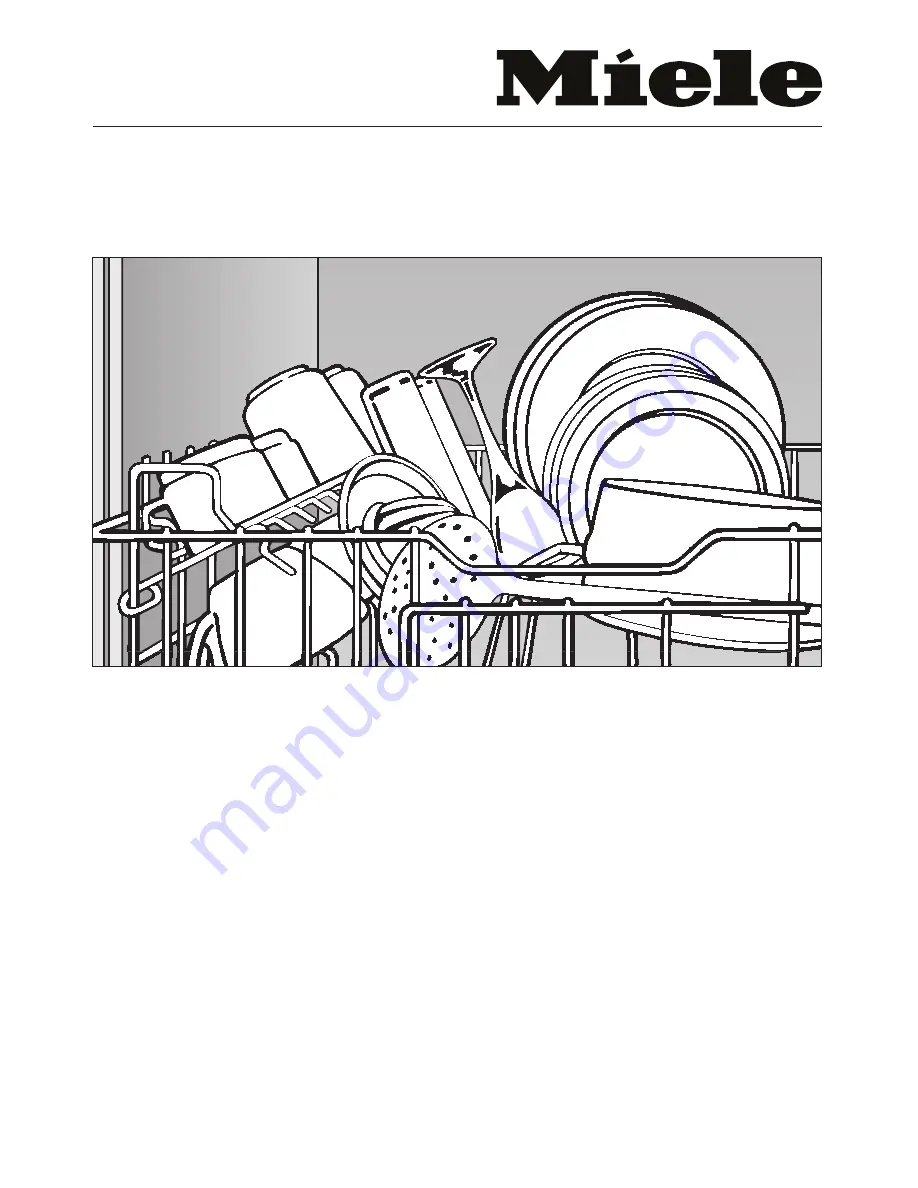
Page 22: ...ed under neath the rack The spray arms must not be blocked by items which are too tall or hang through the baskets If in doubt test for free movement by manually rotat ing the spray arms Some food items may contain natural dyes that can discolor plastic items in the dishwasher e g carrots to matoes ketchup etc The stability of plastic items is not affected by this discoloration Some loading exampl...
Page 23: ...e insert is used The plate inserts on the left and right rear of the lower basket are removable To remove push the handles of both in serts toward the inside of the basket Once removed the open area can ac commodate large pots casserole dishes or accessory inserts see Ac cessories Height limit The height guard at the base of the upper basket is there to protect the middle spray arm No object place...
Page 24: ...n rotate freely after the tray is slid in otherwise the rotation of the spray arm may be inadequate for a thorough cleaning The cutlery tray insert is removable Spoon heads should be placed so that water can run off them freely Place the heads of cutlery with round or oval handles in the holders This will secure them during the wash cycle Place spoons so that their heads are se cured in at least o...
Page 25: ...e bar To allow water to run off of the bottom of coffee mugs place them at a slant on top of the coffee bar The bar can also be used as a separ ator between two rows of glasses to protect them and keep them from lean ing against each other To stack wide items flip the bar to the right Loading the dishwasher 25 ...
Page 26: ...either side of the basket Adjust the basket up or down to the desired height Tighten the locknuts The upper basket can also be set at an angle with one side high and the other side low Depending on the setting of the upper basket the following dishware dimen sions can be accommodated Upper basket position Upper basket diameter Lower basket diameter Top 8 20 5 cm 12 30 cm Middle 9 22 5 cm 11 28 cm ...
Page 27: ...ly cleaned with a silver polish may be damp or spotted at the end of a program where water has adhered to the pol ish This can be rubbed off with a soft dry cloth Silver that has pre viously been cleaned in an immer sion dip is usually dry at the end of a program but may discolor tarnish Colors on dishware that have been painted over the glaze may fade over time Clouding may occur on glasses after...
Page 28: ...elected In this case extra detergent can be added to the small compartment labeled I in the center of the dispenser Dishwasher detergents contain irri tants and corrosive ingredients They can cause burns in the mouth and throat if swallowed or inhibit breathing Keep children away from detergent and from the dishwasher when the door is open To avoid the danger of children com ing into contact with ...
Page 29: ...am Use this program for lightly to nor mally soiled dishware A warm water intake temperature of the incoming water of at least 45 C 115 F is necessary for this program Water is not heated in this program Only 0 10 kWh of electricity approx is used during this cycle The drying result may not match that of a program with a full drying cycle The higher the temperature of the in take water the better ...
Page 30: ...particles of food and very heavy soiling 20 100 120 4 ECONOMY 55 C 130 F for full loads with very light soiling e g coffee cups or for half a normal everyday load 50 3 50 3 CHINA CRYSTAL 45 C 115 F Gentle program for lightly soiled and heat sensitive tableware 50 3 50 3 SHORT 45 C 115 F Quick program for lightly soiled dishware e g party dishware 50 3 50 3 RINSE HOLD For rinsing dishes when a comp...
Page 31: ... X X X X 1 1 14 3 7 99 X X X X X 0 9 19 5 0 106 X X X X X 1 2 19 5 0 129 X X X X X 1 2 19 5 0 111 X X X X X X 0 1 24 6 3 59 X X X X X X 1 6 24 6 3 131 X X X X 0 8 6 14 3 7 75 X X X X X 0 5 19 5 0 64 X X X 0 6 14 3 7 36 X 0 06 5 1 3 11 5 Average consumption values are for a water hardness of up to 17 gr gal 6 With half loads 7 place settings X cycle used Program chart 31 ...
Page 32: ...program stage reached by the dishwasher Note When required the water softener reactivation process is performed before the wash program It may last several minutes During this process the Softener indicator will be on The hardness of the water supply will dictate how often after how many washes the water softener needs to be reactivated For example with a water hardness of 21 gr gal reactivation w...
Page 33: ...urns and scalding exists Once the door has been opened allow 20 30 second for internal temperature to equalize before closing it again and then make sure it clicks into place Changing a program A program can be changed at any time The new program will start as soon as it has been selected Turn the program selector knob to the desired program If you wish to start the new program at its beginning Tu...
Page 34: ...s bowls or other hol low containers in the bottom basket Adjusting the upper basket to its lowest position will allow it to accommodate larger plates Because smaller amounts of dishware are being washed the amount of deter gent used can be reduced accordingly Using Top Solo will also save water and energy For example using Top Solo with the NORMAL 55 C 130 F program uses 3 2 gallons 12 liters of w...
Page 35: ...be removed imme diately upon discovery Use caution when cleaning the fil ters non return valve or drain pump as glass or bone splinters may be caught in the bottom of the wash cabinet Turn the handle counterclockwise to release the filters Lift the combination filter out of the machine Remove any coarse par ticles and rinse it under running water A nylon brush can be used if necessary Cleaning and...
Page 36: ...r by pull ing back on the locking tab After cleaning make sure that the coarse filter cover is properly locked in place Replace the combination filter so that it lies flat in the base of the wash cabinet Secure it by turning the handle clockwise Cleaning and care 36 ...
Page 37: ...rm to remove it Dishwashers with cutlery basket Unscrew the upper spray arm Dishwashers with cutlery tray Pull out the cutlery tray Push up on the upper spray arm to engage the tooth wheel mechanism and then unscrew the spray arm To clean the spray arms use a pointed object to push the the food particles into the jets Rinse under running water to com plete the process After cleaning replace the sp...
Page 38: ...filter Use a jug or bowl to scoop the water out of the wash cabinet Tilt the locking clamp to the side Pull out the non return valve Rinse the non return valve under run ning water The drain pump is situated under the non return valve see arrow Before replacing the non return valve check to make sure that nothing is ob structing the drain pump Spin the im peller several times in both directions it...
Page 39: ...supply unplug it or shut off the circuit breaker Turn off the main shutoff valve and unscrew the intake hose Carefully remove the rubber seal Remove the filter using needle nose pliers and clean it by rinsing under running water Replace the filter and seal Make sure they are seated correctly Screw the intake hose back onto the water valve making certain it is not cross threaded Slowly turn on the ...
Page 40: ...due and drink spillage should be wiped from the sides of the dishwasher door These areas are not normally cleaned by water from the spray arms Cleaning the control panel The control panel can be cleaned using a damp cloth and mild deter gent Do not use abrasive all purpose or glass cleaners as their use may damage plastic surfaces Cleaning the door panel Plastic laminate panels should be cleaned u...
Page 41: ... filters in the wash cabinet are not clean see Cleaning and care The spray arm jets are blocked see Cleaning and care The wrong program was selected see Program chart Shortly after starting a program the Intake Drain indicator lamp flashes The water shutoff valve is closed Open the valve The dishwasher should continue the program If the program does not continue Turn the program and temperature se...
Page 42: ...NERGY SAVER program re quires a water supply temperature of at least 45 C 115 F If the incoming water is less than this temperature the IntakeDrain lamp illuminates see also Program selection If your hot water system has been used recently not enough hot water may have been avail able to adequately clean the dishes If necessary repeat the program If the Intake Drain lamp lights again select a diff...
Page 43: ...f the door Program update function PC The Salt indicator lamp has a second function It allows a technician with the proper equipment to change the pro gramming of the dishwasher to take ad vantage of the latest technological de velopments For instance if a detergent becomes available that gives good wash results using only cold water the wash pro grams can be changed to take advant age of this dev...
Page 44: ... the bottom basket provides the ability to safely wash glasses in the bottom basket Only available for models with remov able inserts in the lower basket Glass insert for the upper basket provides special support for long stemmed glassware Decor panel kit GDU to change an i model into a u model dishwasher Side mount brackets For installing a dishwasher under Co rian or granite countertops These an...
Page 45: ...Installation instructions 45 ...
Page 46: ...ountertop 48 3 Installing the control panel 50 4 Aligning the control panel with the drawer fronts 51 5 Installing the custom door panel 51 6 Adjusting the door springs 55 7 Securing the dishwasher to the countertop 55 8 Installing the toekick 57 Electrical connection 60 Plumbing 62 Technical Data 66 Contents 46 ...
Page 47: ...base units Dimensions 1 with 35 890 mm machine height 2 with 33 1 8 840 mm machine height Range of adjustment is approximately 2 5 cm 1 Installing the steam deflector if applicable A stainless steel plate is supplied to protect the underside of the countertop against steam rising from the dish washer when the door is opened If the countertop is made of Corian gra nite marble or other solid waterpr...
Page 48: ...ed and the front panel has been mounted Install the slides Two slides are included and should be installed on the feet of the dishwasher before the machine is pushed under the countertop This will allow the ma chine to slide easier protect the floor and allow adjustment of the rear level ing legs from the front of the machine Place the slides with the ratchet at the rear onto the dishwasher legs U...
Page 49: ...speed electric or cordless screwdriver can also be used Adjust the front leveling legs by push ing on the foot with a slotted screw driver Tipping the machine slightly if possible will make adjusting the front legs easier Make sure the machine is level when adjustments are complete The dishwasher should be raised until it just touches the underside of the counter top Dishwasher installation 49 ...
Page 50: ...er bars from the control panel place the panel on a table printed side up and gently push down on the spacer bars at a point near the bottom of the control panel This will release the mounting bolts from their slots Install the neccessary spacer bars i on the control panel Place the covers b over the push button switches Install the adapter disc c Place the seal d onto the ventilation grill e Push...
Page 51: ...cessory After adjusting the control panel height cut off the plastic screw ex cess 5 Installing the custom door panel A custom door panel matching the kit chen cabinetry can be installed on the dishwasher by using the provided tem plates and bracket Length 21 25 3 4 53 3 65 4 cm Width 23 1 2 59 8 cm Note The maximum panel length is only applicable when no spacer bars are used If a Stainless Steel ...
Page 52: ...set E Remove the bracket from the door Place the door panel on a flat sur face good side facing down taking care not to scratch the surface Make certain that the bottom of the panel is closest to you Place the bracket on the back of the door panel and adjust it so that the lines you drew on the templates align with the upper edge of the door panel and the mounting bracket is centered left to right...
Page 53: ...ve the bracket from the ma chine door and place it on the rear of the door panel so that the bracket is centered left to right and the bottom of the bracket is aligned with the X line Tape the bracket to the door panel to hold it in place while the mounting holes are being drilled Drill pilot holes for the screws using a 3 32 2 5 mm bit Attach the bracket to the panel using the 6 screws provided R...
Page 54: ...e correspond ing edge of the machine door Repeat the process with the other side of the door panel Shut the door Check that the door panel is adjusted correctly It should be snug at the top and neatly aligned with the cabinet drawer and door lines If it isn t aligned properly loosen the Torx screws and readjust the panel Once the door panel is positioned cor rectly Open the dishwasher door Tighten...
Page 55: ...ew driver turn clockwise to increase the tension turn counterclockwise to decrease the tension 7 Securing the dishwasher to the countertop To ensure the stability of the dish washer it must be attached to the countertop after it has been positioned Insert one mounting bracket into each of the slots located at the left and right side of the machine top Push the machine into its recess and if necess...
Page 56: ...cabinet If in doubt how to secure the dishwasher please call the Miele Service Department For Corian or granite countertops fasten the dishwasher to the adjacent cabinets as follows For openings greater than 23 5 8 60 cm wide Pull the dishwasher 4 10 cm out of its opening Insert the tab of each optional mount ing bracket into the guide hole on top of the dishwasher and then swing it to the right o...
Page 57: ... one continuous or a cabinet matching toekick To prevent damaging the front panel and before installing the toe kick measurements must be taken to ensure that the toekick will not in terfere with the complete opening of the dishwasher door The panel overhang P and toekick depth of recess R determine the maxi mum dishwasher toekick height H If the panel contacts the toekick while the dishwasher doo...
Page 58: ...oekick is recessed less than 4 the toekick must be shortened see following page After installation carefully open the dishwasher door to check that the front panel does not hit the toekick If it does remove the toekick and trim it accordingly Adjusting the toekick recess To adjust the depth recess of the toekick release the tension on the spring clips as shown and push the mounting brackets includ...
Page 59: ...pushed in and the toekick re attached Carefully open the dishwasher door until it hits the toekick Using the front lower edge of the door panel as a guide draw a line across the toekick Unscrew and remove the toekick If one of the cutting lines is close to the line just drawn score the front of the toekick and snap off the excess otherwise trim the toekick along the line using a saw Screw the toek...
Page 60: ...ugh edges that could damage the power cord If metal cabinets are used place the supplied rubber grommet around the edge of the opening be fore passing the cable through Exercise care when pulling the dish washer in or out so as not to dam age the power cord or hoses GROUNDING INSTRUCTIONS THIS APPLIANCE MUST BE GROUNDED In the event of a malfunction or break down grounding will reduce the risk of ...
Page 61: ...ock GRND To ground connector GROUNDING INSTRUCTIONS This appliance must be connected to a grounded metal permanent wiring system or an equipment grounding conductor must be run with the circuit conductors and con nected to the equipment grounding terminal or lead on the appliance Use copper conductors only Warning Hardwiring the dishwasher should only be done if required by local electrical codes ...
Page 62: ...t system and will prevent potable water mixing with waste water Hot water connection New plumbing The water inlet hose comes equipped with a 3 4 female hose thread connec tor This can be directly connected to a shut off valve with 3 4 male hose thread ends It is preferable that the hose assem bly be installed vertically so the hose exits from the bottom of the valve box If this is not possible it ...
Page 63: ...ts with a compression fitting and valve as pic tured Cut the 3 8 copper tube after the valve Install the 3 8 compression to 3 4 MHT Male Hose Thread adapter supplied with the machine as illus trated Connect the inlet hose to the existing valve adapter assembly Electrical wiring and components should not come into contact with any plumbing fixtures or hoses Do not under any circumstances cut the in...
Page 64: ...tact with any plumbing fixtures or hoses IMPORTANT The dishwasher should be con nected directly to the drain line Drain connection D 24 60 cm Connect the supplied drain hose to the drain pipe of the kitchen sink either A above the trap using the clamp provided or B to the dishwasher connector of the garbage disposal When connecting the drain hose to the garbage disposal make sure to remove the kno...
Page 65: ...iele dishwashers are equipped with an odor trap and non re turn valve the drain hose can be con nected directly to the drain pipe as illus trated If plumbing codes require an external air gap on the discharge side of the dishwasher the following requirements must be met No part the drain hose should be higher than 39 1 mm If installed horizontally the drain hose can be up to 12 ft 3 5 m long If th...
Page 66: ...Depth with door open 47 1 2 120 5 cm U and i models Weight approx 130 Ibs 57 kg Voltage 110 120 V AC Rated load 12 5 A 1500 W Fuse rating 15 A Water pressure 4 5 145 psi 0 3 10 bar Hot water connection 120 F 49 C max 140 F 60 C Drain height 3 ft 1 m maximum Drain length 12 ft 3 5 m maximum Power cord length approx 5 ft 1 5 m Technical Data 66 ...
Page 67: ...67 ...
Page 68: ...Alteration rights reserved G880 G882 000 2498 These instructions are printed on 100 recycled paper and are completely Biodegradable ...