Installation
*INSTALLATION*
29
2
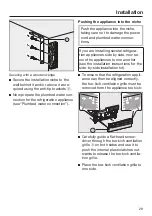
Securing with a wooden wedge
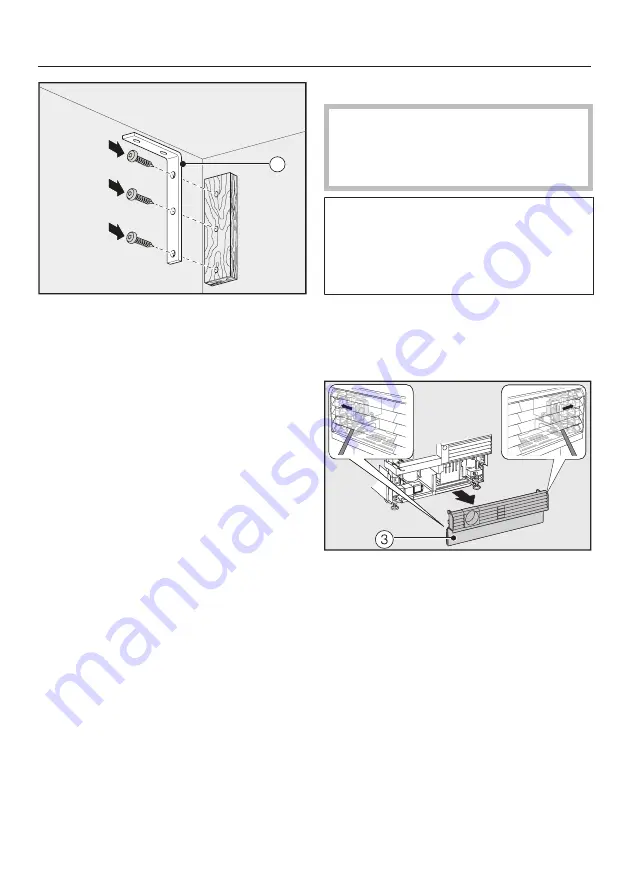
Secure the installation niche to the
wall behind it and/or above it as re-
quired using the anti-tip brackets
.
Now prepare the plumbed water con-
nection for the refrigeration appliance
(see “Plumbed water connection”).
Pushing the appliance into the niche
Push the appliance into the niche,
taking care not to damage the power
cord and plumbed water connec-
tions.
If you are installing several refrigera-
tion appliances side by side, now se-
cure the appliances to one another
(see the installation instructions for the
side-by-side installation kit).
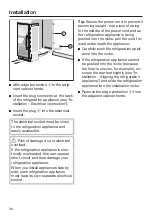
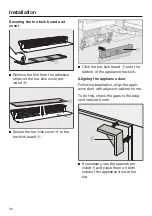
To ensure that the refrigeration appli-
ance can then be aligned correctly,
the toe-kick ventilation grille must be
removed from the appliance toe kick:
Carefully guide a flat-head screw-
driver through the toe-kick ventilation
grille
on both sides and use it to
push the internal plastic latches out-
wards to release the toe-kick ventila-
tion grille.
Place the toe-kick ventilation grille to
one side.

