SAVE THESE INSTRUCTIONS CAREFULLY
Read these instructions carefully before using your hob,and keep it
carefully. If you follow the instructions, your hob will provide you with many years
of good service.
Ceramic Hob
Midea
Instruction
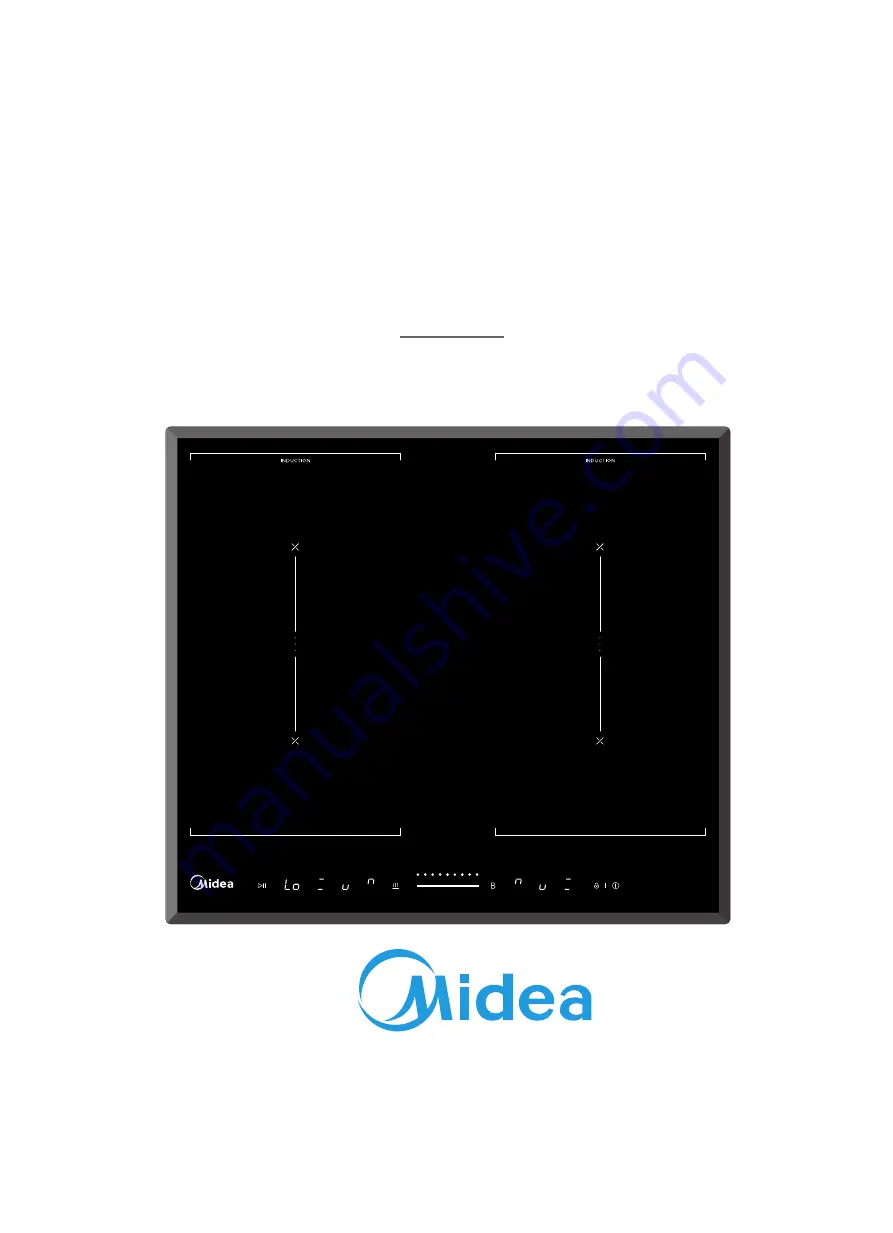
MODEL : MI60S
Page 1: ...NS CAREFULLY Read these instructions carefully before using your hob and keep it carefully If you follow the instructions your hob will provide you with many years of good service Ceramic Hob Midea In...
Page 2: ...1 Start cooking 11 3 4 2 Finish cooking 12 3 4 3 Using the Boost Function 12 3 4 4 Keep Warm 13 3 4 5 Flexible Area 13 3 4 6 Locking the Controls 14 3 4 7 Timer control 14 3 4 8 Using the Pause contro...
Page 3: ...es are sharp Failure to use caution could result in injury or cuts 1 2 3 Important safety instructions Read these instructions carefully before installing or using this appliance No combustible materi...
Page 4: ...or similar material which protect live parts Metallic objects such as knives forks spoons and lids should not be placed on the hob surface since they can get hot A steam cleaner is not to be used Do...
Page 5: ...on glass until the surface is cool Keep children away Handles of saucepans may be hot to touch Check saucepan handles do not overhang other cooking zones that are on Keep handles out of reach of child...
Page 6: ...appliance without danger to themselves or their surroundings Do not repair or replace any part of the appliance unless specifically recommended in the manual All other servicing should be done by a qu...
Page 7: ...View 2 2 Control Panel 2 3 Working Theory Induction cooking is a safe advanced efficient and economical cooking technology It works by electromagnetic vibrations generating heat directly in the pan r...
Page 8: ...sions A B mm 560X490 Weight and Dimensions are approximate Because we continually strive to improve our products we may change specifications and designs without prior notice 3 Operation of Product 3...
Page 9: ...ke sure that the base of your pan is smooth sits flat against the glass and is the same size as the cooking zone Use pans whose diameter is as large as the graphic of the zone selected Using a pot a s...
Page 10: ...sh Adjust heat setting by touching the slider control If you don t choose a heat setting within 1 minute the Induction hob will automatically switch off You will need to start again at step 1 You can...
Page 11: ...he boost function Touching the heating zone selection control Touching the boost control the zone indicator show b and the power reach Max Cancel the Boost function Touching the heating zone selection...
Page 12: ...ection control that you wish to cancel the keep warm function Touching the slider control then the cooking zone will revert to the level you select Note This function may be used on all cooking zones...
Page 13: ...ent unintended use for example children accidentally turning the cooking zones on When the controls are locked all the controls except the ON OFF control are disabled To lock the controls Touch the lo...
Page 14: ...gain the 1 will flash Set the time by touching the slider control e g 9 now the timer you set is 96 minutes Buzzer will beep for 30 seconds and the timer indicator shows when the setting time finished...
Page 15: ...nutes Once the countdown timer expires the corresponding zone will switch off Then it will show the new min timer and the dot of corresponding zone will flash The shown as right set to 30 minutes Touc...
Page 16: ...d is cooked properly in the time recommended 4 1 2 Searing steak To cook juicy flavorsome steaks 1 Stand the meat at room temperature for about 20 minutes before cooking 2 Heat up a heavy based frying...
Page 17: ...ngs below are guidelines only The exact setting will depend on several factors including your cookware and the amount you are cooking Experiment with the induction hob to find the settings that best s...
Page 18: ...but beware of hot cooking zone surfaces 1 Switch the power to the cooktop off at the wall 2 Hold the blade or utensil at a 30 angle and scrape the soiling or spill to a cool area of the cooktop 3 Clea...
Page 19: ...a fault The induction hob makes a low humming noise when used on a high heat setting This is caused by the technology of induction cooking This is normal but the noise should quieten down or disappea...
Page 20: ...s plugged in No power supplied Check to see if plug is secured tightly in outlet and that outlet is working The accessorial power board and the display board connected failure Check the connection The...
Page 21: ...sure the thickness of the work surface is at least 30mm Please select heat resistant and insulated work surface material Wood and similar fibrous or hygroscopic material shall not be used as work surf...
Page 22: ...50mm from the bottom of the hob Follow the requirements below There are ventilation holes around outside of the hob YOU MUST ensure these holes are not blocked by the worktop when you put the hob into...
Page 23: ...ductors if the local wiring rules allow for this variation of the requirements The isolating switch will be easily accessible to the customer with the hob installed You consult local building authorit...
Page 24: ...or technicians We have professionals at your service Please never conduct the operation by yourself 2 The hob will not be installed directly above a dishwasher fridge freezer washing machine or cloth...
Page 25: ...branching devices as they can cause overheating and fire The power supply cable must not touch any hot parts and must be positioned so that its temperature will not exceed 75 C at any point Check wit...
Page 26: ...circuit breaker must be installed with a minimum opening of 3mm between contacts The installer must ensure that the correct electrical connection has been made and that it is compliant with safety re...
Page 27: ...he wrong way The symbol on the product indicates that it may not be treated as normal household waste It should be taken to a collection point for the recycling of electrical and electronic goods This...
Page 28: ......