background image

Microtek TMA1600 Installing and Getting Started     13

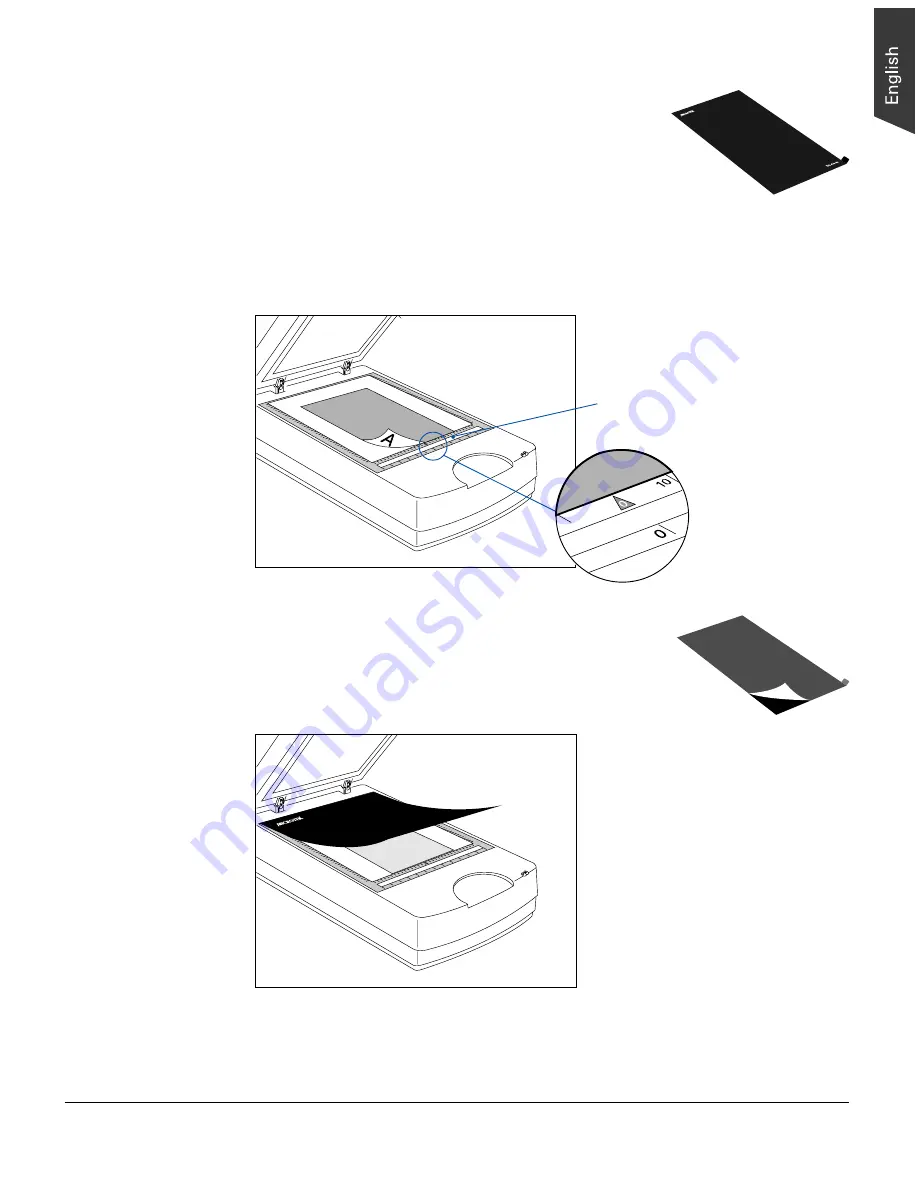
Positioning reflective originals

To scan reflective originals, you will need the black plate*.

Follow the steps below to position reflective originals:

1. Raise the TMA1600, and make sure that nothing is on the scanner glass surface.

2. Place the reflective original face down on the scanner glass surface. Center the top

of the template along the top ruler on the scanner.

3. Peel the protective film from the black plate.

4. Put the black plate on top of the reflective original to

cover it. The side of the black plate (which reads “This
side up”) should face up.

2

1

0

3

4

5

6

5

4

3

2

1

2

1

0

3

4

5

6

5

4

3

2

1

Please  note  that  the

calibration  window

  on  the

glass  surface  should  be  kept
clear and free from any
obstruction  during  scanning.

5. Gently lower the TMA1600 down onto the scanner glass surface.

Summary of Contents for TMA 1600

Page 1: ...rofile 19 Specifications 20 Copyright 2001 Microtek International Inc http www microtek com I49 003257 A December 2001 Installing and Getting Started MicrotekTMA1600 Trademarks Microtek ScanMaker and...

Page 2: ...ument cover or scanner lid The TMA1600 can be mounted on or removed from the top of the scanner in the same way as the scanner lid Unpacking the Package The TMA1600 is packaged as an assembled unit re...

Page 3: ...A1600 must be locked To lock the TMA1600 follow the steps below 1 Make sure the TMA1600 is connected to the scanner then turn off the scanner if your scanner is on 2 Set the scanner SCSI ID number to...

Page 4: ...nner s power switch to Off Your scanner is compatible with the TMA1600 Your scanner has been installed and is working properly Your TMA1600 is unlocked To install the TMA1600 follow these steps 1 Remo...

Page 5: ...s connector into the 15 pin Accessory port at the back panel of the scanner Secure the connector by tightening the retaining screws 4 Turn the scanner s power switch to On and wait for the green ligh...

Page 6: ...aterials such as photographic or prints You do not need to remove the TMA1600 to scan reflective materials Positioning transparent originals To scan various sizes of transparent originals you will nee...

Page 7: ...ler of the scanner and that the two edges left and right fit within the scanner glass area 5 Gently lower the TMA1600 down onto the scanner glass surface 2 1 0 3 4 5 6 6 5 4 3 2 1 2 1 0 3 4 5 6 6 5 4...

Page 8: ...into the template next 1 Place the template which the side reads Microtek logo should face up on the scanner glass surface 2 1 0 3 4 5 6 6 5 4 3 2 1 Make sure that the template s front corners are fir...

Page 9: ...s at a time 1 Load the film face down inside the template Slide the film along the slots of the template until its edge is against the side of the template indicated by an arrow mark 2 Place the templ...

Page 10: ...ieces of film the 6 x 9 cm can hold up to 2 pieces of film 1 Load the film face down inside the template Slide the film along the slots of the template until its edge is against the side of the templa...

Page 11: ...dge of the template indicated by an arrowmark 2 Place the template assembly on the scanner glass surface Center the top of the template along the top ruler on the scanner aligning the template s arrow...

Page 12: ...hat nothing is on the scanner glass surface 2 Place the X ray original face down on the scanner glass surface Center the top of the X ray original along the top ruler on the scanner 2 1 0 3 4 5 6 5 4...

Page 13: ...on the scanner glass surface Center the top of the template along the top ruler on the scanner 3 Peel the protective film from the black plate 4 Put the black plate on top of the reflective original...

Page 14: ...e quality during scanning Caution 1 The black plate may become dirty over time and with prolonged use To clean the plate use a white cotton cloth dipped in some water and gently wipe the plate surface...

Page 15: ...File menu of your image editing application then select ScanWizard Pro To operate ScanWizard Pro in the stand alone batch mode in Macintosh systems go to the Apple menu and choose the Batch Scan comm...

Page 16: ...overview and you will see the thumbnail image appear in your Scan Job Queue window 6 If you like what you see in the Preview window click the Scan button to start scanning The image is then delivered...

Page 17: ...ective sleeve and avoid touching the target image surface When not in use keep the target in its sleeve and away from light and heat Note To keep the colors in your scanner consistent you should perfo...

Page 18: ...le click the ICC Profile icon In Windows select the Start menu Programs Microtek ScanWizard Pro for Windows then Microtek Scanner ICC Profiler 3 The main dialog box appears Set the appropriate paramet...

Page 19: ...exit Scanner ICC Profiler program Loading a profile Once the profile has been produced follow the steps below to load the profile you just created 1 Launch ScanWizard Pro 2 From the Preview window cl...

Page 20: ...colors 16 bit grayscale approx 65 536 shades of gray Scanning area Transparent 12 x16 305x406mm Reflective 12 x17 305x431 8mm Resolution Optical 1600 dpi x 3200 dpi Interpolated 12800 dpi x 12800 dpi...

Reviews: