5
Basic Scanning for PC Users
Scanning Photos
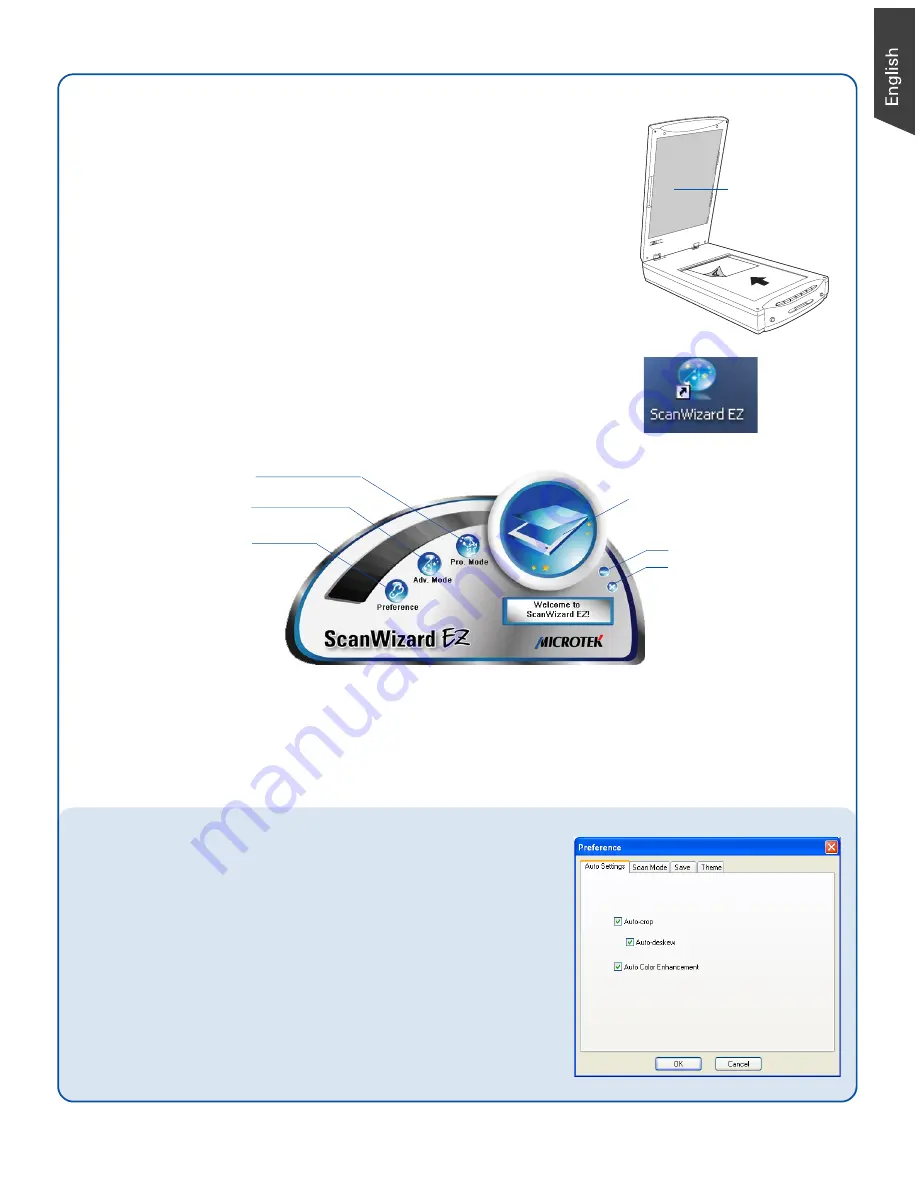
1. Place the photo.
To scan a photo, place the photo on the scanner bed. The top end
of the original should be positioned towards the
back
of the
scanner, with the surface to be scanned facing down.
NOTE
: For the automatic cropping feature to work correctly during the preview scan of
your photo, make sure the Black Mat is attached to the scanner lid.
Black Mat
2. Launch ScanWizard EZ.
To launch ScanWizard EZ as a stand-alone program, double-click
the
ScanWizard EZ
icon on your desktop. When ScanWizard EZ is
launched for the first time, the control panel of
ScanWizard EZ - EZ
Mode
appears automatically.
3. Scan your material.
Click the
Scan
button on the control panel of
EZ Mode
to start scanning.
The ScanWizard EZ will detect the photo on the scanner glass surface first, next automatically
calibrate the scanner, corp the image, and finally perform the image scan with factory settings.
When done, the scanned image can be saved in a file and delivered to the specified location.
Select preferences if necessary
Before you start scanning, specify image settings related to your output image in the
Preferences window according to your preferences.
Auto Settings
– Switches on/off Auto-crop and Auto-deskew, and applies ACE
(Automatic Color Enhancement) to the image.
Scan Mode
– Sets the image resolution and scan quality to match your target
application.
Save
– Assigns the folder location, a file name, and the file format for the output
image
.
Also, it allows you to specify an application to open the image.
Theme
– Changes the appearance of the control panel for the EZ mode.
NOTE:
For details about how to use the ScanWizard EZ ‘s Advanced Mode and
Professional Mode, refer to the ScanMaker i800 Plus Supplement.
Press the Scan button
to start scanning
Switches to
the Professional Mode
Switches to
the Advanced Mode
Activates
the Preferences window
Minimizes ScanWizard EZ
Exits ScanWizard EZ