


2
To the ADF
Make sure the Automatic Document (ADF)
is properly installed, with its connector
securely connected to the scanner’s 15-pin
accessory port.
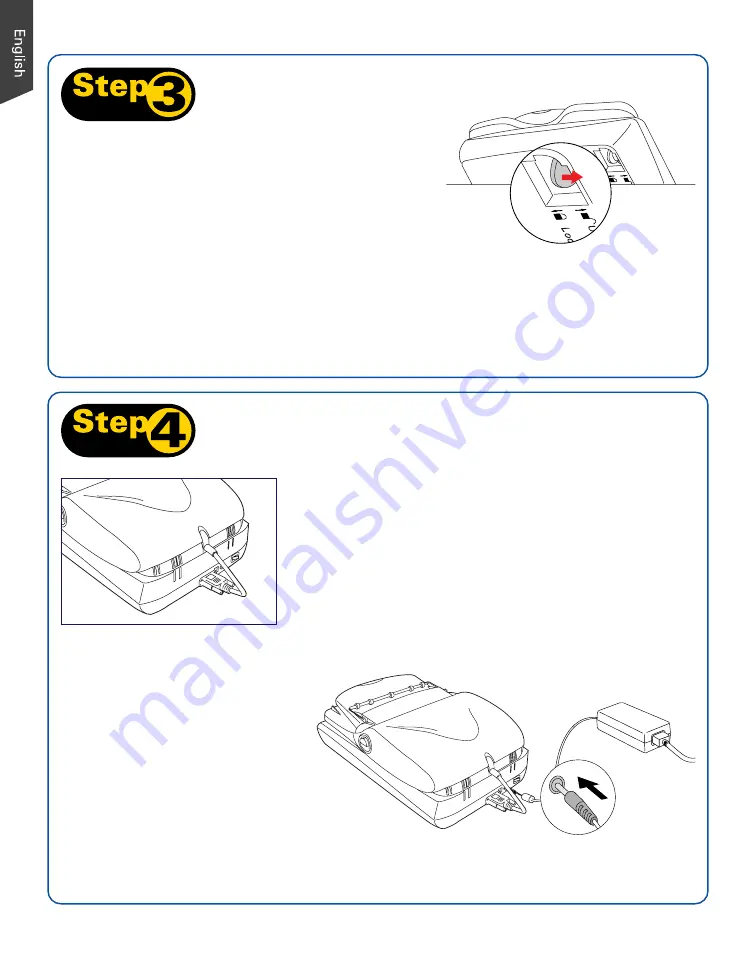
A.
Remove the yellow “Step 3” sticker from your
scanner.
B.
With the scanner power off, tilt the front right
corner of the scanner to see the locking switch
at the bottom.
C.
Pull the carriage lock protector (ivory white in
appearance) out.
Unlock Scanner
Connect Scanner
C
To the power adapter
A.
Remove the yellow “Step 4”
sticker from your scanner.
B.
Connect the power adapter to
the back of the scanner.
C.
Plug one end of the power cord
into the power adapter, and
plug the other end of the power
cord into a wall outlet or other
power source.
B
D.
Push the locking switch to the position as indicated in the graphic above, with the
icon on the lock showing as “unlocked”.
NOTE
: To lock the scanner (for shipping and other reasons), refer to the ArtixScan DI 2015c
User’s Manual.
Unlocked
Summary of Contents for ArtixScan DI 2015c
Page 10: ...10 ...


