


Chapter
2
System Components
2-58
Visionscape GigE Camera Guide
v4.1, November 2011
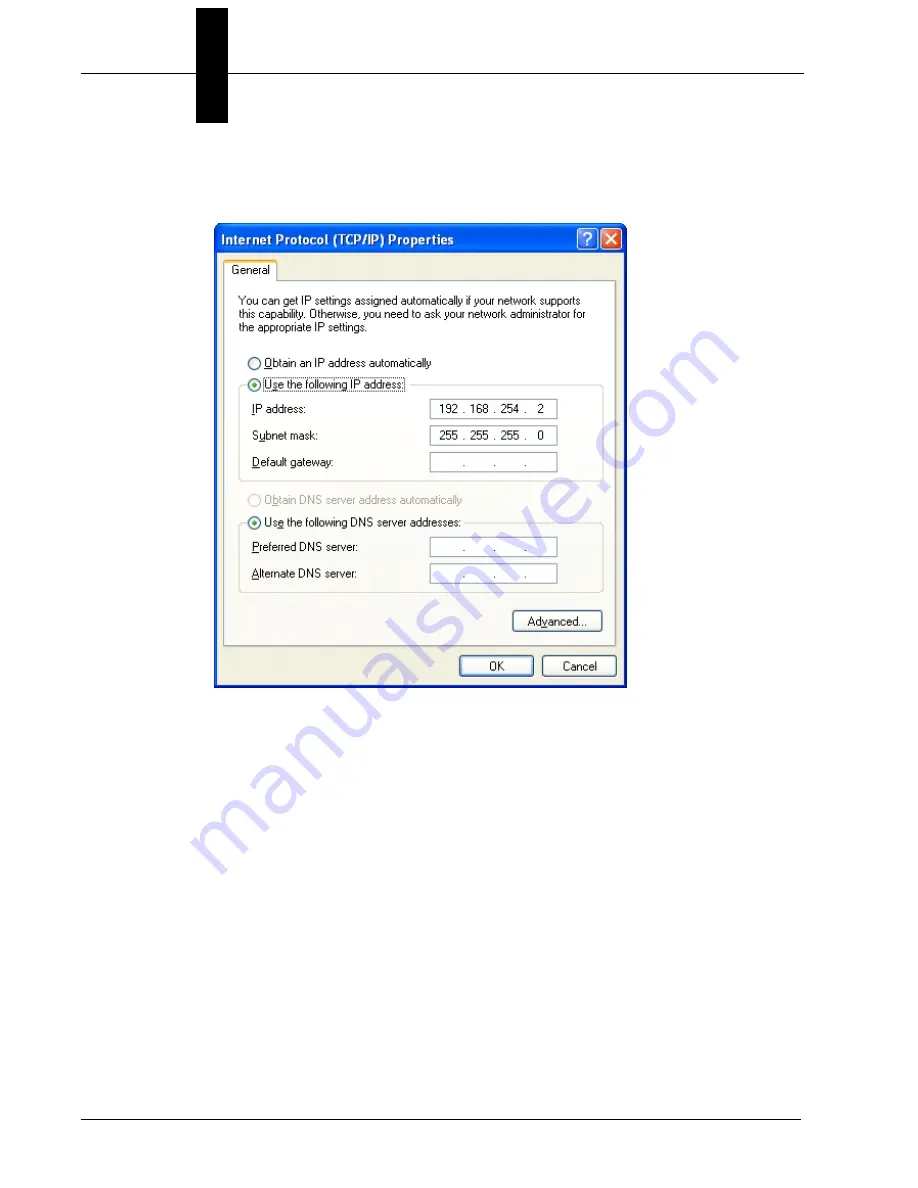
The filter driver requires no setup whatsoever. Clicking on the TCP/IP
Properties button will bring up the following dialog:
There is usually no need for cameras to be on a DHCP network, so
choose a static address that starts with 192.168.x.x. 192.168 is reserved
for private networks. In the picture above the address is set to
192.168.254.2 with the subnet mask set to 255.255.255.0. The mask
means that all devices connected to the NIC should have addresses that
start with 192.168.254.x. It is recommended that you steer clear of using
any address that ends with .1 (for instance 192.168.254.1) as this is
sometimes used by networks for gateways (devices that convert one sort
of protocol to another).
You should also optimize the NIC.
How to Set Up a Multiple-Camera
System
covered setting up the advanced parameters for the NIC (jumbo
packets, receive descriptors, etc.). Make sure you do this for best
performance.
Once you have all this done then you can connect your camera directly or
plug in a switch and then connect cameras to that. As they come out of
Summary of Contents for 98-000113-01
Page 1: ...Visionscape GigE Camera Guide 83 100029 02 v4 1 November 2011 ...
Page 6: ...Preface vi Visionscape GigE Camera Guide v4 1 November 2011 ...
Page 74: ...Chapter 2 System Components 2 64 Visionscape GigE Camera Guide v4 1 November 2011 ...
Page 82: ...Appendix A Connector Pinouts A 6 Visionscape GigE Camera Guide v4 1 November 2011 ...
Page 88: ...Appendix B Cable Specifications B 6 Visionscape GigE Camera Guide v4 1 November 2011 ...
Page 104: ...Appendix C Specifications C 16 Visionscape GigE Camera Guide v4 1 November 2011 ...


