•
Assembly and Installation
8
Loading Discs
The next step is to load your MX Disc Publisher with output discs. The system will accept CD or DVD
120 mm (12 cm) inkjet printable discs. If the disc does not have an inkjet printable surface, the ink
will not adhere to the surface of the disc. The MX Disc Publisher will only accept 12 cm discs.
Business card or 8 cm discs are not supported by this system.
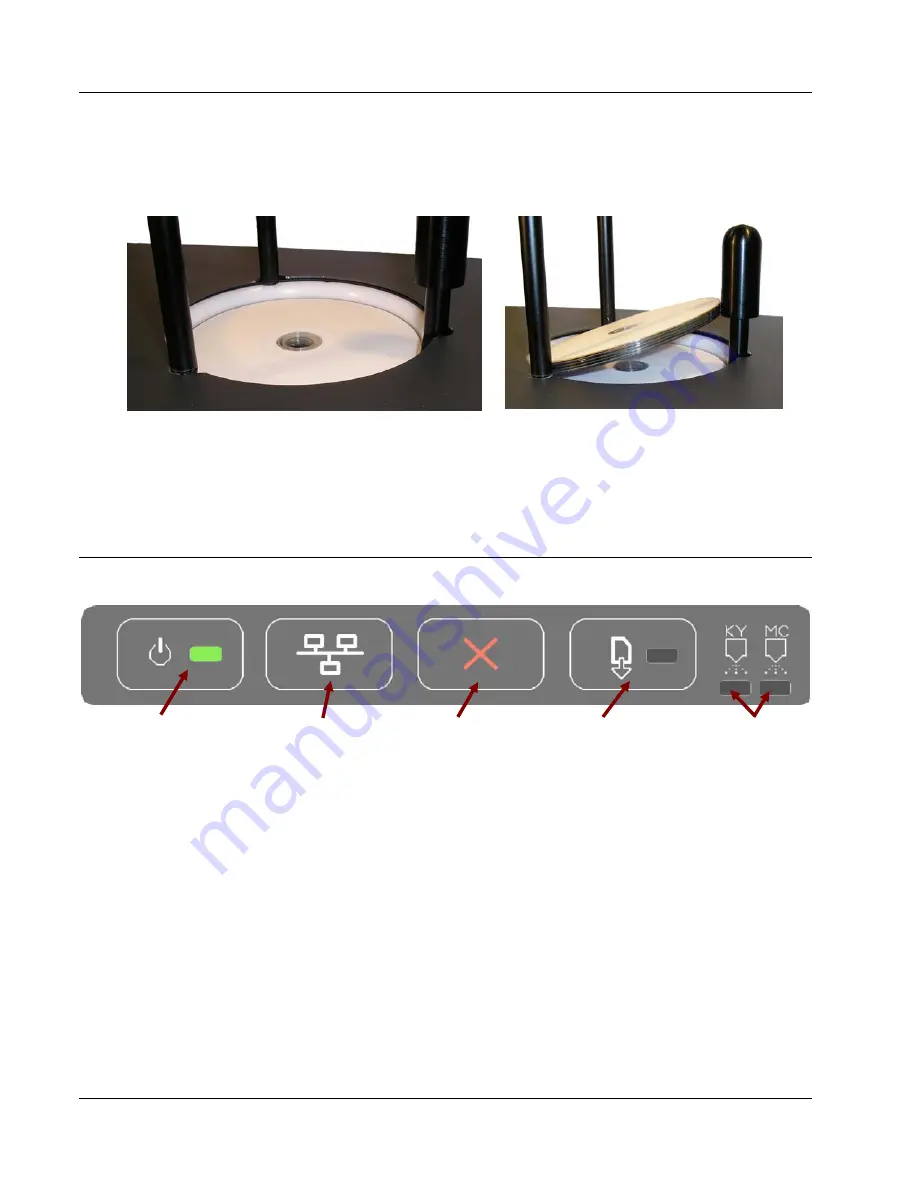
Figure 1
Figure 2
Load the first 5 or 6 discs flat, as seen in figure 1.
Load the rest of the discs at an angle, against the wide input rod, as seen in figure 2.
The MX Disc Publisher will hold a maximum of 100 discs. DO NOT load more than 100 discs in the
system, as this may cause the discs to feed incorrectly.
Front Panel Indicators and Buttons
1. Power Button and LED – The Power button turns the MX Disc Publisher on and off. It may
take a few seconds for the MX Disc Publisher to turn on after you press the Power button.
The green LED on the Power button flashes when the printer is processing.
NOTE: The AC power switch located on the back of the MX Disc Publisher must be
turned on first in order to supply power to the Front Panel.
2. Network Button - This button is unused.
3. Cancel Button – Pressing the Cancel button cancels the current print job.
4. Media Feed Button – Pressing this button will clear any media feed issues. This button has
an LED that will flash amber when a media feed issue is occurring. It will also show a steady
amber if either the ink or the upper doors are opened.
5. Print Head LEDs – These LEDs will be on if there is an issue with either of the print heads.
1. Power
2. Network (unused)
3. Cancel
4. Media Feed
5. Print head
LEDs
Summary of Contents for MX SERIES
Page 2: ...Introduction 2...
Page 4: ...Introduction 4...


