5
Installation Procedures
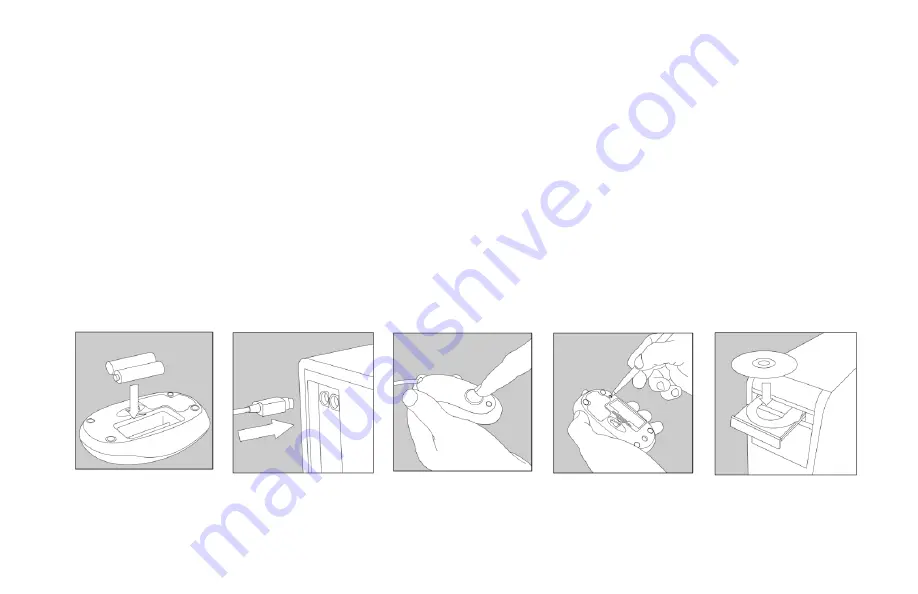
STEP 1 - Install the batteries into the mouse paying close attention to the proper polarities.
*Note that the red optical light underneath
the mouse should light if the batteries are correctly installed.
(See Fig.1)
STEP 2 - Turn your computer off.
STEP 3 - Connect the RF receiver to the PS/2 (Green) mouse port on your computer. (See Fig.2)
STEP 4 - Turn your computer on.
STEP 5 - Synchronize the devices.
Press the button on the RF receiver (See Fig. 3) then using a pen or pencil press the button located underneath the mouse (See
Fig.4) At this point the cursor (arrow) on your PC screen should be working. If not, try re-synchronizing the devices.
STEP 6 - Insert the CD into an available CD-ROM drive (See Fig. 5) and follow the onscreen instructions. Note some operating
systems need to be restarted in order for the program to function properly. It is recommended to restart your PC after installing this
software program.
Fig. 1
Fig. 2
Fig. 3
Fig. 4
Fig. 5


