10
Propane Convection Heater Manual
ASSEMBLY
WARNING: EXTREMELY HOT DURING OPERATION. DO NOT TOUCH ANY METAL COMPONENTS
WHILE IN OPERATION. KEEP GASOLINE AND ANY OTHER FLAMMABLE LIQUIDS AWAY
FROM HEATER.
WARNING: BE SURE TO READ AND UNDERSTAND ALL OF THE SAFETY INFORMATION IN THIS
MANUAL BEFORE LIGHTING THIS HEATER.
CAUTION: HEATER HAS HIGH SURFACE TEMPERATURES. BE SURE TO KEEP CHILDREN, PETS
AND CLOTHING AWAY FROM THE HEATER. BE SURE TO KEEP BURNER AND HEATER
REGULATOR CLEAN AND FREE FROM ANY DEBRIS. MAINTAIN SAFE DISTANCES FROM
HEATER AS SHOWN.
MINIMUM CLEARANCES FROM COMBUSTIBLES:
Top 6 feet
Sides 4 feet
ASSEMBLING THE HEATER
1. Remove heater from carton
2. Slide upper housing straight up and off of lower housing, and remove all of
the packed items from inside heater.
3. Remove all packaging protecting heater during shipping. Retain plastic caps
covering inlet and regulator hose for storage.
4. Save carton and packing materials for later storage.
5. Inspect heater closely for any damage that may have occurred during shipping.
If there is any damage, return the heater to the place of purchase.
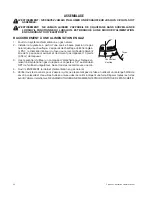
6. Attach 4 (four) of the Phillips head screws to the bottom row of holes in the lower housing.
7. Slide upper housing over lower housing, lining up the four remaining screw holes. Insert 4 (four) Phillips
head screws and tighten securely.
WARNING: NEVER ATTEMPT TO LIGHT A HEATER UNTIL IT IS FULLY ASSEMBLED.
CONNECTING TO GAS SUPPLY
1. Provide natural gas supply system.
2. Install plumbing from a low natural gas source to heater. The heater
must be regulated to 1/2 PSI, maxi mum 3/4" ID pipe or flexible
connector, not longer than 10 feet.
3. Be sure to use thread sealing compound when connecting the house to
the heater ad the 1/2 NPT fitting at the regulator inlet. Tighten all fittings
with a wrench.
4. Open natural gas supply valve SLOWLY.
5. Check all connections for leaks, using a 50/50 solution of dish soap and water. Bubbles at the connections
show a leak. Correct all leaks before lighting heater. NEVER USE AN OPEN FLAME TO CHECK FOR LEAKS.
Phillips screws
Support Screws
in place
Upper Shell
Lower Shell
Phillips screws
(Use bottom holes)
Phillips & support
screws, knob
Gas Line Hose
Inlet Connector


