background image

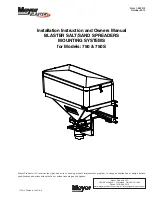
Installation Instruction and Owners Manual

BLASTER SALT/SAND SPREADERS

MOUNTING SYSTEMS

for Models: 750 & 750S

Form 1-922 R2

October 2013

Meyer Products LLC reserves the right, under its continuing product improvement program, to change construction or design details,
specifications and prices without notice or without incurring any obligation.

© 2013 Printed in the U.S.A.

Meyer Products LLC

18513 Euclid Ave. • Cleveland, Ohio 44112-1084

Phone (216) 486-1313

www.meyerproducts.com• email [email protected]

Summary of Contents for Blaster 750

Page 1: ...LLC reserves the right under its continuing product improvement program to change construction or design details specifications and prices without notice or without incurring any obligation 2013 Prin...

Page 2: ...Arm Assemblies 7 to their open locked position With an assistant lift the spreader upright hopper opening face up and set it on the newly installed bumper plates With the assistant holding the spread...

Page 3: ...22743 4 Bolt 3 8 16 x 3 SS 10 22736 2 Bolt 1 2 13 x 3 SS 11 22735 20 Locknut 3 8 16 SS 12 22734 34 Flawasher 3 8 SS 13 22733 2 Flawasher 1 2 SS 14 22744 2 Toggle Wing 1 2 13 15 22745 2 1 4 Snap Pin 1...

Page 4: ...re included in the assembly under which they are indented 1 2 3 4 5 6 7 8 9 10 11 12 13 3 4 5 This section covers the installation of an BLASTER 350 750 as a Swing Away mount CAUTION because of its bu...

Page 5: ...d are included in the assembly under which they are indented This section covers the installation of an BLASTER 350 750 as a Swing Away mount CAUTION because of its bulk and weight this salt spreader...

Page 6: ...s a guide and drill a 3 8 hole through the DS PS Upright Weldments 1 2 Be sure to place a 3 8 16 x 1 Bolt 5 with 3 8 Flatwashers 9 and 3 8 16 Locknuts 7 in each hole before removing clamps 7 Again che...

Page 7: ...l bolts to provide a good gripping action on the tailgate 4 The Lower Supports 4 provided with this kit have several long slots These are to allow for adjustment when installing First examine the rear...

Page 8: ...he DS PS Upright Weldments 1 2 Do not fully tighten units until later 5 Place the mounting into the spreader and align all bolt holes Fully tighten the Spreader Bar 5 bolts and remove the mounting fro...

Reviews: